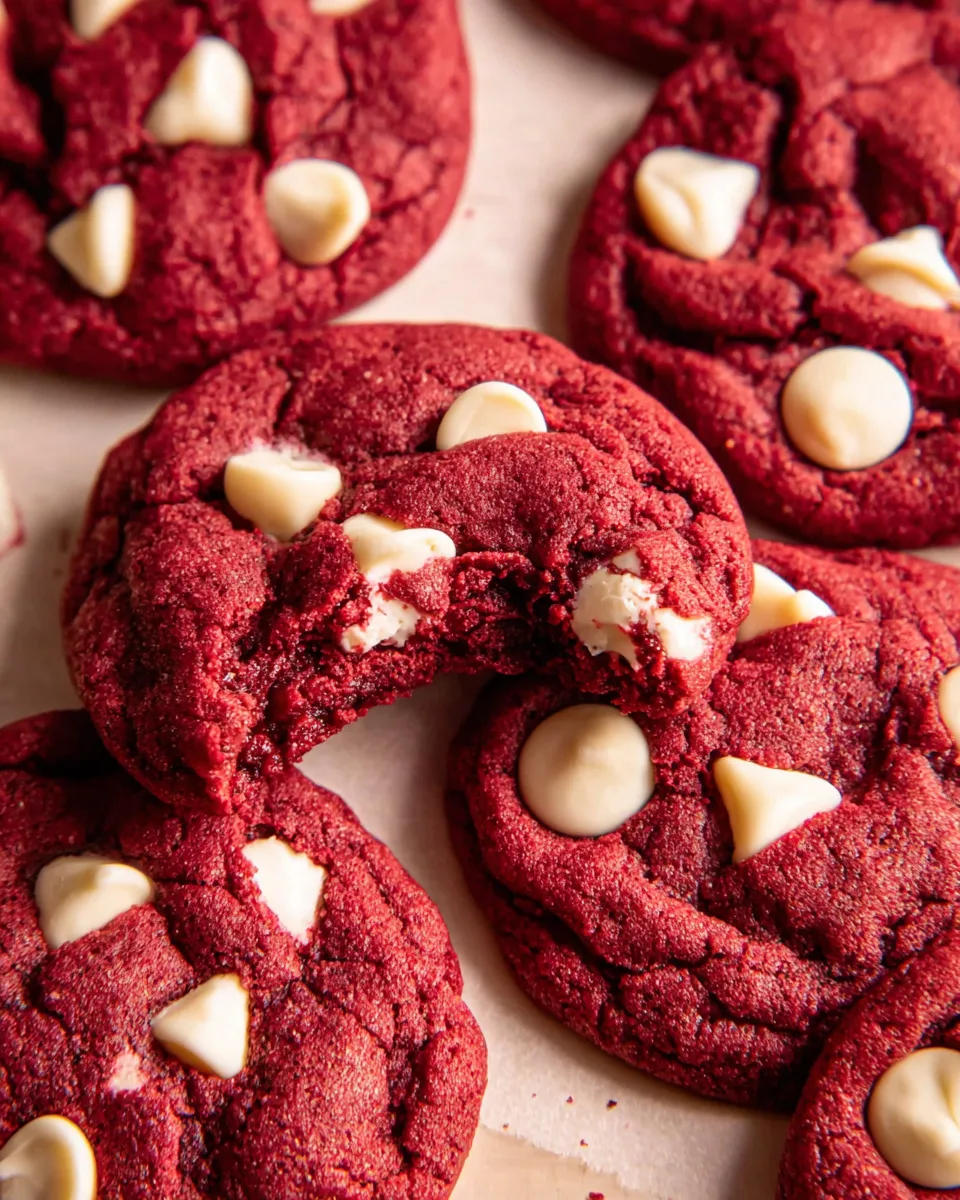
Are you ready to bake up some love? Imagine sinking your teeth into a soft, chewy cookie, bursting with that iconic red velvet tang and studded with creamy white chocolate. These aren’t just any cookies; these are your new go-to Sweetheart Red Velvet Cookies, destined to steal hearts and make any occasion extra special. Whether you’re celebrating Valentine’s Day, an anniversary, or simply want to show someone you care (even if that someone is you!), this recipe delivers pure joy in every vibrant, delicious bite. Get ready to fall head over heels!
Why You’ll Love This Recipe
There are countless reasons to adore these Sweetheart Red Velvet Cookies, but here are four that will have you preheating your oven in no time:
- Irresistible Flavor Combination: They perfectly blend the rich, subtle cocoa notes of red velvet with a hint of tang, beautifully complemented by sweet, melty white chocolate chips. It’s a match made in dessert heaven!
- Stunning Visual Appeal: With their vibrant red hue, these cookies are absolute showstoppers. They look as good as they taste, making them ideal for gifting or dazzling your dessert table.
- Super Simple to Make: Don’t let their elegant appearance fool you! This recipe is straightforward, with clear instructions that even novice bakers can follow with confidence. You’ll be whipping up these beauties in just minutes of active prep time.
- Perfect for Any Occasion: While “Sweetheart” screams Valentine’s, these Red Velvet Cookies are fantastic for birthdays, holidays, potlucks, or just a cozy night in. They bring a touch of special warmth wherever they go.
Ingredients
Gather your delightful components to create these enchanting Sweetheart Red Velvet Cookies:
- 1 ½ cups + 2 tablespoons all-purpose flour, spooned and leveled
- 2 tablespoons Dutch process cocoa powder
- ½ teaspoon baking soda
- ½ teaspoon baking powder
- ½ teaspoon sea salt
- ¾ cup (1 ½ sticks) softened salted butter
- ¾ cup light brown sugar, packed
- ¼ cup granulated white sugar
- 2 large egg yolks, at room temperature
- 1 tablespoon vanilla extract or paste
- 1 to 1 ½ teaspoons red gel food coloring (for that perfect hue!)
- ¾ cup chopped white chocolate or white chocolate chips
Detailed Step-by-Step Directions
Ready to bring these delicious Sweetheart Red Velvet Cookies to life? Follow these easy steps:
- Prep Your Workspace: First, preheat your oven to a cozy 350°F (175°C). While the oven gets warm, line two baking sheets with parchment paper. This vital step not only prevents sticking but also makes cleanup an absolute dream!
- Combine Dry Ingredients: In a medium-sized bowl, gently whisk together your all-purpose flour, rich cocoa powder, baking soda, baking powder, and sea salt. Give it a good whisk to ensure everything is evenly distributed, then set this aromatic dry mix aside.
- Cream Butter and Sugars: Grab a large mixing bowl – this is where the magic begins! Add your wonderfully softened salted butter, the packed light brown sugar, and the sparkling granulated white sugar. Using an electric mixer, beat these delightful ingredients together for about 2 minutes. You’re looking for a transformation: the mixture should become beautifully light and fluffy.
- Wet Ingredients Unite: Now, it’s time to incorporate the vibrant elements! Add your two room-temperature egg yolks, the fragrant vanilla extract (or paste for an extra kick!), and the star of the show – 1 to 1 ½ teaspoons of red gel food coloring. Continue mixing on medium speed for another 2 minutes. Keep going until everything is thoroughly combined, and the mixture is wonderfully fluffy and uniformly red.
- Slowly Add Dry to Wet: With your mixer on low speed, slowly add your dry flour mixture to the wet butter-sugar mixture. Mix just until all the ingredients are combined and you no longer see streaks of flour. Remember the golden rule of cookies: be careful not to overmix! Overmixing can lead to tough cookies.
- Fold in the White Chocolate: Finally, the delicious grand finale! Gently fold in your chopped white chocolate or white chocolate chips. Ensure they are evenly distributed throughout the luscious red dough.
- Scoop and Bake: Divide your beautiful red dough into 18 equal balls. You can use a cookie scoop for consistency. Place these dough balls about 2 inches apart on your prepared baking sheets. This gives them enough room to spread without merging into one giant cookie!
- Bake to Perfection: Pop your baking sheets into the preheated oven and bake for 10-12 minutes. For that perfect, slightly softer, chewier center that everyone loves, lean towards the shorter baking time. If you prefer a crispier edge, give them an extra minute or two.
- Cool and Enjoy: Once baked, let the cookies cool on the baking sheets for a crucial 5 minutes. This helps them set up and prevents them from breaking. Then, carefully transfer them to a wire rack to cool completely. Now, dive in and enjoy these delightful treats!
Ways to Present and Serve Your Sweetheart Red Velvet Cookies
These Sweetheart Red Velvet Cookies are already gorgeous, but with a little extra flair, you can turn them into edible masterpieces! Here are some fun ideas to present and serve them:
- Classic Cookie Platter: Arrange them artfully on a white platter, perhaps with a few fresh berries or a sprig of mint for a pop of freshness.
- Drizzled Delight: Melt a bit of extra white chocolate (or even dark chocolate!) and drizzle it zig-zag style over the cooled cookies. This adds an elegant touch and another layer of flavor.
- Cream Cheese Glaze: For an authentic red velvet experience, whip up a simple cream cheese glaze (cream cheese, powdered sugar, milk, vanilla) and drizzle or spread a thin layer on top.
- Sprinkle Magic: Before the cookies cool completely, add some Valentine’s-themed sprinkles (hearts, nonpareils) for an extra festive look. If glazing, add sprinkles to the glaze while it’s still wet.
- Gift of Love: Pack them in a cute cookie tin, a cellophane bag tied with a ribbon, or a small bakery box. They make the perfect homemade gift for friends, family, or your special sweetheart.
- Cookie “Cake” Stack: Stack a few cookies on top of each other, separated by a dollop of cream cheese frosting, to create a mini cookie cake.
- Warm & Cozy: Serve them slightly warm with a tall glass of cold milk, a hot cup of coffee, or a scoop of vanilla bean ice cream for an indulgent dessert. The warmth brings out their soft texture and melting chocolate.
How to Store Your Sweetheart Red Velvet Cookies and How Long They Last
So, you’ve baked a batch of these glorious Sweetheart Red Velvet Cookies, and now you want to make sure they stay fresh and delicious. Here’s how to store them:
- Room Temperature: Once completely cooled, store your cookies in an airtight container at room temperature. This will keep them wonderfully fresh and chewy for 3 to 5 days. Layer them with parchment paper if stacking to prevent sticking.
- Refrigeration: While not strictly necessary, if your home is particularly warm, or if you’ve added a cream cheese glaze, storing them in the refrigerator can extend their freshness for an extra day or two. Just be aware that refrigeration can sometimes alter the texture, making them a little firmer. Bring them to room temperature before serving for the best experience.
- Freezing Baked Cookies: These cookies freeze beautifully! Once completely cool, place them in a single layer on a baking sheet and flash freeze for about 30 minutes until solid. Then, transfer them to a freezer-safe airtight container or heavy-duty freezer bag. They will keep well in the freezer for up to 1-2 months. Thaw them at room temperature, or warm gently in the microwave for a few seconds for that “freshly baked” feel.
- Freezing Cookie Dough: You can also freeze the unbaked cookie dough balls! Scoop the dough as directed, then arrange the balls on a parchment-lined baking sheet and flash freeze until solid. Transfer them to a freezer-safe bag or container. When you’re ready to bake, place the frozen dough balls on a prepared baking sheet and bake as usual, adding an extra 2-4 minutes to the baking time. This is fantastic for having fresh cookies on demand!
FAQs About Sweetheart Red Velvet Cookies
- What kind of red food coloring should I use?
It’s highly recommended to use gel food coloring, specifically a “super red” or “no-taste red” variety. Gel coloring is concentrated, so you need less of it to achieve a vibrant hue without adding excess liquid or a metallic taste, which can sometimes happen with liquid food coloring.
- Can I use regular cocoa powder instead of Dutch process?
While you can, Dutch process cocoa powder is preferred for red velvet as it has a less acidic, smoother flavor and creates a richer, darker base that helps the red color stand out. Regular cocoa might yield a slightly browner, less vibrant cookie.
- Why does this recipe use only egg yolks?
Using only egg yolks adds richness and fat to the cookies, resulting in a wonderfully chewy and tender texture. Egg whites can make cookies cakier or crispier, so yolks are key for that classic soft red velvet cookie feel.
- My cookies spread too much. What went wrong?
Several factors can cause excessive spreading: your butter might have been too soft (verging on melted), your oven temperature could be inaccurate (too low), or you might have overmixed the dough, developing too much gluten. Ensure butter is just softened, not greasy, and chill the dough for 15-30 minutes if it feels very warm or soft.
- Can I make the cookie dough ahead of time?
Absolutely! You can prepare the dough and refrigerate it, covered, for up to 2-3 days. Chilling the dough can even enhance the flavors and texture. If baking from chilled dough, you might need to add a minute or two to the baking time.
- What if I don’t have an electric mixer?
While an electric mixer makes creaming the butter and sugar much easier, you can do it by hand with a sturdy whisk and a good amount of elbow grease! Just ensure the butter and sugars are thoroughly combined and fluffy before adding other ingredients.
- Can I add other mix-ins besides white chocolate?
Certainly! While white chocolate is traditional, you could try dark chocolate chunks, milk chocolate chips, or even a handful of chopped pecans or walnuts for a textural contrast. Adjust quantities to your preference.
- How do I ensure an even red color throughout my cookies?
The key is to use a good quality gel food coloring and ensure it’s thoroughly mixed into the wet ingredients before adding the dry ones. Continue mixing until no streaks of uncolored dough remain, ensuring a uniform, vibrant hue.
- Are these cookies suitable for gifting?
They are absolutely perfect for gifting! Their beautiful color, delicious flavor, and easy portability make them an ideal homemade present for any occasion. Package them nicely for an extra special touch.
- How can I achieve consistent cookie size and baking?
For consistent size, use a cookie scoop (about 1.5-2 tablespoons per cookie). To ensure even baking, space the cookies adequately on the baking sheet, and if your oven bakes unevenly, rotate the baking sheets halfway through the baking time.
Sweetheart Red Velvet Cookies
Equipment
- Baking Sheets
- Parchment Paper
- Medium Bowl
- Large Bowl
- Electric Mixer
- Wire Rack
Ingredients
- 1.625 cups all-purpose flour spooned and leveled (1 ½ cups + 2 tablespoons)
- 2 tablespoons Dutch process cocoa powder
- 0.5 teaspoon baking soda
- 0.5 teaspoon baking powder
- 0.5 teaspoon sea salt
- 0.75 cup salted butter softened (1 ½ sticks)
- 0.75 cup light brown sugar packed
- 0.25 cup granulated white sugar
- 2 large egg yolks at room temperature
- 1 tablespoon vanilla extract or paste
- 1-1.5 teaspoons red gel food coloring (for that perfect hue!)
- 0.75 cup white chocolate chopped or white chocolate chips
Instructions
- First, preheat your oven to 350°F (175°C). Line two baking sheets with parchment paper – this helps prevent sticking and makes cleanup a breeze!
- In a medium bowl, gently whisk together your flour, cocoa powder, baking soda, baking powder, and salt. Set this mix aside for a moment.
- Grab a large bowl and add your softened butter, light brown sugar, and granulated sugar. Using an electric mixer, beat these ingredients for about 2 minutes until the mixture looks light and fluffy.
- Now, incorporate the egg yolks, vanilla, and red food coloring into the butter-sugar mixture. Continue mixing on medium speed for another 2 minutes until everything is well combined and fluffy.
- Slowly add your dry flour mixture to the wet ingredients, mixing just until everything is combined. Be careful not to overmix!
- Finally, fold in your chopped white chocolate until it's evenly distributed throughout the dough.
- Divide the dough into 18 equal balls and place them about 2 inches apart on your prepared baking sheets.
- Bake for 10-12 minutes. For a slightly softer, chewier center, bake on the shorter side; for crispier edges, go a bit longer.
- Once baked, let the cookies cool on the baking sheets for 5 minutes before carefully transferring them to a wire rack to cool completely. Enjoy these delightful treats!
Notes
Calories: 195 kcal
Total Carbs: 28g
Net Carbs: 27g
Fats: 12g
Protein: 2.5g