Step into a winter wonderland of flavor with the ultimate holiday treat: Peppermint Meltaways: A Festive Delight!
The air is crisp, the lights are twinkling, and the unmistakable scent of peppermint fills the kitchen – it can only mean one thing: holiday baking season is upon us! And what better way to celebrate than with a cookie that literally melts in your mouth, leaving behind a cool, refreshing burst of minty joy? Forget complicated recipes and endless baking marathons; these Peppermint Meltaways are here to make your festive season deliciously simple and utterly unforgettable. Get ready to bake a batch of pure bliss that will have everyone asking for more!
Why You’ll Love This Recipe
1. Melt-in-Your-Mouth Magic
True to their name, these cookies are the epitome of “meltaway.” Thanks to a clever combination of butter and cornstarch, each bite dissolves on your tongue, leaving behind a wonderfully smooth and tender texture. It’s a delicate, buttery crumb that’s simply irresistible and makes them stand out from your usual holiday cookie lineup.
2. Irresistible Peppermint Perfection
If you’re a fan of all things minty, these Peppermint Meltaways are your dream come true. Infused with just the right amount of peppermint extract in both the cookie and the frosting, they strike a perfect balance between sweet and refreshing. The crushed peppermint candy garnish adds an extra layer of crunch and intense mint flavor, making every bite an invigorating experience.
3. Easy & Fun to Make
Don’t let their elegant appearance fool you – these cookies are surprisingly simple to whip up! With straightforward steps and common pantry ingredients, even novice bakers can achieve spectacular results. It’s a fantastic recipe to get the whole family involved in, from rolling the dough balls to decorating with vibrant frosting and festive sprinkles.
4. Perfect for Holidays & Gifting
When it comes to holiday cheer, these Peppermint Meltaways check all the boxes. Their festive colors and delightful flavor make them a standout addition to any Christmas cookie platter, a thoughtful homemade gift for friends and neighbors, or a sweet treat to enjoy with a warm cup of cocoa by the fireplace. They embody the spirit of the season in every delicious bite!
Ingredients with Measurements
For the Cookies:
- 🍪 1 cup (2 sticks) butter, softened
- 🍚 1/2 cup confectioners’ sugar
- 🌿 1/2 teaspoon peppermint extract
- 🌾 1 1/4 cups all-purpose flour
- 🥄 1/2 cup cornstarch
- 🧂 1/4 teaspoon salt
For the Frosting:
- 🧈 2 tablespoons butter, softened
- 🍭 1 1/2 cups confectioners’ sugar
- 🥛 2 tablespoons milk
- 🌿 1/4 teaspoon peppermint extract
- 🔴 2-3 drops red food coloring (optional)
- 🍬 Crushed peppermint candies, for garnish
Detailed Step-by-Step on How to Make the Recipe
- Cream Butter & Sugar: In your largest mixing bowl, let’s get started! Take that beautifully softened butter and whip it together with the confectioners’ sugar. Beat them until the mixture transforms into a dreamy, cloud-like consistency – light, fluffy, and absolutely inviting. Now, stir in the peppermint extract. Oh, that wonderful minty aroma will instantly get you into the festive mood!
- Combine Dry Ingredients: Grab a separate, smaller bowl. Gently whisk together your all-purpose flour, cornstarch (this is the secret to that meltaway texture!), and salt. Once combined, gradually introduce this dry magic into your creamy butter mixture. Mix just until a soft, uniform dough comes together. Remember, the less you mix, the more tender your cookies will be!
- Chill Your Dough: This step is non-negotiable for perfectly shaped cookies! Cover your freshly made dough with plastic wrap and pop it into the refrigerator for at least 30 minutes. This chilling time allows the butter to firm up and prevents your cookies from spreading too much in the oven.
- Shape & Preheat: While your dough is chilling, preheat your oven to a cozy 350°F (180°C). Once the dough is nicely chilled, roll it into charmingly small, 1-inch balls. Arrange these little spheres on an ungreased baking sheet, making sure to leave about 2 inches of space between each one to allow for a little spread.
- Bake to Perfection: Slide your baking sheet into the preheated oven. Bake for just 9-11 minutes. You’re looking for bottoms that are very lightly browned – the tops should still be pale. Overbaking will take away from that signature meltaway texture, so keep a close eye! As soon as they’re done, carefully transfer the hot cookies to a wire rack to cool completely. Patience, young baker, patience!
- Whip Up the Frosting: Now for the delicious finish! In a small bowl, beat the softened butter until it’s wonderfully creamy. Gradually beat in the confectioners’ sugar, followed by the milk and the second dose of peppermint extract. If you’re going for that classic holiday look, add 2-3 drops of red food coloring and mix until your frosting is smooth, vibrant, and perfectly spreadable.
- Decorate & Enjoy: Once your cookies are completely cool (this is important, or your frosting will melt!), spread a generous, lovely layer of that vibrant frosting over each one. For that extra festive sparkle and crunch, sprinkle generously with crushed peppermint candies. Let the frosting set for a bit before serving these absolutely delightful Peppermint Meltaways!
Detailed Different Ways You Can Present the Recipe and How to Serve It
Peppermint Meltaways are not just delicious; they’re also incredibly versatile when it comes to presentation and serving. Their vibrant colors and festive appeal make them a star on any holiday table!
Serving Suggestions:
- Classic Cookie Platter: Arrange them artfully on a festive platter alongside other holiday favorites like gingerbread, sugar cookies, and shortbread for a show-stopping display.
- With Hot Beverages: These cookies are the perfect companion to a steaming mug of hot cocoa, coffee, or your favorite herbal tea. The cool peppermint complements the warmth beautifully.
- Dessert Table Delight: Serve them as individual dessert bites at your holiday party. Their small size makes them easy to grab and enjoy without needing cutlery.
- Ice Cream Topper: Crush a few extra peppermint meltaways and sprinkle them over vanilla ice cream for a quick and decadent dessert.
Presentation Ideas:
- Stacked Elegance: Stack a few cookies in small, clear treat bags tied with festive red or green ribbon for an elegant look.
- Decorative Tins: Fill holiday-themed tins or boxes with layers of parchment paper separating the cookies. This makes for a beautiful and practical gift.
- Mini Cupcake Liners: Place individual cookies in mini paper cupcake liners on a platter to prevent sticking and add a touch of charm.
- Color Coordination: If you’re making other red and white treats, ensure your Peppermint Meltaways are prominently featured to enhance the color scheme. A sprinkle of edible glitter on top of the crushed candy can also add an extra sparkle!
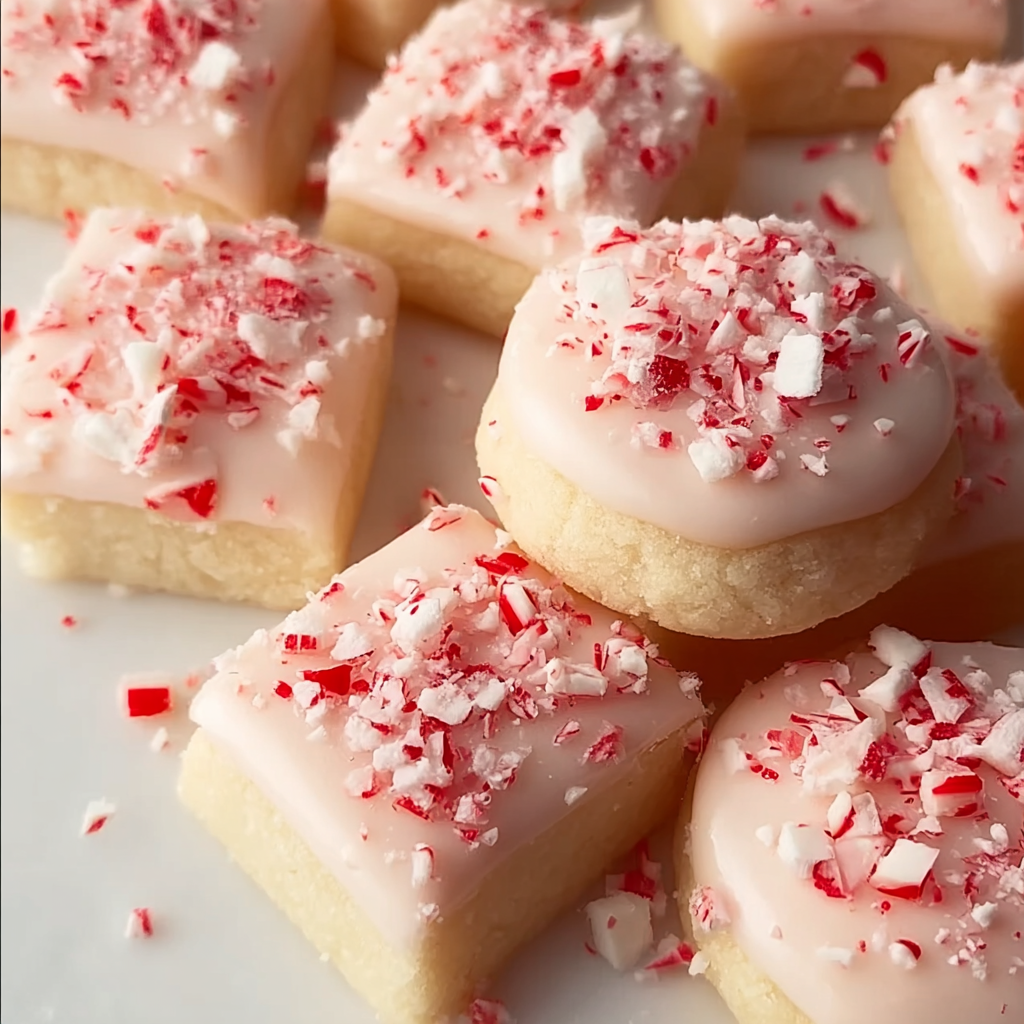
The visual appeal of these cookies, with their crisp white or pink frosting and sparkling red crushed candy, truly embodies the holiday spirit. Don’t be shy about making them the centerpiece!
How You Can Store It and How Long Does It Last
Ensuring your Peppermint Meltaways stay fresh and delightful is key to enjoying them long after baking. Here’s how to store them effectively:
Storage at Room Temperature:
- Airtight Container: Once the frosting has fully set, stack the cookies gently in an airtight container. If you need to layer them, place a piece of parchment paper between each layer to prevent sticking and protect the frosting.
- Duration: Stored correctly, these cookies will maintain their freshness and melt-in-your-mouth texture for up to 5-7 days at room temperature. Keep them away from direct sunlight or heat sources.
Storage in the Refrigerator:
- While not strictly necessary for freshness, refrigerating can sometimes help the frosting set more firmly, especially if your kitchen is warm.
- Airtight Container: Store in an airtight container, again with parchment paper between layers.
- Duration: They will last for about 7-10 days in the refrigerator. Allow them to come to room temperature for about 15-20 minutes before serving for the best texture.
Freezing for Longer Storage:
- Unfrosted Cookies: For the best results, freeze the unfrosted baked cookies. Once completely cooled, place them in a single layer on a baking sheet and freeze until solid (about 1-2 hours). Transfer the frozen cookies to a freezer-safe bag or airtight container, separated by parchment paper. They can be frozen for up to 2-3 months. Thaw at room temperature and then proceed with frosting.
- Frosted Cookies: While possible, freezing frosted cookies can sometimes affect the texture of the frosting upon thawing. If you must freeze them frosted, ensure the frosting is completely set, then flash freeze them on a tray before transferring to an airtight container. They will last for about 1 month. Thaw in the refrigerator, then let them come to room temperature before serving.
Always ensure your cookies are completely cool before storing to prevent condensation, which can lead to soggy cookies.
FAQs Section
Frequently Asked Questions
1. Can I use different extracts instead of peppermint?
Yes, you absolutely can! For a different flavor profile, you could try vanilla extract, almond extract, or even a citrus extract like lemon or orange. Just be aware that the “meltaway” aspect would remain, but it wouldn’t be a “Peppermint Meltaway” anymore!
2. Can I make the cookie dough ahead of time?
Definitely! The dough can be prepared and stored, covered tightly, in the refrigerator for up to 2-3 days. You can also form the balls and freeze them on a baking sheet, then transfer to a freezer bag for up to a month. Thaw slightly before baking.
3. Why did my cookies spread too much while baking?
This usually happens for a few reasons: your butter might have been too soft (or even melted), you didn’t chill the dough long enough (or at all), or you might have overmixed the dough, which develops the gluten. Ensure your butter is softened but still cool, and don’t skip the chilling step!
4. Can I freeze the baked cookies?
Yes, you can! For best results, freeze the unfrosted cookies by placing them in a single layer on a baking sheet to freeze solid, then transfer to an airtight container or freezer bag for up to 2-3 months. Thaw at room temperature before frosting and serving.
5. What kind of peppermint candies should I use for garnish?
Crushed candy canes are the most traditional and festive choice! You can also use crushed starlight mints or any other hard peppermint candies. Just make sure they’re finely crushed for the best texture and adhesion to the frosting.
6. Can I omit the red food coloring in the frosting?
Absolutely! The red food coloring is entirely optional and purely for aesthetic appeal. Your frosting will be a lovely pure white, which is equally beautiful and festive, especially with the red crushed peppermint candy on top.
7. How do I get uniform cookie sizes?
For perfectly consistent cookies, use a small cookie scoop (about 1 tablespoon in size) to portion the dough. You can also roll the dough into a log, chill it, and then slice it into even rounds.
8. My frosting is too thick/thin. How can I fix it?
If your frosting is too thick, add more milk (or cream) a tiny bit at a time (1/2 teaspoon) until it reaches your desired consistency. If it’s too thin, gradually mix in more confectioners’ sugar (1-2 tablespoons) until it thickens up.
9. Can I make these Peppermint Meltaways gluten-free?
While this recipe uses all-purpose flour, you can experiment with a 1:1 gluten-free baking flour blend that contains xanthan gum. Results may vary slightly in texture, but many have success with similar shortbread-style cookies using GF flour.
10. Are these cookies suitable for gifting?
They are absolutely perfect for gifting! Their festive appearance, delicious flavor, and good shelf life (when stored correctly) make them an ideal homemade present. Package them in decorative tins or clear bags tied with ribbons for a thoughtful touch.
Peppermint Meltaways
Ingredients
Cookies
- 1 cup butter 2 sticks, softened
- 0.5 cup confectioners’ sugar
- 0.5 tsp peppermint extract
- 1.25 cups all-purpose flour
- 0.5 cup cornstarch
- 0.25 tsp salt
For the Frosting
- 2 tbsp butter softened
- 1.5 cups confectioners’ sugar
- 2 tbsp milk
- 0.25 tsp peppermint extract
- 2-3 drops red food coloring optional
- crushed peppermint candies for garnish
Instructions
- In a large mixing bowl, beat the softened butter and confectioners’ sugar together until they’re wonderfully light and fluffy. Stir in the peppermint extract to infuse that delightful minty aroma.
- Grab a separate bowl and gently whisk together the flour, cornstarch, and salt. Gradually add this dry mixture into your creamy butter mixture, blending just until a soft, smooth dough forms. Remember, less is more when mixing!
- Cover the dough and pop it into the refrigerator for at least 30 minutes. This simple step helps the cookies hold their perfect shape beautifully when baked.
- Preheat your oven to a cozy 350°F (180°C). Once your dough is chilled, roll it into small, 1-inch balls. Place them about 2 inches apart on an ungreased baking sheet.
- Bake for just 9-11 minutes, or until the bottoms are very lightly browned. Carefully transfer the cookies to a wire rack to cool completely. Patience is key for perfect meltaways!
- In a small bowl, beat the softened butter until it’s creamy. Gradually mix in the confectioners’ sugar, milk, and peppermint extract. If you’re feeling festive, add a few drops of red food coloring until your frosting is smooth and spreadable.
- Once your cookies are fully cooled, spread a lovely layer of frosting over each. Then, sprinkle generously with crushed peppermint candies for that extra holiday sparkle. Let the frosting set before serving these delightful treats!
Notes
Calories: 120
Total Carbs: 14g
Fats: 7g
Protein: 1g