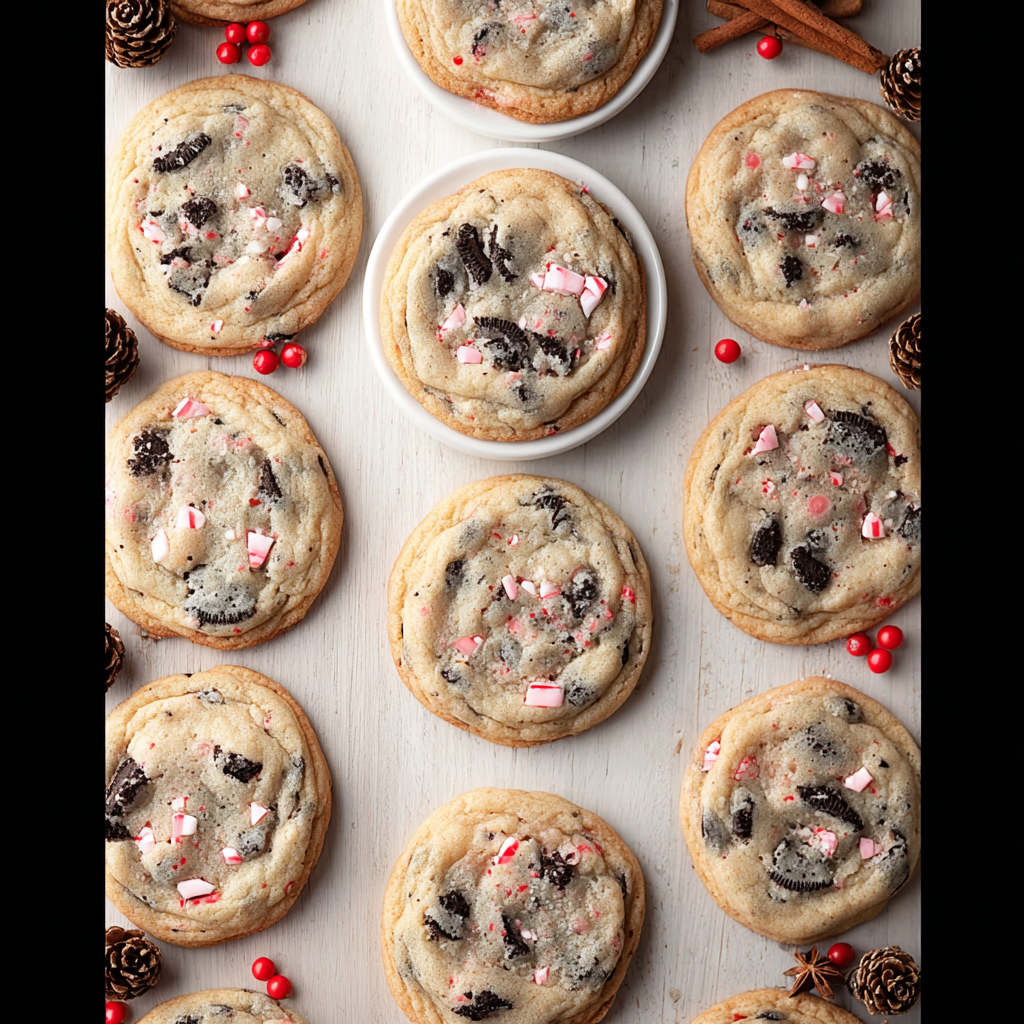
Picture this: the twinkling lights are up, carols are playing softly, and your kitchen is filled with the irresistible aroma of chocolate and peppermint. That, my friend, is the magic of the holidays, and we’re about to make it even more magical with our show-stopping, yet incredibly simple, cookie recipe! Get ready to bake a batch of pure Christmas joy with these delightful **Quick & Simple Christmas Peppermint Oreo Cookies**. They’re chewy, festive, and guaranteed to be a hit with Santa and everyone else on your nice list!
Why You’ll Love This Recipe
Ready to fall in love with your new favorite holiday cookie? Here are four delicious reasons why these **Quick & Simple Christmas Peppermint Oreo Cookies** will become a staple in your festive baking repertoire:
- Effortlessly Festive Flavor: These cookies scream “Christmas!” with every bite. The cool, crisp peppermint perfectly complements the rich chocolate, creating a flavor explosion that’s both nostalgic and incredibly satisfying.
- Seriously Simple to Make: Don’t let the stunning results fool you – this recipe is designed for ease. With straightforward steps and readily available ingredients, even novice bakers can whip up a batch of professional-looking cookies.
- Irresistibly Chewy Texture: Thanks to a few clever tricks (hello, cold butter and cornstarch!), these cookies boast an incredible chewiness that’s hard to beat. They’re soft in the middle and perfectly set at the edges – pure cookie perfection!
- A Guaranteed Crowd-Pleaser: From holiday parties to cozy nights in, these cookies disappear fast. The combination of classic Oreos, festive peppermint, and chocolate chips ensures they’re loved by all ages. Prepare for rave reviews!
Ingredients with Measurements
- 1 cup light brown sugar, firmly packed (for a rich, chewy texture)
- 3/4 teaspoon salt (use a good quality coarse kosher salt to balance flavors)
- 10 ounces Andes peppermint crunch pieces (or crushed candy canes mixed with white chocolate chips)
- 1/2 cup semisweet chocolate chips (feel free to swap for dark or mint chocolate chips!)
- 2 large eggs, at room temperature (for smoother mixing)
- 2 teaspoons vanilla extract (enhances all the delicious flavors!)
- 1 1/2 cups crushed Oreo cookies (crush them by hand for great chunky pieces!)
- 1 cup cold salted butter, cut into 1/2-inch pieces (essential for that perfect chewy texture!)
- 1 teaspoon baking soda (helps with the cookie’s lift)
- 1/2 cup white granulated sugar
- 3 cups all-purpose flour
- 2 teaspoons cornstarch (for extra soft and tender cookies, optional but recommended)
Detailed Step-by-Step Directions How to Make the Recipe
- Prep Your Oven & Pans: Let’s get baking! Start by preheating your oven to a festive 400°F (200°C). Grab two baking sheets and line them with parchment paper. This little trick is your secret weapon for preventing sticking and ensuring all your **Quick & Simple Christmas Peppermint Oreo Cookies** bake beautifully and evenly.
- Cream the Cold Butter & Sugars: In a spacious mixer bowl, combine your cold, cubed butter with both the packed brown sugar and the white granulated sugar. Now, beat them together on medium-high speed for a good 3-4 minutes. You’re aiming for a mixture that’s light, fluffy, and wonderfully creamy. That cold butter and thorough beating are key to achieving those incredibly thick, chewy cookies we all adore!
- Mix in Wet Ingredients: Time to add the magic! Introduce your room-temperature eggs and fragrant vanilla extract to the creamed butter and sugar. Keep beating until everything is perfectly combined. Don’t forget to pause and scrape down the bottom and sides of the bowl – we want every bit of deliciousness incorporated evenly.
- Gently Fold in Dry Ingredients: It’s flour power time! Gradually add the all-purpose flour, cornstarch (if using for that extra tender touch), baking soda, and salt to your wet mixture. Mix on low speed, and here’s the crucial part: mix *just* until the dry ingredients are fully combined and a soft dough forms. Be a gentle baker – overmixing is the enemy of tender cookies!
- Stir in Festive Add-ins: Now for the fun part that makes these **Quick & Simple Christmas Peppermint Oreo Cookies** truly special! By hand, gently fold in the Andes peppermint crunch pieces, those wonderfully chunky crushed Oreos, and the delightful semisweet chocolate chips. Take your time to distribute these delicious additions evenly throughout your cookie dough – you want bursts of flavor in every single bite!
- Chill the Dough (Key Step!): Patience is a virtue, especially in baking! For the absolute best texture and to prevent your cookies from spreading too much, cover the dough and tuck it into the refrigerator for at least 2 hours. Chilling overnight is even better for richer flavor and results in cookies that are super chewy and truly unforgettable!
- Portion & Bake: Once your dough is perfectly chilled and ready, grab a large 1/4 cup cookie scoop. Place your dough balls onto your prepared baking sheets, ensuring you leave a few inches between each for them to spread comfortably. Pop them into your preheated oven for 10-12 minutes. Keep an eye out for edges that are just set and slightly golden, while the centers still look a bit soft – they’ll continue cooking beautifully as they cool. Remember, warm baking sheets are a no-go for unbaked dough!
- Cool & Enjoy: The moment you’ve been waiting for! Carefully remove your cookies from the oven and let them cool right on the baking sheets for at least 5 minutes. This allows them to set up properly. Then, transfer them to a wire rack to cool completely. Now, get ready to savor these delightfully chewy, minty-chocolatey Christmas treats!
Detailed Different Ways You Can Present the Recipe and How to Serve It
These **Quick & Simple Christmas Peppermint Oreo Cookies** aren’t just delicious; they’re also incredibly versatile for holiday presentation! Elevate your serving game with these fun ideas:
- The Festive Platter: Arrange your cooled cookies artfully on a festive ceramic platter. Consider dusting lightly with powdered sugar for a “snowy” effect, or adding a few extra peppermint crunches on top for visual appeal right before serving.
- Stacked & Tied: For a simple yet elegant look, stack 3-4 cookies and tie them with a pretty red, green, or silver ribbon. Perfect for individual servings or small gifts!
- Cookie Jar Charm: Fill a clear glass cookie jar with these beauties. It makes a charming centerpiece and is an open invitation for guests to grab a treat.
- Gift Bags & Boxes: Package a few cookies in cellophane bags tied with a festive bow, or in small decorative boxes. These make wonderful homemade gifts for neighbors, teachers, or colleagues.
- Serve with Warm Beverages: There’s no better pairing than a warm drink! Offer these cookies alongside a mug of rich hot cocoa (maybe with an extra dollop of whipped cream and a sprinkle of crushed peppermint!), a frothy latte, or a classic glass of cold milk.
- Ice Cream Sandwich Twist: For an extra decadent dessert, gently press a scoop of vanilla or peppermint ice cream between two cookies for a truly indulgent treat.
How You Can Store It and How Long Does It Last
Keeping your **Quick & Simple Christmas Peppermint Oreo Cookies** fresh is easy, ensuring you can enjoy that festive flavor for longer:
- At Room Temperature: Once completely cooled, store your cookies in an airtight container at room temperature. They will stay wonderfully fresh and chewy for up to 3-5 days. To maintain softness, you can even place a slice of bread in the container with them (the cookies will absorb moisture from the bread).
- In the Refrigerator: While not strictly necessary for freshness, storing them in the refrigerator in an airtight container can extend their shelf life slightly, up to about a week.
- Freezing Baked Cookies: These cookies freeze beautifully! Once fully cooled, place them in a single layer on a baking sheet and freeze for about an hour until firm. Then, transfer them to a freezer-safe airtight container or heavy-duty freezer bag, separating layers with parchment paper. They will last for ups to 2-3 months. Thaw at room temperature or warm briefly in the microwave for a just-baked feel.
- Freezing Raw Dough: You can also freeze the unbaked dough! Scoop the dough into balls as if you were going to bake them, then arrange them on a parchment-lined baking sheet and freeze until solid. Transfer the frozen dough balls to a freezer-safe bag. When ready to bake, place them on a prepared baking sheet and bake from frozen, adding a couple of extra minutes to the baking time. This is perfect for having fresh-baked **Quick & Simple Christmas Peppermint Oreo Cookies** on demand!
Prep Time & Nutrition
Prep Time: 18 minutes
Cook Time: 11 minutes
Total Time: 29 minutes (plus 2+ hours chilling time)
Servings: 18 cookies
Calories: 222 (per cookie)
Total Carbs: 29g (per cookie)
Net Carbs: 27g (per cookie, estimated)
Fats: 11.5g (per cookie)
Protein: 2g (per cookie)
FAQs Section
1. Why is cold butter essential for these cookies?
Using cold butter and creaming it thoroughly helps create tiny pockets of air and steam within the dough during baking. This prevents the cookies from spreading too much, resulting in a thicker, chewier texture that’s absolutely delightful.
2. Can I use different types of Oreos or chocolate chips?
Absolutely! Feel free to experiment. Mint Oreos would double down on the peppermint flavor, or you could use golden Oreos for a different twist. For chocolate chips, dark chocolate, white chocolate, or even mint chocolate chips would work wonderfully.
3. What if I don’t have cornstarch?
While cornstarch is optional, it’s highly recommended for extra soft and tender cookies. If you omit it, your cookies will still be delicious, but might have a slightly firmer texture.
4. How important is chilling the dough?
Chilling the dough is a crucial step! It solidifies the butter, preventing excessive spreading in the oven, which leads to thicker cookies. It also allows the flavors to meld and the flour to fully hydrate, resulting in a richer taste and chewier texture. Don’t skip it!
5. Can I freeze the cookie dough for later?
Yes! You can scoop the dough into balls and freeze them on a baking sheet until solid. Then transfer to a freezer-safe bag for up to 2-3 months. Bake from frozen, adding a couple of extra minutes to the baking time, for fresh cookies anytime.
6. How do I know when the cookies are perfectly baked?
Look for edges that are just set and slightly golden brown. The centers should still appear a bit soft and slightly underdone – they will continue to set as they cool on the hot baking sheet, ensuring that perfect chewy interior.
7. Can I make these without the peppermint element?
Certainly! If you prefer a classic chocolate Oreo cookie, simply omit the Andes peppermint crunch pieces and use more chocolate chips or just stick with regular chocolate chips and crushed Oreos. They’ll still be fantastic!
8. What’s the best way to crush the Oreo cookies?
For chunky pieces (as recommended), place Oreos in a sturdy freezer bag and crush them with a rolling pin or the back of a heavy pan. For finer crumbs, a food processor works quickly and efficiently.
9. My cookies spread too much. What went wrong?
The most common reason for spreading is insufficient chilling of the dough. Ensure it chills for at least 2 hours, or even overnight. Also, make sure your oven temperature is accurate and that your baking sheets aren’t warm when you place the dough on them.
10. Can I double or halve this recipe?
Yes, this recipe scales well. You can easily double the ingredients for a larger batch for holiday gatherings or halve them if you just want a small treat for yourself. Remember to adjust chilling and baking times as needed.
“`
Quick & Simple Christmas Peppermint Oreo Cookies 🎄
Equipment
- Baking Sheets
- Parchment Paper
- Large mixer
- Large 1/4 cup cookie scoop
- Wire Rack
Ingredients
- 1 cup light brown sugar firmly packed (for a rich, chewy texture)
- 3/4 tsp salt use a good quality coarse kosher salt to balance flavors
- 10 ounces Andes peppermint crunch pieces or crushed candy canes mixed with white chocolate chips
- 1/2 cup semisweet chocolate chips feel free to swap for dark or mint chocolate chips!
- 2 large eggs at room temperature (for smoother mixing)
- 2 tsp vanilla extract enhances all the delicious flavors!
- 1 1/2 cups crushed Oreo cookies crush them by hand for great chunky pieces!
- 1 cup cold salted butter cut into 1/2-inch pieces (essential for that perfect chewy texture!)
- 1 tsp baking soda helps with the cookie's lift
- 1/2 cup white granulated sugar
- 3 cups all-purpose flour
- 2 tsp cornstarch for extra soft and tender cookies, optional but recommended
Instructions
- Prep Your Oven & Pans: Begin by preheating your oven to 400°F (200°C). Line two baking sheets with parchment paper; this helps prevent sticking and promotes even baking for perfect cookies.
- Cream the Cold Butter & Sugars: In a large mixer, combine the cold, cubed butter with both the packed brown sugar and white granulated sugar. Beat them together on medium-high speed for 3-4 minutes until the mixture is light, fluffy, and creamy. Using cold butter and beating it well helps create thick, chewy cookies.
- Mix in Wet Ingredients: Add the room-temperature eggs and vanilla extract to the creamed butter and sugar. Continue to beat until everything is well combined, scraping down the bottom and sides of the bowl to ensure all ingredients are incorporated evenly.
- Gently Fold in Dry Ingredients: Gradually add the all-purpose flour, cornstarch, baking soda, and salt to the wet mixture. Mix on low speed just until the dry ingredients are fully combined and a soft dough forms. Be careful not to overmix, as this can make your cookies tough.
- Stir in Festive Add-ins: By hand, gently fold in the Andes peppermint crunch pieces, the chunky crushed Oreos, and the semisweet chocolate chips. Distribute these delicious additions evenly throughout your cookie dough for bursts of flavor in every bite.
- Chill the Dough (Key Step!): For the best texture and to prevent your cookies from spreading too much, cover the dough and chill it in the refrigerator for at least 2 hours. Chilling overnight is even better for richer flavor and a super chewy result!
- Portion & Bake: Once chilled, use a large 1/4 cup cookie scoop to place dough balls onto your prepared baking sheets, leaving a few inches between each for spreading. Bake in the preheated oven for 10-12 minutes. Look for edges that are just set and slightly golden, while the centers still look a bit soft – they'll continue cooking as they cool. Avoid putting dough on warm baking sheets.
- Cool & Enjoy: Remove the cookies from the oven and let them cool on the baking sheets for at least 5 minutes to set. Then, transfer them to a wire rack to cool completely. Get ready to enjoy these delightfully chewy, minty-chocolate Christmas treats!
Notes
Calories: 222
Total Carbs: 29g (Net Carbs: 27g estimated)
Fats: 11.5g
Protein: 2g