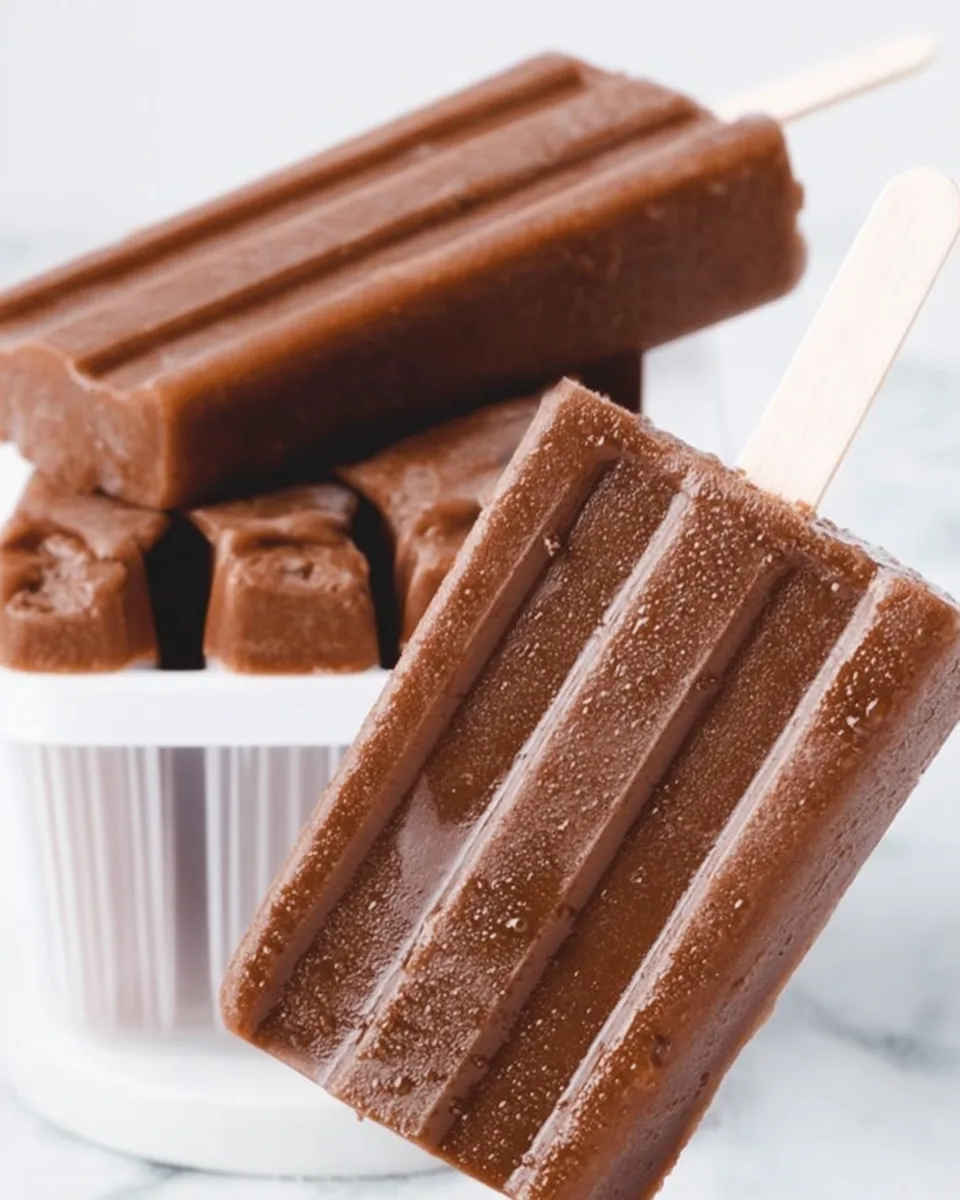
Tired of the relentless summer heat? Craving a nostalgic treat that takes you back to childhood days, but without all the fuss? Get ready to whip up a batch of the most delightful, frosty, and absolutely irresistible **Easy Creamy Fudgesicles**! Imagine biting into a rich, chocolatey dream, perfectly chilled and melting ever so slowly on your tongue. This isn’t just a recipe; it’s your passport to a hassle-free, homemade frozen dessert experience that will have everyone asking for more. Say goodbye to store-bought mediocrity and hello to homemade perfection!
Why You’ll Love This Recipe
There are countless reasons why these **Easy Creamy Fudgesicles** are about to become your new favorite go-to treat. Here are just four compelling ones:
- Effortless Simplicity: Seriously, if you can whisk, you can make these fudgesicles. With just two main ingredients and a few minutes of active prep, they’re perfect for even the busiest schedules or beginner cooks. No baking, no complex steps – just pure, simple deliciousness.
- Luxuriously Creamy Texture: Thanks to the magic of instant pudding, these fudgesicles aren’t just frozen chocolate blocks. They boast an incredibly smooth, velvety, and creamy texture that truly melts in your mouth, making every bite an absolute pleasure.
- Healthier & Customizable Option: Looking for a treat that aligns with your wellness goals? This recipe is incredibly adaptable! Opt for sugar-free pudding and non-dairy milk (like almond or oat) to significantly reduce calories and sugar, creating a guilt-free indulgence that doesn’t skimp on flavor.
- Nostalgic & Crowd-Pleasing: Fudgesicles evoke happy memories for many. This homemade version delivers that classic chocolatey goodness everyone loves, making them a fantastic dessert for family gatherings, kids’ parties, or simply a sweet escape after a long day. They’re a guaranteed hit!
Ingredients
You won’t believe how few ingredients you need to create these heavenly **Easy Creamy Fudgesicles**. It’s pure magic with minimal fuss!
- 🍫 1 (5.9-ounce) package chocolate instant pudding mix (consider sugar-free or light for a healthier option)
- 🥛 3 cups cold milk (dairy or non-dairy like almond, soy, or oat milk for a lighter treat)
- 🍦 10 popsicle sticks
- 🧊 Popsicle molds (for 10 popsicles)
Detailed Step-by-Step Directions
Making your own **Easy Creamy Fudgesicles** is a breeze! Follow these simple steps, and you’ll be on your way to a frozen delight in no time:
- Whisk It Up: Grab a large bowl and pour in your instant pudding mix. Add the three cups of ice-cold milk. Now, get ready for an arm workout (the fun kind!). Whisk vigorously for about 5 glorious minutes. You’ll notice the mixture transforming, becoming wonderfully thick, smooth, and oh-so-creamy. This velvety base is the secret to your sensational fudgesicles!
- Fill the Molds: Carefully spoon or pour your luscious pudding mixture into each compartment of your popsicle molds. For a super neat pour, especially if you have fancy molds, a piping bag can be your best friend here. Once filled, gently tap the molds a few times on your kitchen counter. This little trick helps the pudding settle perfectly and banishes any pesky air bubbles, ensuring beautifully smooth fudgesicles.
- Add Sticks: Pop a popsicle stick into the center of each filled mold. If they seem a bit wobbly and don’t stand upright immediately, don’t fret! You can place the molds in the freezer for about an hour or two until the pudding starts to firm up. Then, just insert the sticks, and they’ll stand perfectly straight.
- Freeze Solid: This is the hardest part – the waiting game! Transfer your filled molds to the freezer and let them chill out for at least 8 hours. For best results and a perfectly solid, scoopable (well, lickable!) treat, letting them freeze overnight is ideal.
- Release with Ease: When your sweet cravings hit and the fudgesicles are rock solid, it’s time for the grand reveal! Dip the bottom of the molds into a bowl of warm water for about 20-30 seconds. This gentle warmth works wonders, slightly melting the outer layer just enough to effortlessly slide your beautiful homemade fudgesicles out.
- Store Smart: Once released, you’ll want to keep your delicious creations safe and sound. Lay them on a baking sheet lined with parchment paper, then transfer them to a freezer-safe bag or an airtight container. If stacking, place parchment paper between layers to prevent them from sticking together. Now, enjoy your refreshing, unbelievably easy, and homemade **Easy Creamy Fudgesicles** whenever you need a sweet escape!
Ways to Present and Serve Your Easy Creamy Fudgesicles
These **Easy Creamy Fudgesicles** are fantastic on their own, but with a little creativity, you can elevate them into even more impressive desserts!
- Classic Enjoyment: The simplest and often best way! Just grab one from the freezer, unwrap (if stored), and enjoy straight from the stick. Perfect for a quick cool-down.
- Dipping Delight: Melt some chocolate chips (milk, dark, or white) in a microwave-safe bowl. Dip your frozen fudgesicle into the melted chocolate, letting any excess drip off. Before the chocolate hardens, sprinkle with chopped nuts, colorful sprinkles, shredded coconut, or even a dash of sea salt for a gourmet touch.
- Fudgesicle Floats: Break a fudgesicle into pieces and drop them into a glass of cold milk (dairy or non-dairy), sparkling water, or even root beer for a fun, fizzy twist.
- Mini Fudgesicle Bites: If you have smaller molds, make mini fudgesicles perfect for little hands or as a bite-sized treat on a dessert platter.
- Over Ice Cream: Chop a fudgesicle into small pieces and sprinkle over a scoop of vanilla or chocolate ice cream for an extra layer of creamy, chocolatey goodness.
- Gourmet Garnish: For an elegant touch, arrange a fudgesicle on a small plate with a few fresh berries (raspberries or strawberries work wonderfully) and a sprig of mint.
Storage and Shelf Life
Proper storage is key to enjoying your homemade **Easy Creamy Fudgesicles** for weeks to come. Once you’ve released them from their molds, place them on a baking sheet lined with parchment paper, ensuring they don’t touch each other. Pop them back into the freezer for about 30 minutes to firm up again if they softened during release. Then, transfer them to an airtight, freezer-safe container or a heavy-duty freezer bag.
If you’re layering them in a container, always place a piece of parchment paper between each fudgesicle to prevent them from sticking together. Stored correctly, your delicious fudgesicles can last for up to 2-3 months in the freezer. However, given how irresistibly creamy and easy they are, we doubt they’ll stick around that long!
FAQs Section
- Can I use sugar-free pudding mix?
Absolutely! The recipe specifically suggests sugar-free or light pudding mix as a healthier option. It works just as well. - What kind of milk works best?
Any cold milk will work! Dairy milk (whole, 2%, skim) will yield a creamier texture, but non-dairy options like almond, soy, or oat milk are excellent for a lighter or dairy-free version. - Can I add mix-ins to the fudgesicles?
Yes, you can! Before pouring into molds, gently fold in mini chocolate chips, a swirl of peanut butter, a dash of instant coffee powder for a mocha flavor, or even a few drops of peppermint extract. - What if I don’t have popsicle molds?
No problem! You can use small paper cups (like Dixie cups) and cover them with foil. Poke a popsicle stick through the foil into the center of the pudding mixture. - Why are my fudgesicles not firm enough?
Ensure your milk is very cold and you whisk vigorously for the full 5 minutes. The mixture needs to be thick before freezing. Also, make sure they freeze for at least 8 hours, or preferably overnight. - How do I make them release easily from the molds?
The warm water trick (dipping the bottom of the mold for 20-30 seconds) is the best way to ensure easy release. Don’t leave them in the water too long, or they’ll get too soft. - Can I use a different flavor of instant pudding?
Of course! While these are **Easy Creamy Fudgesicles**, you can certainly experiment with vanilla, butterscotch, pistachio, or strawberry pudding for different flavored popsicles. - Are these suitable for kids?
They are perfect for kids! They’re a fun, less messy (than ice cream cones!), and customizable treat. Just ensure any mix-ins are age-appropriate. - How long do these fudgesicles last in the freezer?
When stored properly in an airtight container or freezer bag, they can last for up to 2-3 months. - Can I make a big batch for a party?
Absolutely! This recipe scales up easily. Just ensure you have enough molds and freezer space for your delicious **Easy Creamy Fudgesicles**!
Easy Creamy Fudgesicles
Equipment
- Large Bowl
- Whisk
- Popsicle molds
- Popsicle Sticks
Ingredients
- 1 package chocolate instant pudding mix 5.9-ounce; consider sugar-free or light for a healthier option
- 3 cups cold milk dairy or non-dairy like almond, soy, or oat milk for a lighter treat
- 10 popsicle sticks
- Popsicle molds for 10 popsicles
Instructions
- Whisk It Up: In a large bowl, combine the instant pudding mix with the cold milk. Whisk vigorously for about 5 minutes until the mixture becomes wonderfully thick and smooth. This is the simple base for your delicious fudgesicles!
- Fill the Molds: Carefully spoon or pour the pudding mixture into your popsicle molds. For a cleaner pour, you can use a piping bag. Gently tap the filled molds on your counter a few times to help the pudding settle and release any trapped air bubbles.
- Add Sticks: Insert a popsicle stick into each filled mold. If the sticks don't stand upright immediately, don't worry! You can pop them in after the fudgesicles have been in the freezer for an hour or two and are slightly firm.
- Freeze Solid: Place the molds in the freezer for at least 8 hours, or until they are completely frozen and very firm. This ensures a perfect, solid treat.
- Release with Ease: When you're ready to enjoy, dip the bottom of the molds into warm water for about 30 seconds. This simple trick helps loosen the fudgesicles, making them easy to slide out.
- Store Smart: Gently remove the fudgesicles from their molds. For best storage, place them on a baking sheet lined with parchment paper, then transfer them to a freezer-safe bag or container with parchment paper between layers to prevent sticking. Enjoy your refreshing, homemade fudgesicles!
Notes
Calories: 98 kcal
Total Carbs: 16 g
Net Carbs: 16 g
Fats: 2 g
Protein: 2 g