Are you ready to fall head over heels for a cookie that’s as enchanting as a love letter and as comforting as a warm hug? Get ready to unleash a cascade of pure delight with our incredible Velvet Love Oreo Dream Cookies! Forget your ordinary chocolate chip; we’re diving into a world where vibrant red velvet meets the irresistible crunch of Oreos and the creamy kiss of white chocolate. This isn’t just a recipe; it’s an experience, a celebration of flavor that will make your taste buds sing and your heart flutter. Perfect for sharing with someone special, bringing to a party, or simply treating yourself to a moment of blissful indulgence, these cookies are truly a dream come true. Let’s bake some magic!
Why You’ll Love This Velvet Love Oreo Dream Cookies Recipe
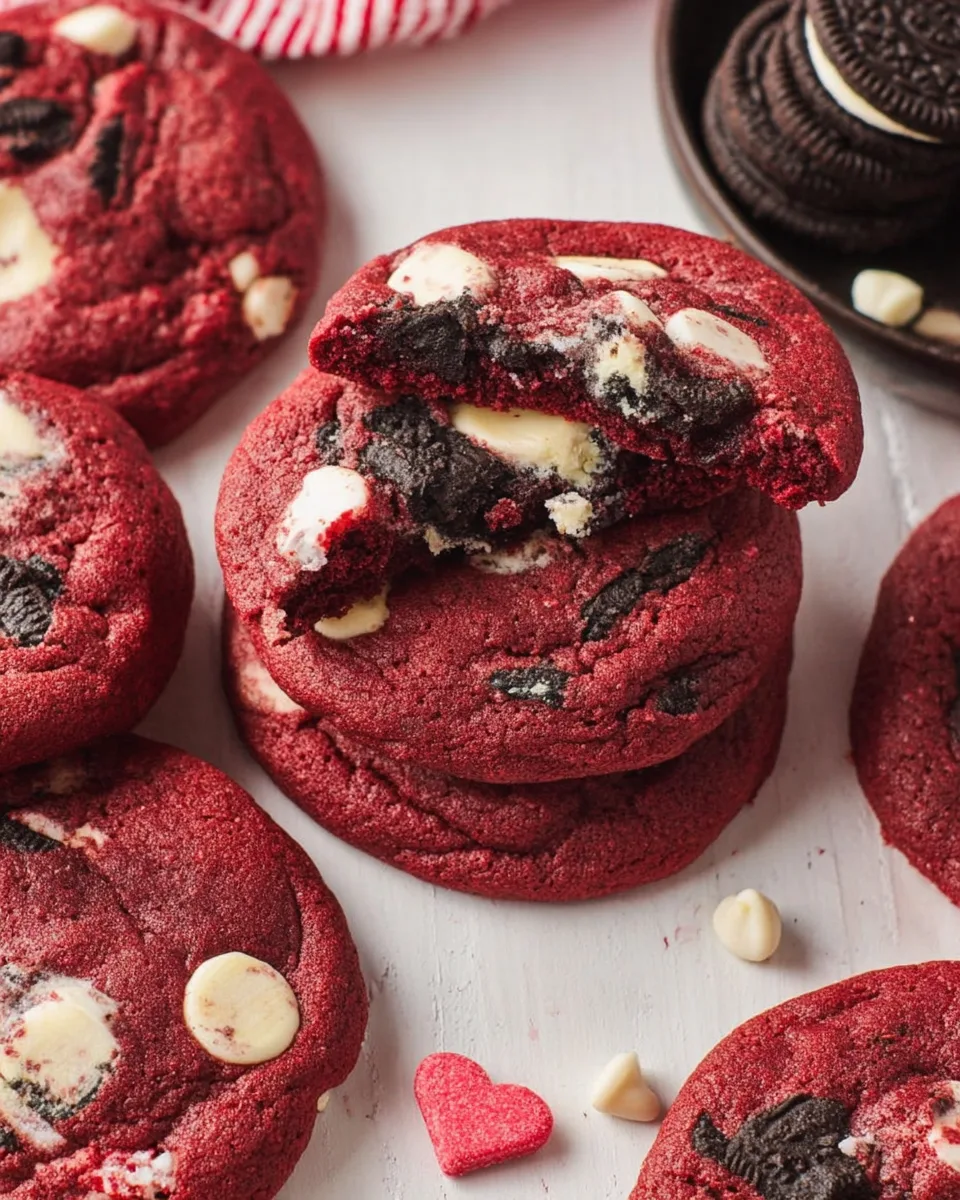
- Irresistibly Vibrant: The stunning, rich red hue of these cookies makes them a feast for the eyes before they even hit your tongue. It’s love at first sight, perfectly encapsulating the “Velvet Love” in their name.
- Texture Wonderland: Experience the perfect chewiness of a classic red velvet cookie, studded with delightful chunks of Oreo, and the soft melt of white chocolate chips. Each bite is a journey through different, harmonious textures.
- Flavor Fusion Perfection: Imagine the iconic taste of red velvet, enhanced by a hint of cocoa, combined with the beloved creaminess and crunch of Oreo cookies. It’s a flavor explosion that’s both familiar and wonderfully novel.
- The Ultimate Crowd-Pleaser: Whether it’s a romantic gesture, a family gathering, or a potluck with friends, these Velvet Love Oreo Dream Cookies are guaranteed to steal the show and leave everyone asking for the recipe.
Ingredients for Your Velvet Love Oreo Dream Cookies
Gather your baking essentials and prepare for a sweet adventure:
- 🥣 4 cups All-Purpose Flour
- 🍫 ½ cup Unsweetened Cocoa Powder
- 🧂 1 teaspoon Sea Salt
- 🍚 2 teaspoons Baking Soda
- 🧈 1 ½ cups Salted Butter, softened
- 🍬 1 cup Granulated Sugar
- 🍯 1 ¾ cups Light Brown Sugar, packed
- 🥚 3 Large Eggs
- 🥄 2 teaspoons Vanilla Extract
- 💖 1 ½ cups White Chocolate Chips
- 🍪 22 Oreo Cookies (original or preferred flavor)
- 🍓 0.6 oz Liquid Red Food Coloring (for vibrant color)
Detailed Step-by-Step Directions to Bake Perfection
- Cream it Up with Sweetness: In your largest mixing bowl, grab your electric mixer and beat the softened salted butter on medium speed until it’s beautifully light and airy, about 2-3 minutes. Now, gradually add both the granulated sugar and the packed light brown sugar. Continue beating until the mixture is wonderfully fluffy and well combined, scraping down the sides of the bowl as needed.
- Infuse with Wet Goodness & Color: Crack in your large eggs, one at a time, beating well after each addition to ensure it’s fully incorporated before adding the next. This creates a smoother batter. Then, pour in the vanilla extract and, for that show-stopping “Velvet Love” appeal, stir in the liquid red food coloring. Mix until your entire wet mixture is a uniformly vibrant, captivating red hue.
- Dry Mix Magic Joins the Party: In a separate, medium-sized bowl, whisk together the all-purpose flour, unsweetened cocoa powder, baking soda, and sea salt. This ensures all your dry ingredients are evenly distributed. Now, with your mixer on low speed, gradually add this dry mixture to your wet ingredients. Mix gently, just until everything comes together into a soft, cohesive, and bright red dough. Remember, overmixing can lead to tough cookies, so stop as soon as it’s combined!
- Oreo Infusion – The Heart of the Dream: This is where the magic truly unfolds! First, take 6 of your Oreo cookies and finely crush them in a food processor until they resemble fine crumbs, or place them in a zip-top bag and crush them with a rolling pin. For the remaining 16 Oreos, gently break them into larger, chunky pieces by hand – we want those delightful pockets of crunch! Using a sturdy spatula, carefully fold both the finely crushed Oreos, the chunky Oreo pieces, and the lovely white chocolate chips into your vibrant red velvet dough. This step ensures an explosion of delightful texture and flavor in every single bite!
- Shape, Chill & Anticipate: Scoop out generous tablespoons of your incredible dough. Gently roll each scoop into a uniform ball, placing them approximately 2 inches apart on a baking sheet lined with parchment paper. Lightly press the top of each cookie dough ball down just a touch with your palm or the back of a spoon – don’t flatten them completely, just a slight nudge! Now, here’s the secret to perfectly thick, chewy cookies: pop the entire tray into the fridge for a crucial 30 minutes. This chill time helps prevent your cookies from spreading too much, ensuring that gorgeous, gooey center.
- Bake to Velvet Perfection: While your dough is chilling, preheat your oven to a cozy 375°F (190°C). Once the dough has had its vital rest, transfer the baking sheet directly from the fridge to your hot oven. Bake the cookies for approximately 12 minutes. You’ll know they’re done when the edges appear beautifully set, but the centers are still wonderfully soft and look slightly gooey. This promises that irresistible chewiness!
- Cool Down & Savor the Love: Let the freshly baked Velvet Love Oreo Dream Cookies cool on the baking sheet for a few minutes. This allows them to firm up slightly before you move them. Then, carefully transfer them to a wire rack to cool completely. Get ready to enjoy these delightful, healthy-ish Valentine’s treats that are sure to win hearts and become an instant favorite!
Presenting and Serving Your Velvet Love Oreo Dream Cookies
These stunning Velvet Love Oreo Dream Cookies are a treat in themselves, but here are some fun ways to elevate their presentation and serving:
- Classic Stack: Simply stack them high on a beautiful white platter or a rustic wooden board. The vibrant red color will pop!
- Drizzled Delight: Melt some extra white chocolate or even dark chocolate and drizzle it artfully over the cooled cookies for an extra touch of elegance and flavor.
- Cream Cheese Frosting Swirl: For a true red velvet experience, whip up a small batch of cream cheese frosting and pipe a dollop or swirl on top of each cooled cookie.
- Cookie Ice Cream Sandwiches: Take two cookies and sandwich a scoop of vanilla bean, strawberry, or even cookies and cream ice cream between them. Roll the edges in extra crushed Oreos for an epic dessert!
- Milk & Cookies Party: Serve them warm with a tall glass of cold milk, a steaming mug of coffee, or a rich hot chocolate for the ultimate cozy treat.
- Gift of Love: Package them in a clear cello bag tied with a pretty ribbon, or arrange them in a decorative box with tissue paper. They make a perfect handmade gift for birthdays, holidays, or just to say “I love you.”
- Dessert Board Star: Include them on a festive dessert charcuterie board alongside fresh berries, other small treats, and perhaps some whipped cream for dipping.
Storing Your Velvet Love Oreo Dream Cookies
To keep your delicious Velvet Love Oreo Dream Cookies fresh and irresistible, follow these simple storage tips:
- Room Temperature: Once completely cooled, store the cookies in an airtight container at room temperature for up to 3-4 days. Placing a slice of plain bread in the container can help keep them soft.
- Refrigeration: If you’ve added cream cheese frosting or live in a very warm climate, refrigerate them in an airtight container for up to 1 week. Bring them to room temperature for optimal enjoyment.
- Freezing Baked Cookies: For longer storage, place cooled cookies in a freezer-safe airtight container or heavy-duty freezer bag. They can be frozen for up to 2-3 months. Thaw at room temperature or warm gently in the microwave for a few seconds.
- Freezing Dough Balls: You can also prepare the dough balls and freeze them unbaked! Place the shaped dough balls on a parchment-lined baking sheet and freeze until solid (about 1-2 hours). Then transfer them to a freezer-safe bag or container. When ready to bake, place frozen dough balls on a baking sheet and bake for a few extra minutes (14-16 minutes total) without thawing.
FAQs About Velvet Love Oreo Dream Cookies
Here are some common questions to help you master your Velvet Love Oreo Dream Cookies!
-
Can I use unsalted butter instead of salted butter?
Yes, absolutely! If using unsalted butter, increase the sea salt in the recipe by about ¼ to ½ teaspoon to ensure the flavors balance out.
-
What if I don’t have a food processor for crushing Oreos?
No problem! Place the Oreos in a sturdy zip-top bag, seal it, and use a rolling pin or the bottom of a heavy pan to crush them into fine crumbs.
-
Can I make the cookie dough ahead of time?
Yes, you can! Prepare the dough up to the shaping stage (Step 5). Cover the dough tightly with plastic wrap and refrigerate for up to 2 days, or freeze the dough balls as described in the storage section.
-
Can I use other Oreo flavors for these cookies?
Definitely! Feel free to experiment with different Oreo flavors like Golden Oreos, Mint Oreos, or even Peanut Butter Oreos to create your own unique twist on the Velvet Love Oreo Dream Cookies.
-
Why is chilling the dough so important?
Chilling the dough helps solidify the butter, which prevents the cookies from spreading too much in the oven. It results in thicker, chewier cookies with a better texture and richer flavor.
-
How do I know when the cookies are perfectly baked?
The cookies are done when their edges appear set and slightly golden, but the centers still look soft and perhaps a little underbaked. They will continue to set as they cool on the baking sheet.
-
Is the red food coloring necessary?
The red food coloring is essential for achieving the vibrant “red velvet” look. While you can omit it, the cookies won’t have the characteristic red hue, but they will still be delicious!
-
Can I make these cookies gluten-free?
You can try substituting the all-purpose flour with a 1:1 gluten-free baking flour blend that contains xanthan gum. Results may vary slightly in texture.
-
Can I reduce the amount of sugar in the recipe?
While you can try, reducing the sugar significantly might affect the texture, chewiness, and overall flavor balance of the cookies. Sugar plays a role in moisture and tenderness.
-
What’s the best way to get uniform cookie dough balls?
Using a cookie scoop (about 1.5-2 tablespoons) is the easiest way to ensure all your cookies are roughly the same size, which helps them bake evenly.
Velvet Love Oreo Dream Cookies ❤️
Equipment
- Large mixing bowl
- Medium-sized bowl
- Electric Mixer
- Spatula
- Baking Sheet
- Parchment Paper
- Wire Rack
Ingredients
- 4 cups All-Purpose Flour
- 0.5 cup Unsweetened Cocoa Powder
- 1 teaspoon Sea Salt
- 2 teaspoons Baking Soda
- 1.5 cups Salted Butter softened
- granulated Sugar
- 1.75 cups Light Brown Sugar packed
- 3 Large Eggs
- 2 teaspoons Vanilla Extract
- 1.5 cups White Chocolate Chips
- 22 Oreo Cookies (original or preferred flavor)
- 0.6 oz Liquid Red Food Coloring (for vibrant color)
Instructions
- In a large mixing bowl, beat your softened butter until it's wonderfully light and airy. Gradually mix in both the granulated sugar and brown sugar until the mixture is well combined and fluffy.
- Beat in the eggs one at a time, ensuring each is fully incorporated before adding the next. Then, stir in the vanilla extract and that beautiful red food coloring until your mixture achieves a uniformly vibrant red hue.
- In a separate medium-sized bowl, whisk together the flour, cocoa powder, baking soda, and salt. Gradually add this dry mixture to your wet ingredients, mixing gently just until everything comes together into a soft, cohesive dough. Be careful not to overmix!
- Prepare your Oreos by finely crushing 6 cookies in a food processor or by hand. For the remaining 16 Oreos, gently break them into larger, chunky pieces. Fold both the finely crushed Oreos, the delightful chunky Oreo pieces, and the white chocolate chips into your red velvet dough using a spatula. This step ensures a delightful texture and flavor in every bite!
- Scoop out generous tablespoons of dough, gently rolling them into uniform balls. Place these irresistible cookie dough balls about 2 inches apart on a baking sheet lined with parchment paper. Lightly press the top of each cookie dough ball down just a touch (don't flatten them completely!). Now, pop the entire tray into the fridge for a crucial 30 minutes – this chill time is the secret to perfectly thick, chewy cookies that won't spread too much!
- Preheat your oven to 375°F (190°C). Once the dough is chilled, transfer the baking sheet directly from the fridge to the hot oven. Bake the cookies for approximately 12 minutes. They should appear set around the edges but still wonderfully soft and slightly gooey in the center.
- Let the freshly baked cookies cool on the baking sheet for a few minutes before carefully transferring them to a wire rack to cool completely. Get ready to enjoy these delightful, healthy-ish Valentine's treats that are sure to win hearts!
Notes
Calories: 200 kcal
Total Carbs: 28g
Net Carbs: 26g
Fats: 11g
Protein: 3g