Why You’ll Love These Shamrock Shake Pudding Cups
- Super Speedy & Simple: With just 15 minutes of prep and absolutely no baking involved, these Shamrock Shake Pudding Cups are a dream come true for busy schedules or impromptu cravings. Perfect for whipping up a festive treat in a flash!
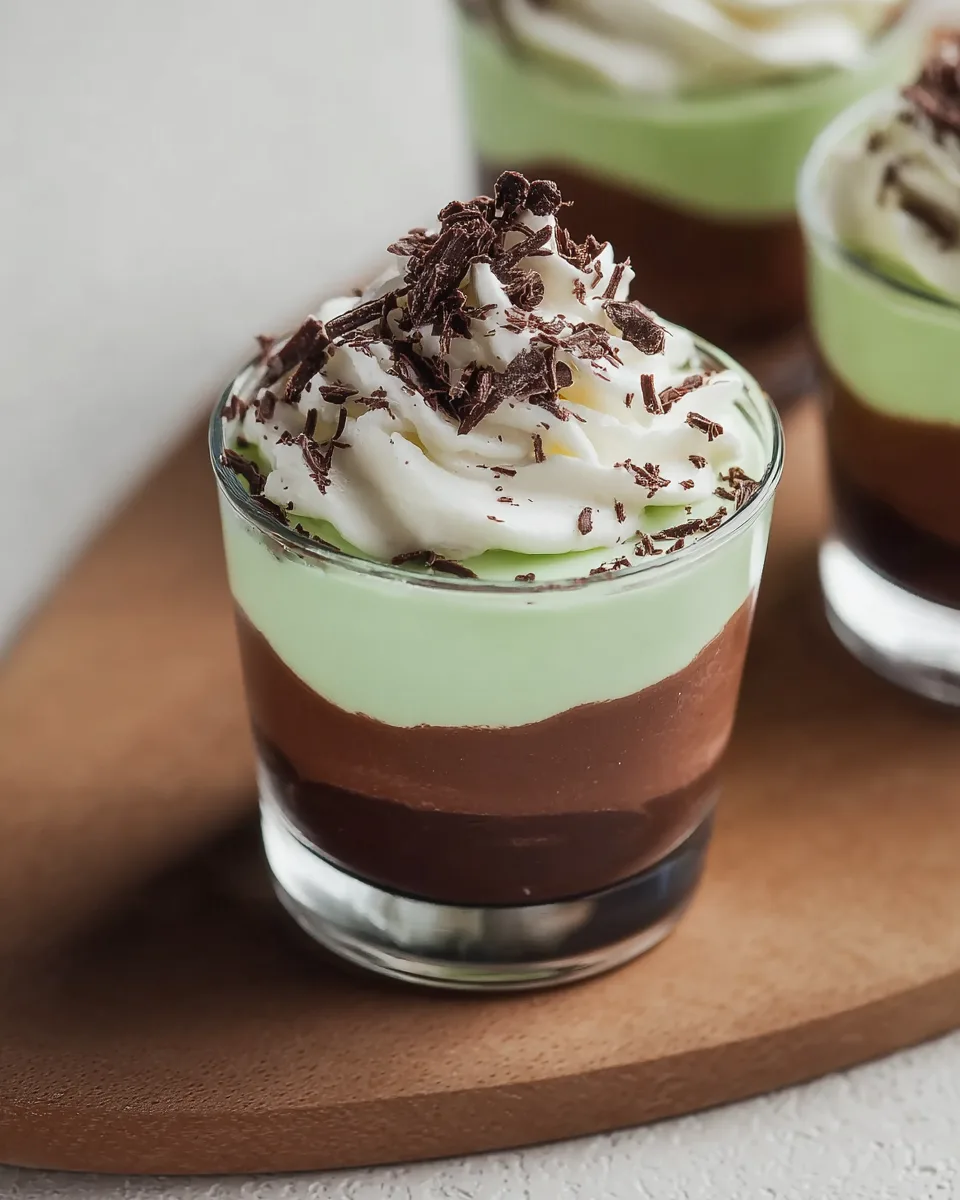
- Irresistibly Delicious & Festive: Get ready for the iconic combo of rich chocolate and refreshing mint, layered perfectly to evoke the beloved Shamrock Shake! The vibrant green and deep brown layers make these pudding cups a visually stunning and delicious celebration for any occasion, especially St. Patrick’s Day.
- A Lighter Indulgence: Craving something sweet without the guilt? Made with skim milk and light whipped cream, these Shamrock Shake Pudding Cups are a delightfully lighter dessert option, offering fantastic flavor for an estimated ~118 calories per serving.
- No-Bake Bliss: Forget turning on the oven! These easy-peasy pudding cups require zero baking, making them an ideal dessert for all skill levels and perfect for warm weather or when you just want a quick, fuss-free sweet fix.
Unleash Your Inner Leprechaun with Shamrock Shake Pudding Cups!
Are you ready to sham-rock and roll your taste buds? Forget battling the crowds for that seasonal green milkshake! This year, bring the magic of minty-chocolate goodness right into your kitchen with our incredible, no-fuss Shamrock Shake Pudding Cups. Imagine creamy layers of rich chocolate and vibrant mint, crowned with fluffy whipped cream and a sprinkle of chocolatey cheer. It’s the beloved flavor of a Shamrock Shake, transformed into an effortlessly elegant and utterly delicious pudding dessert!
Perfect for St. Patrick’s Day celebrations, a fun family treat, or simply when you need a little something sweet and refreshing, these Shamrock Shake Pudding Cups are ridiculously easy to make. Get ready to impress your friends and delight your family with a dessert that tastes like a dream and looks like a festive masterpiece. Let’s dive in and create some green magic!
Shamrock Shake Pudding Cups Ingredients
Gather your magic ingredients, and let’s get ready to whip up some festive deliciousness!
- 🍀 1 package (3.4 oz) instant chocolate pudding mix
- 🥛 2 cups skim milk (or plant-based milk for a dairy-free option)
- 🍃 1 package (3.4 oz) instant mint pudding mix
- 🥛 2 cups skim milk (or plant-based milk)
- 🍦 1 cup light whipped cream or whipped topping
- 🌈 Green food coloring (optional, for an extra vibrant mint layer)
- 🍫 Chocolate shavings or a few crushed mint candies (for a delightful garnish)
Detailed Directions: How to Make Your Shamrock Shake Pudding Cups
Get ready for some layering fun! These Shamrock Shake Pudding Cups come together in a flash.
- Whip Up the Chocolate Layer: In a medium-sized bowl, pour in the instant chocolate pudding mix. Add 2 cups of your chosen milk (skim or plant-based). Whisk vigorously for about 2 minutes until the mixture is smooth and well combined. Don’t worry if it seems a little thin at first; patience, young padawan! Let it sit untouched for 5 minutes. You’ll notice it magically begin to thicken into a lovely, rich chocolate pudding.
- Prepare the Mint Layer: Grab a separate clean bowl for your refreshing mint layer. Empty the instant mint pudding mix into it, then add the remaining 2 cups of milk. Whisk it with the same enthusiasm for 2 minutes until it’s silky smooth. Now, for that extra festive touch: if you desire a more vibrant, “leprechaun-approved” green, add a few drops of green food coloring. Stir it in until you reach your desired hue. Just like the chocolate, let this minty mixture sit for 5 minutes to thicken up.
- Create Your Layers of Delight: Now for the artistic part! Line up your clear dessert cups, glasses, or jars. Spoon a generous layer of the thickened chocolate pudding into the bottom of each cup. Be gentle to keep your layers neat! Next, carefully spoon a layer of the green mint pudding over the chocolate. Repeat these layers, alternating chocolate and mint, until your cups are filled to your preferred level, leaving a little space for the creamy topping.
- Add a Creamy Crown: Once your layers are beautifully stacked, it’s time for the crowning glory! Dollop or, if you’re feeling fancy, pipe a generous swirl of light whipped cream or whipped topping onto the very top of each pudding cup. This adds a cloud-like texture and a touch of sweetness.
- Garnish with Cheer: Elevate your Shamrock Shake Pudding Cups with a delightful garnish! Sprinkle a dusting of chocolate shavings or a few crushed mint candies over the whipped cream. This not only adds visual appeal but also an extra burst of flavor and texture.
- Chill to Perfection: The final, crucial step! Place your decorated pudding cups into the refrigerator. Let them chill for at least 30 minutes. This chilling time allows the puddings to set completely, firm up, and become wonderfully cool and refreshing. Serve them chilled for the ultimate treat!
Presentation & Serving Ideas for Your Shamrock Shake Pudding Cups
These Shamrock Shake Pudding Cups are already delightful, but with a little creativity, you can make them truly shine!
- Classic Clear Cups: The easiest and most popular way to showcase those beautiful layers. Use stemless wine glasses, tumblers, or even small Mason jars for a charming rustic touch.
- Mini Marvels: For a party or tasting platter, layer the pudding into shot glasses or mini dessert cups. These bite-sized treats are perfect for guests to grab and enjoy.
- Elegant Parfait Style: Use tall, slender parfait glasses to emphasize the dramatic vertical layers. This presentation makes them feel extra special for a dinner party.
- “Dirt Cup” Twist: Instead of chocolate shavings, crush some chocolate sandwich cookies (like Oreos) for an “earthy” layer between the mint, or sprinkle on top.
- Layering Creativity: Don’t just stick to two layers! You could create multiple thinner layers for a more intricate look. For an advanced touch, try tilting the cups slightly in a muffin tin while the pudding sets for a diagonal layer effect before adding the next level straight.
How to Serve: These pudding cups are a fantastic standalone dessert after any meal. They’re also perfect for potlucks, St. Patrick’s Day parties, or as a fun, quick snack when you need a pick-me-up. Serve them straight from the fridge for maximum refreshment!
Storage & Longevity of Your Shamrock Shake Pudding Cups
Keeping your Shamrock Shake Pudding Cups fresh is simple, ensuring you can enjoy them for a few days!
- Refrigeration is Key: Always store your pudding cups in the refrigerator. The cold temperature helps them maintain their set consistency and keeps them fresh.
- Cover Them Up: To prevent the pudding from forming a skin or absorbing odors from the fridge, cover each cup tightly with plastic wrap. If you’re using cups with lids (like Mason jars), even better!
- How Long Do They Last? When stored properly in the refrigerator, these Shamrock Shake Pudding Cups will stay fresh and delicious for about 2-3 days. While they might still be safe to eat on day 4, the texture and freshness of the whipped cream might start to diminish.
- Freezing Not Recommended: Unfortunately, instant pudding does not freeze well. The texture can become watery and grainy upon thawing, so it’s best to enjoy these fresh from the fridge.
For the best experience, try to enjoy your homemade Shamrock Shake Pudding Cups within 48 hours of making them.
Shamrock Shake Pudding Cups FAQs
- Can I use regular whole milk instead of skim milk?
Absolutely! Using whole milk will result in a richer, creamier pudding, though it will slightly increase the calorie and fat content. Any type of milk (dairy or non-dairy) can be used as long as it’s a liquid.
- Is green food coloring essential for the mint layer?
No, it’s entirely optional! The green food coloring is purely for aesthetics to give the mint layer that vibrant, festive look. The flavor will be just as delicious without it.
- Can I make these pudding cups dairy-free?
Yes! The recipe specifically mentions using plant-based milk (like almond, soy, or oat milk) for a dairy-free option. Just be sure to also use a dairy-free whipped topping if you’re aiming for a completely dairy-free treat.
- How can I prevent lumps in my pudding?
The key to smooth pudding is vigorous whisking right after adding the milk to the mix. Ensure your milk is cold, and whisk continuously for at least 2 minutes until all lumps are dissolved.
- Can I use sugar-free pudding mixes?
Yes, you can easily substitute instant sugar-free pudding mixes for both the chocolate and mint layers to reduce the sugar content, if desired. The preparation steps remain the same.
- What if my pudding doesn’t thicken after 5 minutes?
Sometimes, pudding mixes can be a bit finicky. Ensure your milk was very cold, and you whisked thoroughly. If it’s still too thin, try popping it in the fridge for an extra 10-15 minutes. Also, always check the expiration date on your pudding mix!
- Can I prepare these Shamrock Shake Pudding Cups ahead of time for a party?
Definitely! These pudding cups are perfect for making ahead. Assemble them completely (minus the garnish, which can be added right before serving) and chill in the refrigerator for up to 2-3 days. This makes them an ideal party dessert.
- What other toppings could I use for garnish?
Get creative! Besides chocolate shavings or crushed mint candies, consider mini chocolate chips, a drizzle of chocolate syrup, a sprinkle of festive green sprinkles, or even finely crushed chocolate cookies.
- Can I use homemade whipped cream instead of store-bought?
Absolutely! Freshly whipped cream will elevate these pudding cups even further. Just be sure to whip it until stiff peaks form so it holds its shape beautifully on top.
- Are these Shamrock Shake Pudding Cups suitable for kids?
Yes, they are a fantastic treat for kids! The fun colors, sweet flavors, and easy-to-eat format make them a huge hit with children of all ages. They can even help with the layering!
Shamrock Shake Pudding Cups ☘️
Equipment
- Mixing Bowls
- Whisk
- Clear Cups or Dessert Glasses
Ingredients
Pudding Layers
- 1 package instant chocolate pudding mix (3.4 oz)
- 2 cups skim milk or plant-based milk for a dairy-free option
- 1 package instant mint pudding mix (3.4 oz)
- 2 cups skim milk or plant-based milk
- 1 cup light whipped cream or whipped topping
- green food coloring optional, for an extra vibrant mint layer
Garnish
- chocolate shavings or a few crushed mint candies
Instructions
- In a medium bowl, simply whisk together the chocolate pudding mix with 2 cups of your chosen milk until it's smooth. Let it sit for about 5 minutes; it will start to thicken beautifully.
- Grab another bowl and whisk the mint pudding mix with the remaining 2 cups of milk. If you want a brighter green, add a few drops of green food coloring – it’s totally optional but adds a fun pop! Let this mixture thicken for 5 minutes as well.
- Now for the fun part! Get your clear cups or dessert glasses ready. Spoon a layer of the chocolate pudding into the bottom of each cup. Gently top it with a layer of the mint pudding. Repeat these layers until your cups are filled to your liking.
- Dollop or pipe a generous swirl of light whipped cream on top of the pudding layers in each cup.
- Sprinkle a little chocolate shavings or a few crushed mint candies over the whipped cream for a festive finish.
- Pop your pudding cups into the refrigerator for at least 30 minutes. This helps them set up perfectly and ensures a wonderfully cool and refreshing treat!
Notes
Calories: ~118 kcal
Total Carbs: ~23 g
Net Carbs: ~23 g
Fats: ~2 g
Protein: ~3 g