The holidays are here, and with them comes the irresistible urge to indulge in festive treats! But what if you could whip up something decadent, delicious, and surprisingly health-conscious without spending hours in the kitchen? Get ready to unwrap the magic of our Simple 2-Ingredient Holiday Fudge! Forget the stress of complex recipes and a mountain of dishes. This recipe is your new secret weapon for satisfying sweet cravings and impressing guests with minimal effort.
Why You’ll Love This Recipe
- Effortlessly Simple: With just two ingredients and a microwave, you’ll be amazed at how quickly you can create luxurious, melt-in-your-mouth fudge. Perfect for even the busiest holiday schedules!
- Keto & Low-Carb Friendly: Indulge without the guilt! Using sugar-free ingredients, this fudge fits perfectly into a low-carb or ketogenic lifestyle, allowing everyone to enjoy a festive treat.
- Incredibly Quick: From start to freezer, you’re looking at about 5 minutes of active prep time. Chill time is a mere 20 minutes, meaning you can go from craving to devouring in less than half an hour.
- Deliciously Versatile: This basic recipe is a fantastic canvas for various flavor additions and presentation styles. Customize it to your heart’s content, making it truly your own holiday masterpiece.
Your Holiday Dessert Hero: Simple 2-Ingredient Fudge!
Are you feeling the holiday hustle already? The twinkling lights, the festive music, the endless to-do list… and the inevitable craving for something sweet and chocolatey! But who has hours to spend baking elaborate desserts when there’s so much merry-making to be done? Fear not, sweet-toothed friends, because we’re about to introduce you to the ultimate holiday hack: a Simple 2-Ingredient Holiday Fudge that’s not only ridiculously easy to make but also perfectly fits your low-carb lifestyle. Imagine rich, smooth, chocolatey goodness that comes together faster than you can say “Jingle Bells.” This isn’t just fudge; it’s a holiday miracle in a bowl, designed to bring joy without the culinary marathon. Get ready to impress yourself and everyone else with this shockingly easy and utterly delightful treat!
Ingredients You’ll Need
Gathering your ingredients for this delightful holiday treat is as simple as the recipe itself! You only need two essential items to create this luscious fudge:
- 🥛 1 cup Low-Carb Sugar-Free Sweetened Condensed Milk: This is the creamy backbone of your fudge, providing that signature rich texture and sweetness without the added sugars. Look for brands specifically labeled “sugar-free” and “low-carb.”
- 🍫 1 cup Sugar-Free Chocolate Chips (such as Lily’s Stevia Sweetened): The star of the show! Sugar-free chocolate chips melt beautifully and give your fudge its deep, satisfying chocolate flavor. Brands like Lily’s are excellent choices for their quality and stevia-sweetened profile.
Crafting Your Simple 2-Ingredient Holiday Fudge: Step-by-Step
Get ready for the easiest fudge-making experience of your life! Follow these simple steps to create your delicious low-carb holiday treat:
- Prep Your Bowl: Grab a microwave-safe bowl. It should be large enough to comfortably hold and stir both ingredients.
- Combine & Initial Heat: Pour the entire cup of sugar-free chocolate chips into the bowl, followed by the full cup of low-carb sugar-free sweetened condensed milk. Place the bowl in the microwave and heat for 1 minute to begin the melting process.
- Stir Until Smooth: Carefully remove the bowl from the microwave. Using a sturdy spatula or spoon, stir the mixture thoroughly. You’ll notice the chocolate chips starting to soften and melt into the condensed milk. Continue to stir vigorously. If the mixture isn’t completely smooth, return it to the microwave.
- Short Bursts & Vigor: Microwave in short 10-second intervals. After each interval, remove the bowl and stir, stir, stir! The key to smooth, glossy fudge is consistent stirring after each heat burst. Continue this process until all the chocolate chips are completely melted and the mixture is perfectly smooth and has a beautiful glossy sheen.
- Pour & Prepare to Set: Once your fudge mixture is smooth and warm, carefully pour it into your chosen setting vessel. Silicone molds (like mini muffin or ice cube trays) work wonderfully for individual pieces. Alternatively, line a small pan (an 8×8 inch dish is ideal) with parchment paper, leaving an overhang to easily lift the fudge out later.
- Chill to Perfection: Transfer your molds or pan to the freezer. This rapid chill will help the fudge firm up quickly. Leave it in the freezer until it’s completely solid, which usually takes about 20 minutes.
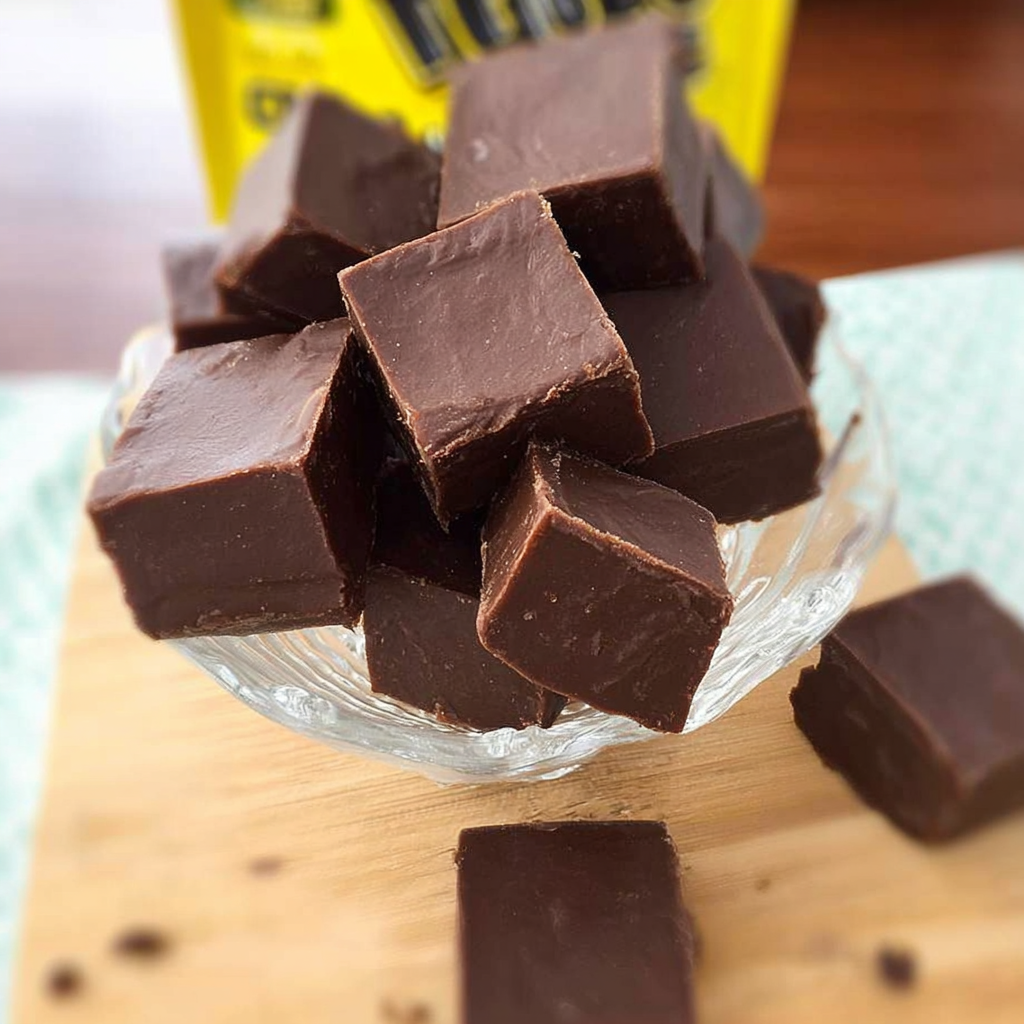
- Ready to Enjoy: Once firm, pop the fudge out of the silicone molds or use the parchment paper overhang to lift the slab from the pan. If using a pan, cut the slab into bite-sized squares or festive shapes. Store your delectable, guilt-free fudge in an airtight container in the refrigerator to maintain its firm texture and freshness.
Presenting & Serving Your Festive Fudge
Making delicious fudge is only half the fun; presenting it beautifully is where the holiday magic truly comes alive! Here are several delightful ways to serve and showcase your Simple 2-Ingredient Holiday Fudge:
- Elegant Squares: The classic presentation! Cut your fudge slab into neat squares or rectangles. Arrange them artfully on a festive platter, perhaps garnished with a sprinkle of sugar-free powdered erythritol for a “snowy” effect, or a few fresh cranberries and a sprig of rosemary for a pop of color.
- Festive Molds: If you used silicone molds (think tiny Christmas trees, stars, or snowflakes), simply pop them out for instant holiday charm! These are perfect for individual servings and look adorable on a dessert buffet.
- Gift-Worthy Treats: Package a few pieces of fudge in small cellophane bags tied with a festive ribbon. They make thoughtful, homemade gifts for friends, neighbors, or teachers, showing you care without breaking the carb bank!
- Drizzle & Garnish: Elevate your fudge with simple toppings. Drizzle a contrasting sugar-free white chocolate or dark chocolate over the set pieces. Sprinkle with a pinch of flaky sea salt (highly recommended!), crushed sugar-free candy canes, chopped pecans, or a dusting of unsweetened cocoa powder.
- Mini Fudge Bites: If you use very small molds, these tiny bites are perfect for a tasting plate or for those who want just a hint of sweetness without overindulging.
- Coffee & Hot Cocoa Companion: Serve a piece alongside a warm mug of coffee or a comforting cup of sugar-free hot cocoa. The fudge will melt slightly in the warmth, creating an extra decadent experience.
Storing Your Delicious Holiday Fudge
Proper storage is key to keeping your Simple 2-Ingredient Holiday Fudge fresh and firm, ensuring you can enjoy its delightful taste for days after making it. Here’s how to store it:
- The Refrigerator is Your Friend: Due to the nature of the ingredients (especially the condensed milk), this fudge is best stored in the refrigerator. The cool temperature keeps it perfectly firm and prevents it from becoming too soft or sticky.
- Airtight Container is Essential: To maintain its freshness, prevent it from absorbing other odors from your fridge, and keep it from drying out, always store your fudge in an airtight container. A plastic food storage container with a tight-fitting lid or a glass container with a sealed lid works perfectly.
- Layer if Needed: If you have multiple layers of fudge, you can place small pieces of parchment paper between the layers to prevent them from sticking together.
- How Long Does It Last? When stored correctly in the refrigerator, your homemade sugar-free fudge will remain fresh and delicious for up to 1-2 weeks. While it might last longer, the quality and taste are best enjoyed within this timeframe.
- Can You Freeze It? Yes! For longer storage, you can freeze the fudge. Wrap individual pieces tightly in plastic wrap, then place them in a freezer-safe airtight container or bag. It can last for up to 1-2 months in the freezer. Thaw in the refrigerator for a few hours before serving.
FAQs About Simple 2-Ingredient Holiday Fudge
- Can I use regular sweetened condensed milk and chocolate chips?
Yes, but it will no longer be low-carb or sugar-free. The nutritional information provided is for the specified sugar-free ingredients. - What if my fudge doesn’t set?
Ensure your chocolate chips are fully melted and thoroughly incorporated. Also, make sure it chills in the freezer for the full 20 minutes (or longer if needed) until completely solid. - Can I make this on the stovetop instead of the microwave?
Absolutely! Gently heat both ingredients in a saucepan over low heat, stirring constantly until smooth and glossy. Be careful not to scorch the chocolate. - What brands of sugar-free condensed milk do you recommend?
Brands like Lakanto, Swerve, or homemade versions are popular for their low-carb profiles. Read labels carefully to ensure it’s truly sugar-free. - How can I add different flavors to this fudge?
Get creative! Stir in a few drops of peppermint extract, almond extract, orange zest, or a pinch of cinnamon along with the chocolate. You can also mix in chopped nuts or sugar-free dried cranberries before chilling. - Is this fudge safe for diabetics?
Using sugar-free ingredients makes it a much better option, but it’s always best for individuals with diabetes to consult their doctor or a dietitian regarding specific dietary choices. - My fudge looks grainy. What went wrong?
Graininess can occur if the mixture is overheated or not stirred thoroughly enough. Ensure you’re heating in short bursts and stirring vigorously until completely smooth. - Can I use a different type of sugar-free chocolate?
Yes, you can use sugar-free dark chocolate bars (chopped) or other sugar-free chocolate varieties. Just ensure they melt smoothly. - What are “Net Carbs”?
Net carbs are calculated by subtracting fiber and sugar alcohols (if applicable and non-impactful) from total carbohydrates. For those on a keto diet, net carbs are often the most relevant number. - How many pieces should I cut the fudge into?
The recipe suggests 24 pieces for the stated nutrition. An 8×8 inch pan can yield 25 (5×5) or 36 (6×6) small pieces, so adjust based on your desired serving size and nutritional targets.
Simple 2-Ingredient Holiday Fudge
Equipment
- Microwave-safe Bowl
- Microwave
- Silicone Molds
- Parchment Paper
Ingredients
- 1 cup Low-Carb Sugar-Free Sweetened Condensed Milk
- 1 cup Sugar-Free Chocolate Chips (such as Lily’s Stevia Sweetened)
Instructions
- Place both the sugar-free chocolate chips and the low-carb sweetened condensed milk in a microwave-safe bowl.
- Microwave the mixture for 1 minute to begin softening the chocolate.
- Remove from the microwave and stir thoroughly until the chocolate starts to melt into the condensed milk. Continue heating in short 10-second intervals, stirring vigorously after each, until the chocolate chips are completely melted and the fudge mixture is smooth and glossy.
- Carefully pour the warm fudge into silicone molds (like ice cube trays) or a small pan (like an 8×8 inch dish) lined with parchment paper.
- Transfer the molds or pan to the freezer until the fudge is completely solid, typically around 20 minutes.
- Once firm, pop the fudge out of the molds or cut the slab into bite-sized pieces. Store your delicious, guilt-free fudge in the refrigerator.