Get ready to infuse some serious luck and a whole lot of green deliciousness into your St. Patrick’s Day celebrations! Forget pinching, it’s time for some serious party pleasure with a dessert that’s as dazzling as a pot of gold at the end of a rainbow. We’re talking about making the most charming and vibrant St. Patrick’s Day Layered Jello Cups. These aren’t just any jello cups; they’re a three-layered masterpiece of emerald goodness, topped with fluffy white Cool Whip and a shower of festive sprinkles. Easy to make, incredibly fun to look at, and even more fun to eat, these cups are sure to be the star of your festive spread. Whether you’re hosting a big bash or just want to add a touch of St. Paddy’s magic to your family dinner, these jello cups are your golden ticket to a joyful dessert. Let’s get jiggy with it and dive into how to create this delightful treat!
Why You’ll Love This Recipe
The St. Patrick’s Day Layered Jello Cups aren’t just a dessert; they’re an experience! Here are four compelling reasons why this recipe will become your go-to festive treat:
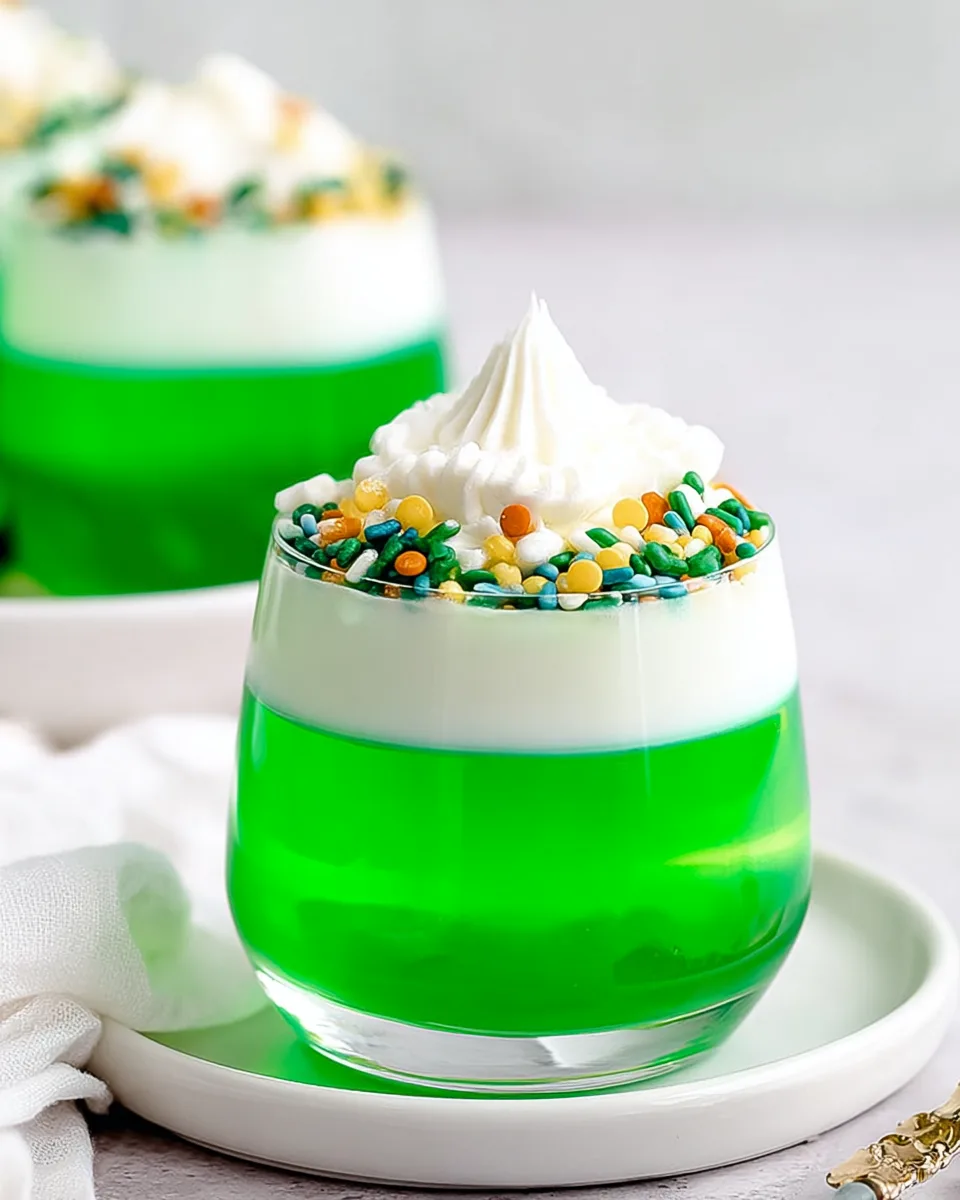
- Visually Stunning & Festive: With its distinct green layers and cloud-like topping, these jello cups are an absolute showstopper. They perfectly capture the vibrant spirit of St. Patrick’s Day, making them an instant conversation starter and a feast for the eyes before the first spoonful.
- Surprisingly Simple to Make: Don’t let the elegant appearance fool you! While these cups look intricate, the process is straightforward and beginner-friendly. Each step is easy to follow, making it a stress-free dessert project even for those new to the kitchen.
- Kid-Friendly Fun for Everyone: Jello is a universal crowd-pleaser, and these layered versions take the fun to the next level. Kids will adore the jiggly texture and vibrant color, and adults will appreciate the nostalgic charm. It’s a treat that brings smiles to faces of all ages!
- Perfect Make-Ahead Magic: Planning a party? These jello cups are your best friend! They require significant chilling time, which means you can prepare them well in advance, freeing you up to enjoy your guests and the festivities on St. Patrick’s Day itself. Just pull them out of the fridge, garnish, and serve!
Ingredients with Measurements
Gather your lucky charm ingredients to create these delightful St. Patrick’s Day Layered Jello Cups:
- 🍀 9 ounces (3 standard boxes) green jello mix (lime or apple flavor suggested)
- 🥛 8 ounces Cool Whip (you can use light or sugar-free whipped topping for a healthier twist)
- 💧 6 cups water (3 cups boiling, 3 cups cold)
- ✨ Festive sprinkles (optional, for garnish)
Detailed Step-by-Step Directions on How to Make the Recipe
Crafting your mesmerizing St. Patrick’s Day Layered Jello Cups is a fun and rewarding process. Follow these steps carefully for perfect layers every time:
- Get Ready: Set out six individual heat-proof serving glasses or cups. Clear glasses work best to showcase those beautiful layers!
- First Green Layer: In a large bowl, empty one package of the green jello mix. Pour in 1 cup of freshly boiling water. Whisk it well until all the jello granules have completely dissolved and there are no lumps. Then, stir in 1 cup of cold water. Carefully pour this liquid into your prepared glasses, dividing it equally among them (about 1/2 cup per glass).
- Chill Time 1: Gently transfer the cups to the refrigerator. Let them chill for about 2 to 3 hours, or until this first layer is perfectly set and firm to the touch. This is crucial for clean layers!
- Creamy Middle Layer: Once the first layer is solid, take the cups out of the fridge. In a separate, clean bowl, whisk together another package of green jello mix with 1 cup of boiling water until fully dissolved. Add 1 cup of cold water, then carefully fold in half (4 ounces) of the Cool Whip. Continue folding gently until the mixture is smooth, evenly colored, and slightly opaque.
- Chill Time 2: Slowly pour this creamy green jello mixture over the top of the set first layer in each cup, making sure to distribute it evenly. Return the cups to the refrigerator for another 2 to 3 hours to allow this second layer to firm up completely.
- Final Green Layer: After the second layer is set, it’s time for the last jello layer. In a clean bowl, whisk the final package of green jello mix with 1 cup of boiling water until dissolved. Stir in the last 1 cup of cold water.
- Final Chill: Carefully pour this final jello mixture over the second layer in each cup. Place all the cups back in the refrigerator for a final chill of 2 to 3 hours, ensuring all three layers are completely firm and ready to enjoy.
- Decorate & Serve: Just before you’re ready to serve, top each St. Patrick’s Day Layered Jello Cups with the remaining Cool Whip. For an extra festive touch and a burst of color, sprinkle with green or rainbow sprinkles! Serve chilled and enjoy this easy, vibrant treat.
Detailed Different Ways You Can Present the Recipe and How to Serve It
These St. Patrick’s Day Layered Jello Cups are already a feast for the eyes, but with a few creative touches, you can elevate their presentation even further:
- Elegant Serving Vessels: While individual cups are perfect, consider using clear martini glasses for a sophisticated touch, or small Mason jars for a rustic, charming look. For mini-desserts, shot glasses work wonderfully.
- Creative Toppings: Beyond traditional festive sprinkles, get creative! Try green sanding sugar for extra sparkle, mini chocolate coins for a nod to the pot of gold, or tiny shamrock-shaped candies. A fresh mint leaf or a thin lime wheel perched on the Cool Whip can add a burst of freshness.
- Serving Tray Glam: Arrange your finished jello cups on a decorative tray lined with green tissue paper or a festive St. Patrick’s Day-themed napkin. This makes them easy to carry and adds to the overall presentation.
- Buffet or Individual Plates: For a party, present them on a dessert buffet alongside other green treats. For a more formal setting, serve each cup on a small dessert plate with a mini spoon.
- Personalized Touch: If serving to a smaller group, you can even tie a small green ribbon around each cup or attach a tiny label with a St. Patrick’s Day wish.
Remember to always serve these delightful cups chilled for the best texture and flavor!
How You Can Store It and How Long Does It Last
Proper storage ensures your beautiful St. Patrick’s Day Layered Jello Cups remain fresh and firm for as long as possible. Good news—they’re excellent for making ahead!
- Storage: Once all layers are fully set and before adding the final Cool Whip topping and sprinkles, cover each cup tightly with plastic wrap. Ensure the wrap makes good contact with the rim of the cup to prevent air from getting in and drying out the jello.
- Location: Always store your jello cups in the refrigerator. Jello needs to be kept cold to maintain its firm, jiggly texture.
- Duration: When stored correctly, these layered jello cups will last for up to 3-4 days in the refrigerator. While they might still be safe to eat after this, the jello can start to “weep” or become a bit watery over time, and the texture may soften slightly.
- Tips for Best Results: Only add the final Cool Whip and sprinkles just before serving. Whipped toppings can break down or absorb into the jello if left on for too long, and sprinkles can dissolve.
FAQs Sections
1. Can I use different jello colors for the St. Patrick’s Day Layered Jello Cups?
While green is quintessential for St. Patrick’s Day, you absolutely can experiment with other colors for different occasions! For this specific recipe, sticking to various shades of green, or alternating green with a white or clear layer, keeps it festive.
2. Can I make this recipe sugar-free?
Yes, you can! Simply use sugar-free green jello mix and a light or sugar-free whipped topping (like sugar-free Cool Whip) to create a delicious sugar-free version of the St. Patrick’s Day Layered Jello Cups.
3. What if my jello layers don’t set properly?
The most common reasons for jello not setting are not using enough boiling water to dissolve the mix fully, adding too much cold water, or not chilling for long enough. Ensure each layer is thoroughly firm before adding the next, especially the creamy layer which can be a bit more delicate.
4. Can I speed up the chilling process?
You can carefully place the cups in the freezer for about 15-20 minutes per layer to speed up chilling. However, keep a close eye on them to prevent freezing, which would ruin the texture. Refrigeration is generally preferred for the best results.
5. Can I make a larger batch of these jello cups?
Absolutely! Simply scale up the ingredients proportionally. Remember to also increase the number of serving cups and ensure you have enough refrigerator space for all of them.
6. What’s the best way to get clean, distinct layers?
The key to distinct layers is patience. Ensure each layer is completely firm before pouring the next one. Pour the subsequent layers slowly and gently over the back of a spoon to prevent it from breaking through the set layer below.
7. Can I add alcohol to these jello cups for an adult version?
Yes, for an adult treat, you can add a small amount of clear or green-colored alcohol (like vodka, gin, or a melon liqueur) to one or more of the jello layers. Replace a portion of the cold water with the alcohol. Be mindful that alcohol can sometimes inhibit jello from setting as firmly, so test with a small amount first.
8. What if I don’t have Cool Whip?
If Cool Whip isn’t available, you can use homemade whipped cream (heavy cream whipped with a little sugar) or another brand of whipped topping. For the creamy middle layer, ensure it’s still folded in gently to maintain a light, airy texture.
9. Can I use a different flavor of green jello?
Yes, the recipe suggests lime or apple, but any green-colored jello mix will work perfectly for your St. Patrick’s Day Layered Jello Cups. Just ensure it’s a flavor you enjoy!
10. Is this recipe suitable for kids?
Yes, this recipe is incredibly kid-friendly! It’s a fun, vibrant, and delicious dessert that children will love to eat, and older kids might even enjoy helping to make (with adult supervision for the hot water steps).
“`
St. Patrick's Day Layered Jello Cups 🍀
Equipment
- Serving glasses or cups
- Large Bowl
- Whisk
Ingredients
- 9 ounces green jello mix (3 standard boxes, lime or apple flavor suggested)
- 8 ounces Cool Whip (can use light or sugar-free whipped topping)
- 6 cups water (3 cups boiling, 3 cups cold)
- Festive sprinkles (optional, for garnish)
Instructions
- Get Ready: Set out six individual heat-proof serving glasses or cups for your fun, layered dessert.
- First Green Layer: In a large bowl, combine one package of the green jello mix with 1 cup of boiling water. Whisk it well until all the jello granules have completely dissolved. Then, stir in 1 cup of cold water. Carefully pour this liquid into your prepared glasses, dividing it equally among them.
- Chill Time 1: Gently transfer the cups to the refrigerator. Let them chill for about 2 to 3 hours, or until this first layer is perfectly set and firm to the touch.
- Creamy Middle Layer: Once the first layer is solid, take the cups out of the fridge. In a separate bowl, whisk together another package of green jello mix with 1 cup of boiling water until fully dissolved. Add 1 cup of cold water, then carefully fold in half (4 ounces) of the Cool Whip until the mixture is smooth and evenly colored.
- Chill Time 2: Slowly pour this creamy green jello mixture over the top of the set first layer in each cup, making sure to distribute it evenly. Return the cups to the refrigerator for another 2 to 3 hours to allow this second layer to firm up.
- Final Green Layer: After the second layer is set, it's time for the last jello layer. In a clean bowl, whisk the final package of green jello mix with 1 cup of boiling water until dissolved. Stir in the last 1 cup of cold water.
- Final Chill: Carefully pour this final jello mixture over the second layer in each cup. Place all the cups back in the refrigerator for a final chill of 2 to 3 hours, ensuring all three layers are completely firm and ready to enjoy.
- Decorate & Serve: Just before you're ready to serve, top each jello cup with the remaining Cool Whip. For an extra festive touch, sprinkle with green or rainbow sprinkles! Serve chilled and enjoy this easy, vibrant treat.