
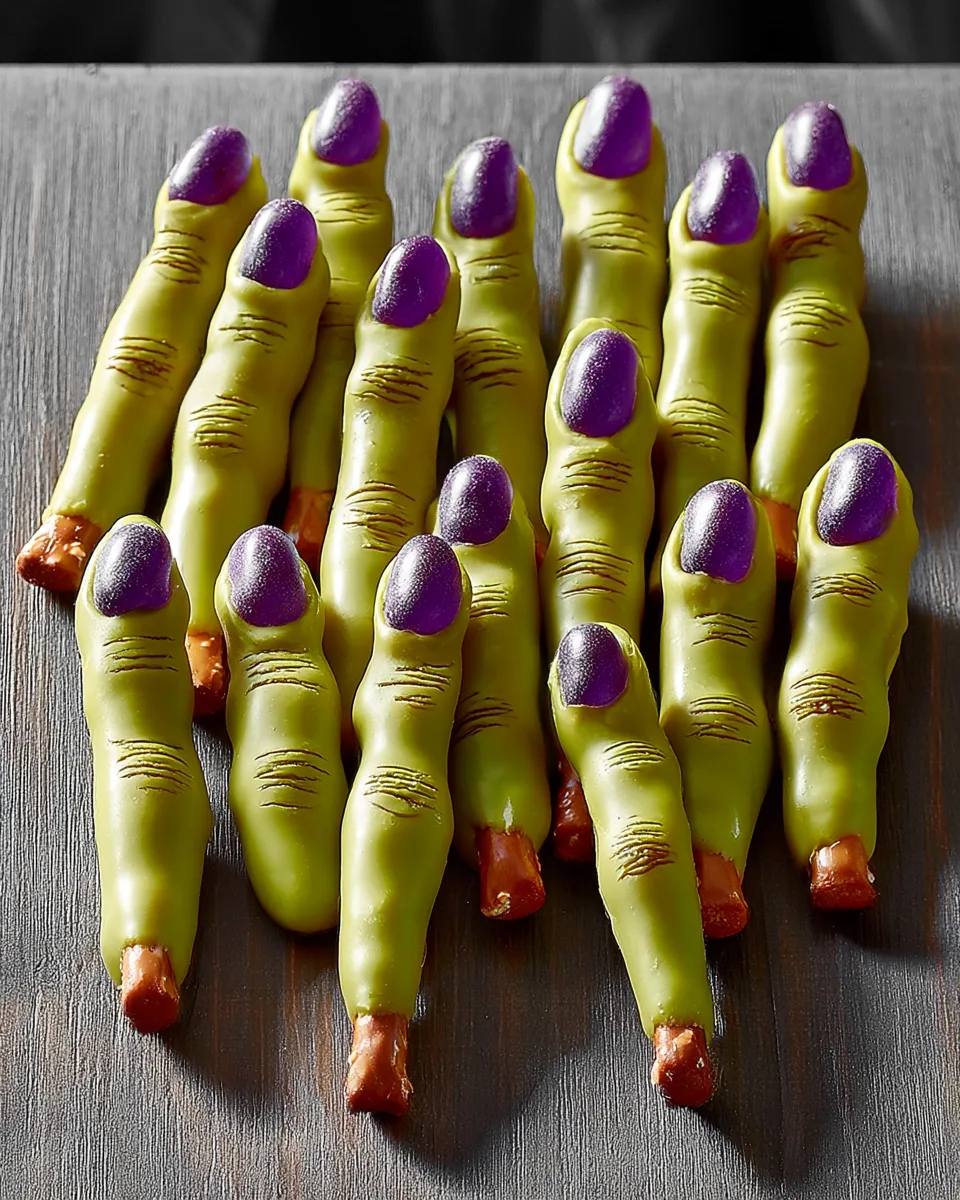
Brewing up a batch of Witches’ Fingers is the ultimate spell for a spooktacular Halloween party. These creepy-crawly snacks look like they just crawled out of a graveyard, but they taste like a sweet and salty dream. With just three simple ingredients and zero oven time, you can conjure up a platter of these ghoulish goodies that will have your guests both shrieking and snacking. Get ready to wiggle your digits and dip into the most delightfully diabolical treat of the season!
Why You’ll Love This Recipe
- Super Easy & Fast: Ready in just 20 minutes with zero baking required. Perfect for last-minute Halloween prep.
- Kid-Friendly Fun: A hands-on activity that lets little ghouls create their own creepy fingers. No sharp tools or hot ovens needed.
- Sweet & Salty Perfection: The crunch of salty pretzel rods meets smooth, sweet candy coating and a fruity jelly bean nail. Irresistible.
- Instantly Impressive: Looks like a professional bakery item but costs pennies to make. Guaranteed to be the star of any Halloween dessert table.
Ingredients with Measurements
- 1½ cups vibrant green candy coating disks
- 6 pretzel rods, broken in half (to make 12 pieces)
- 6 jelly beans, cut in half lengthwise (to make 12 “fingernails”)
Detailed Step-by-Step Directions
- Melt the Magic: Place the green candy coating disks in a microwave-safe bowl. Microwave in 30-second intervals, stirring after each, until completely smooth and glossy. Be careful not to overheat.
- Dip the Digits: Take a pretzel rod half and dip the broken (flat) end into the melted coating. Let the excess drip off for a few seconds so you get a nice, even “finger” tip.
- Attach the Nail: Immediately place the dipped pretzel on a sheet of wax paper. Gently press one jelly bean half (cut side down) onto the coated end to form a realistic-looking fingernail.
- Draw the Details: Let the coating set until it’s almost firm but still slightly soft to the touch (about 5-7 minutes). Use a toothpick to gently draw 2-3 small horizontal lines on the pretzel below the “nail” to create knuckles.
- Set & Serve: Allow the fingers to finish setting completely at room temperature, about 10-15 more minutes. Once firm, they are ready to serve with maximum creep factor.
How to Present and Serve Witches’ Fingers
On a Graveyard Platter: Arrange the fingers artfully on a black platter. Sprinkle with crushed chocolate cookies for “dirt” and add a few gummy worms for a truly haunting scene.
In a Cauldron: Pile them high in a small black cauldron or a hollowed-out pumpkin. Let them stick out like a witch’s hand reaching up from the brew.
Dipping Station: Serve alongside a bowl of “blood” (raspberry or strawberry jam thinned with a splash of water) or extra melted green candy coating for dipping.
Edible Decorations: Use them to decorate the top of Halloween cupcakes or a spooky cake. They also look fantastic protruding from a bowl of Halloween popcorn mix.
How to Store and How Long Witches’ Fingers Last
Store your Witches’ Fingers in an airtight container at room temperature, separating layers with wax paper to prevent sticking. They will stay crisp and fresh for up to 1 week. Do not refrigerate them, as the candy coating can become tacky and the pretzels may lose their crunch. For best texture, enjoy within 3-4 days of making them.
FAQs
- Can I use white chocolate instead of candy coating? Yes! White chocolate chips work well. Add a few drops of green food coloring and a pinch of vegetable oil for smooth melting.
- What if I can’t find green candy coating? Use any color candy melts and add green oil-based food coloring. You can also use melted green Wilton candy melts available at most craft stores.
- Can I make these gluten-free? Absolutely! Use gluten-free pretzel rods, which are widely available in most grocery stores.
- Why did my candy coating seize up? A tiny amount of water or steam can cause candy coating to seize. Ensure all utensils are completely dry, and do not microwave too long.
- Can I use other colors for the coating? Definitely! Make purple fingers, orange fingers, or even classic white “bone” fingers. Use matching jelly beans for nails.
- How do I keep the jelly bean from falling off? Press the jelly bean gently into the coating while it is still wet. If it starts to slide, hold it in place for 10 seconds until the coating begins to set.
- Can I make these vegan? Yes. Use vegan candy melts (many are dairy-free) and check that your pretzels are vegan-friendly. Most jelly beans are also vegan.
- Can I freeze Witches’ Fingers? Not recommended. Freezing will make the pretzels stale and the coating can become chalky. Always store at room temperature.
- What can I use instead of jelly beans for nails? Use sliced almonds, candy corn, or small pieces of fruit leather for different “nail” textures.
- How can I make them look extra realistic? Dip the pretzel end more irregularly to mimic a real fingertip, and add tiny lines for wrinkles near the knuckles. Dust with a little cocoa powder for dirt.
“`
Witches’ Fingers
Equipment
- Microwave-safe Bowl
- Toothpick
Ingredients
- 1.5 cups vibrant green candy coating disks
- 6 pretzel rods broken in half
- 6 jelly beans cut in half lengthwise
Instructions
- Melt the green candy coating in a microwave-safe bowl until smooth, stirring often.
- Dip the broken end of each pretzel rod half into the melted coating, letting the excess drip off.
- Place the dipped pretzels on wax paper and gently press a jelly bean half onto the coated end to look like a fingernail.
- Let the coating set until it's almost firm, then use a toothpick to draw small lines on the pretzel to create knuckles.
- Let them finish setting completely before serving.