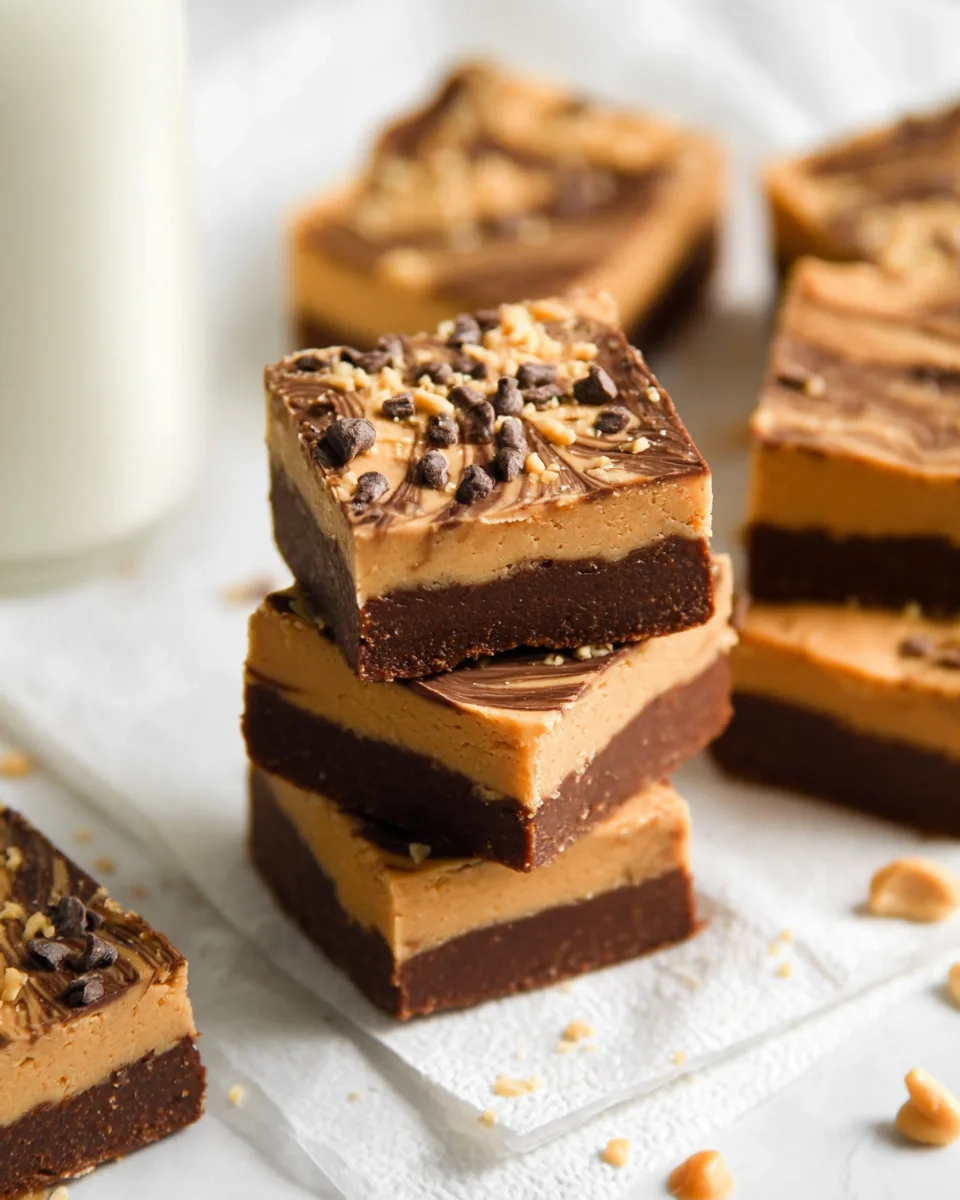
The sun is shining, the days are long, and the last thing you want to do is turn on your oven. Sound familiar? We totally get it! Summer calls for effortless, delicious treats that satisfy your sweet tooth without breaking a sweat. And that, my friends, is exactly where our incredible Summer Swirl Peanut Butter Chocolate Fudge Bites come in! Imagine a creamy, dreamy fusion of rich chocolate and velvety peanut butter, swirled together in perfect harmony, chilled to perfection, and ready to devour. These no-bake beauties are a breeze to make, incredibly satisfying, and destined to become your go-to summer indulgence. Get ready to swirl into sweet bliss!
Why You’ll Love This Recipe
There are countless reasons to adore these delightful Summer Swirl Peanut Butter Chocolate Fudge Bites, but here are four top contenders that make them an absolute must-try this season:
- No-Bake Bliss: Say goodbye to hot kitchens! This recipe requires zero oven time, making it the ultimate summer dessert. Just a few minutes of microwave melting and a chill in the fridge, and you’re golden.
- Irresistible Flavor Combo: It’s a classic for a reason! The rich, semi-sweet chocolate perfectly complements the creamy, savory peanut butter. Each bite delivers that iconic, beloved flavor pairing that everyone adores.
- Super Simple & Quick Prep: With only three core ingredients and minimal steps, even novice bakers (or non-bakers!) can whip up these decadent fudge bites in no time. The “prep” time is genuinely just 10 minutes!
- Perfect for Any Occasion: Whether you’re hosting a backyard BBQ, heading to a potluck, or simply craving a sweet snack, these Summer Swirl Peanut Butter Chocolate Fudge Bites are a crowd-pleaser. They’re easy to transport and always disappear fast!
Ingredients with Measurements
Gathering your ingredients for these sensational Summer Swirl Peanut Butter Chocolate Fudge Bites couldn’t be simpler. You only need three pantry staples to create this magic!
- 1 (14-ounce) can sweetened condensed milk
- 1 ½ cups semi-sweet chocolate chips
- 1 cup creamy peanut butter
Detailed Step-by-Step Directions How to Make the Recipe
Get ready to create some kitchen magic! Here’s how you’ll make your very own batch of irresistible Summer Swirl Peanut Butter Chocolate Fudge Bites:
- Prep Your Pan: First things first, grab an 8×8 inch square pan. Line it generously with parchment paper, making sure to leave some overhang on all sides. This “secret weapon” will be your best friend for easily lifting the fudge out later!
- Melt the Chocolate Magic: In a microwave-safe bowl, combine your 1 ½ cups of semi-sweet chocolate chips with about half (roughly 2/3 cup) of the sweetened condensed milk. Pop it into the microwave for 30 seconds. After the first zap, give it a good stir. Continue microwaving in 30-second bursts, stirring thoroughly after each interval, until you have a beautifully smooth, glossy, and completely melted chocolate mixture. Patience here ensures no burnt chocolate!
- Create Peanut Butter Dream: Now, grab another microwave-safe bowl. Add the creamy peanut butter and the remaining sweetened condensed milk. Follow the same microwave process: heat in 30-second intervals, stirring vigorously after each one, until the mixture is wonderfully smooth, warm, and creamy.
- Layer and Swirl: Pour the melted chocolate mixture evenly into your parchment-lined pan, spreading it out to form a smooth first layer. Next, gently spoon the warm peanut butter mixture on top of the chocolate. Carefully spread it out, trying not to disturb the chocolate layer too much. For that signature “swirl” effect, take a sharp knife (a little non-stick spray on the blade helps prevent sticking!) and gently drag it through both layers in a swirling pattern. If you prefer distinct, beautiful layers, simply skip the swirl!
- Chill to Perfection: This step is crucial! Place your pan into the refrigerator and let it chill for at least 4 hours, or even better, overnight, until it’s completely firm. This patience will be rewarded with the perfect fudge texture.
- Slice and Enjoy: Once your fudge is perfectly firm, use the parchment paper overhang to lift the entire block out of the pan. Place it on a cutting board and cut it into 16 delightful bite-sized squares. Now, get ready to savor your easy, no-bake, and incredibly delicious summer treat!
Detailed Different Ways You Can Present the Recipe and How to Serve It
These Summer Swirl Peanut Butter Chocolate Fudge Bites are already gorgeous with their marbled design, but with a few simple touches, you can elevate their presentation even further! Here are some ideas to make them shine and serve them with style:
- Elegant Dusting: Just before serving, lightly dust the top with a sprinkle of sea salt flakes (which enhances both chocolate and peanut butter flavors!), a touch of cocoa powder, or even powdered sugar for a refined look.
- Sprinkle Fun: For a festive and colorful touch, immediately after swirling (before chilling), scatter some fun sprinkles over the top. Mini chocolate chips or chopped peanuts also make excellent textural garnishes.
- Mini Cupcake Liners: For individual servings and easy handling at parties, place each cut fudge bite into a mini paper cupcake liner. This looks incredibly professional and keeps things tidy.
- Dessert Platter Star: Arrange the fudge bites beautifully on a dessert platter alongside fresh berries (strawberries or raspberries pair wonderfully), small cookies, or other mini desserts for an impressive spread.
- Gift Giving: Package a few bites in a cute box or cello bag tied with a ribbon for a thoughtful homemade gift. They’re perfect for hostesses, teachers, or just to brighten someone’s day.
- With Coffee or Milk: These rich fudge bites are heavenly when paired with a cold glass of milk, a hot cup of coffee, or even a shot of espresso.
- Ice Cream Topping: Get creative! Chop a few fudge bites into smaller pieces and sprinkle them over a scoop of vanilla or chocolate ice cream for an ultimate dessert experience.
How You Can Store It and How Long Does It Last
Keeping your delightful Summer Swirl Peanut Butter Chocolate Fudge Bites fresh is super easy, ensuring you can enjoy them for days (if they last that long!).
Storage in the Refrigerator:
Once completely set and cut, store the fudge bites in an airtight container in the refrigerator. Keeping them chilled maintains their firm texture and prevents them from becoming too soft or sticky. Stored this way, your fudge will remain fresh and delicious for 1 to 2 weeks.
Storage in the Freezer:
For longer storage, these fudge bites freeze beautifully! Wrap individual pieces tightly in plastic wrap, then place them in an airtight, freezer-safe container or a heavy-duty freezer bag. They can be frozen for up to 2 to 3 months. When you’re ready to enjoy them, simply thaw the fudge in the refrigerator for a few hours, or at room temperature for about 30 minutes, before serving. Freezing is a fantastic way to make a big batch and have a ready-made treat whenever a craving strikes!
Always remember to keep them covered to prevent them from drying out or absorbing any fridge/freezer odors.
FAQs Section
- Can I use a different type of chocolate for these Summer Swirl Peanut Butter Chocolate Fudge Bites?
Yes, you can! While semi-sweet chocolate chips are recommended for balance, you can experiment with milk chocolate chips for a sweeter fudge or dark chocolate chips for a richer, less sweet version. - Why is my fudge not setting properly?
The most common reason for unset fudge is not enough chilling time or incorrect measurements of the ingredients. Ensure you chill it for at least 4 hours, or preferably overnight, until it’s very firm. Also, make sure to use sweetened condensed milk, not evaporated milk. - Can I use natural peanut butter instead of creamy peanut butter?
We recommend sticking to creamy, processed peanut butter (like Jif or Skippy) as natural peanut butter can separate more and result in a greasier or less firm fudge texture. - Is this recipe gluten-free?
Yes, typically all the ingredients (sweetened condensed milk, chocolate chips, and peanut butter) are naturally gluten-free. However, always check the labels of your specific brands to confirm. - Can I add mix-ins to the fudge?
Absolutely! Before chilling, you can gently fold in mini marshmallows, chopped nuts (like peanuts or walnuts), crushed pretzels for a salty crunch, or even a dash of vanilla extract into either the chocolate or peanut butter mixture for extra flavor. - How do I get a really distinct swirl?
For a more pronounced swirl, after spooning the peanut butter on top of the chocolate, use a knife or a skewer to make longer, S-shaped or figure-eight motions, ensuring you drag through both layers gently without overmixing. - What if I don’t have parchment paper?
While parchment paper is highly recommended for easy removal, you can grease and flour your pan thoroughly, or line it with aluminum foil and grease the foil. However, parchment paper truly makes lifting the fudge effortless. - Can I double the recipe?
Yes, you can easily double this recipe. Just use a larger pan (like a 9×13 inch) and adjust chilling time if needed, though 4 hours should still be sufficient. - How long does it take for the fudge to firm up in the refrigerator?
It generally takes a minimum of 4 hours for the fudge to become firm enough to slice. For the best, most consistent texture, chilling overnight is ideal. - What’s the best way to cut the fudge cleanly?
For clean cuts, ensure the fudge is thoroughly chilled and firm. Use a sharp, thin knife. For extra clean slices, run your knife under hot water, wipe it dry, and then make each cut. Repeat for every cut if desired, wiping the knife clean each time.
Summer Swirl Peanut Butter Chocolate Fudge Bites
Equipment
- 8x8 inch square pan
Ingredients
- 1 can sweetened condensed milk 14-ounce
- 1.5 cups semi-sweet chocolate chips
- 1 cup creamy peanut butter
Instructions
- Get an 8x8 inch square pan ready by lining it with parchment paper. Make sure some paper hangs over the edges – this will be your secret weapon for easy lifting later!
- In a microwave-safe bowl, combine your semi-sweet chocolate chips with about half of the sweetened condensed milk (around 2/3 cup). Pop it in the microwave for 30 seconds, then stir well. Repeat this in 30-second bursts, stirring each time, until you have a beautifully smooth, melted chocolate mixture.
- Grab another microwave-safe bowl. Add the creamy peanut butter and the rest of the sweetened condensed milk. Microwave in 30-second intervals, stirring vigorously after each, until it's wonderfully smooth and creamy.
- Pour the melted chocolate mixture into your prepared pan and spread it evenly to form the first layer. Gently spoon the peanut butter mixture on top of the chocolate layer, spreading it out. For a pretty swirl effect, take a sharp knife (lightly sprayed with non-stick spray for ease) and gently drag it through both layers. If you prefer distinct layers, just skip the swirl!
- Place your pan in the refrigerator and let it chill for at least 4 hours, or until it's completely firm. This is crucial for that perfect fudge texture!
- Once firm, lift the fudge out of the pan using the parchment paper overhang. Cut it into 16 delightful bite-sized squares. Get ready to enjoy this easy, no-bake summer treat!