Forget the fancy reservations and complicated desserts this Valentine’s Day! This year, let your love shine through with a treat that’s as easy to make as it is adorable to look at. Get ready to whip up the cutest, most crave-worthy confections that scream “I love you” in every bite: our delightful Sweetheart Oreo Pops! Perfect for gifting, sharing, or simply indulging yourself, these no-bake wonders combine the classic appeal of America’s favorite cookie with a festive, colorful twist. Prepare for a sprinkle of magic and a whole lot of delicious fun!
Why You’ll Love This Recipe
There are countless reasons to fall head over heels for these charming Sweetheart Oreo Pops. Here are just four that will have you grabbing your lollipop sticks in no time:
- No-Bake Bliss: Seriously, no oven required! This recipe is a dream come true for beginner bakers, busy bees, or anyone who wants a show-stopping dessert without the fuss. It’s quick, easy, and mess-minimal (mostly!).
- Irresistibly Delicious: It’s an Oreo, dipped in smooth, luscious candy, and adorned with festive sprinkles. What’s not to love? Each bite delivers that iconic chocolatey crunch perfectly complemented by a sweet candy shell. Pure bliss!
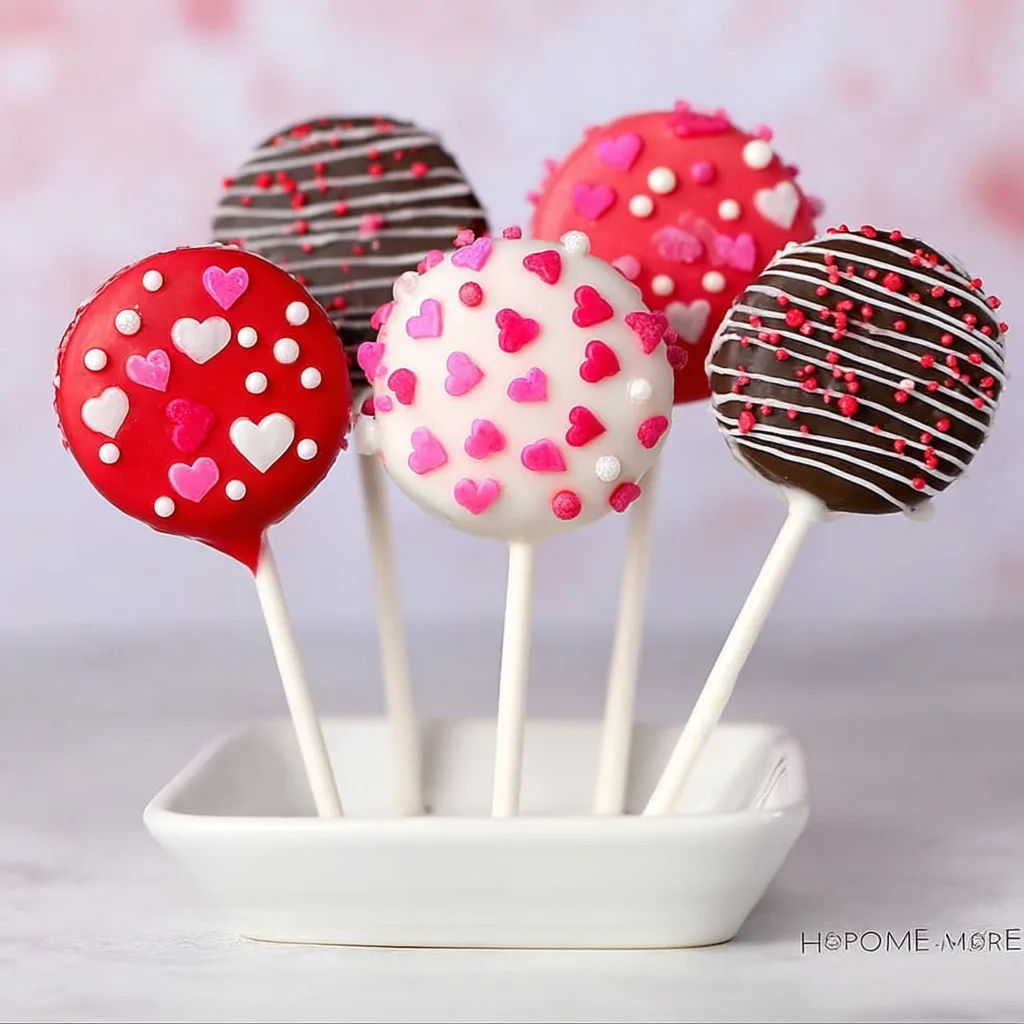
- Picture-Perfect & Customizable: These Sweetheart Oreo Pops are an absolute feast for the eyes! With a palette of red, pink, and white candy melts, plus an array of Valentine’s Day sprinkles, you can create treats that are as unique and beautiful as your loved ones. They’re truly Instagram-worthy!
- Fun for Everyone: This is a fantastic project for all ages! Kids will adore helping separate cookies, dipping, and especially sprinkling. It’s a wonderful way to spend quality time together, creating delicious memories.
Ingredients with Measurements
Gather your supplies and get ready to create some magic with these Sweetheart Oreo Pops!
- 🍪 1 standard package (approx. 36 cookies) Oreo Cookies
- 🍭 A pack of 4-inch Lollipop Sticks
- 🍫 Assorted Candy Melts (red, bright pink, and bright white) – enough for dipping (approximately 12 oz of each color will be more than enough for generous dipping)
- 💖 Valentine’s Day Sprinkles (heart shapes, sugar pearls)
- ☕️ 3 small Microwave-Safe Cups
- ✍️ Optional: 1 Disposable Candy Piping Bag (for decorative drizzles)
- 📝 1 roll Parchment Paper
Detailed Step-by-Step Directions
Let’s dive into making your adorable Sweetheart Oreo Pops! Follow these steps for perfect results:
- Cookie Prep & Split: Gently twist each Oreo cookie apart. You want to separate them into two halves, aiming to keep the creamy white filling attached to one side. You’ll have about 36 cream-filled halves and 36 plain halves.
- Lollipop Stick Insertion: In one of your small microwave-safe cups, melt a tiny bit of any candy melt color (about a tablespoon). Heat in 20-second bursts, stirring until smooth. Dip the very tip of a lollipop stick into this melted candy. Quickly place the candy-dipped stick onto the cream-filled side of an Oreo half. Immediately press a plain Oreo half on top, sandwiching the stick firmly in place. The melted candy acts as a “glue.”
- Chill for Stability: Lay your assembled Oreo pops flat on a sheet of parchment paper. Allow them to cool and set completely. For a speedy process, pop them into the freezer for 5-10 minutes. This ensures they’re sturdy and won’t fall apart during dipping.
- Melt Dipping Candy: Fill a separate microwave-safe cup about two-thirds full with your chosen main colored candy melts (e.g., red or pink). Microwave in 20-second intervals, stirring thoroughly after each. Continue until the candy is wonderfully smooth and perfectly dippable – no lumps allowed!
- Dip & Decorate with Love: Hold a chilled Oreo pop by its stick. Dip the entire cookie into the melted candy, rotating gently to ensure full, smooth coverage. Lift it out, letting any excess candy drip back into the cup. Immediately place the dipped pop onto a clean sheet of parchment paper. While the candy coating is still wet and glossy, generously shower it with your festive Valentine’s Day sprinkles!
- Cool & Repeat the Fun: Let the decorated Sweetheart Oreo Pops cool completely on the parchment paper until the candy shell is firm and dry to the touch. This can take about 15-20 minutes at room temperature, or a few minutes in the fridge. Repeat the dipping and decorating process with your other chosen candy melt colors for a beautiful assortment.
- Optional Decorative Drizzle: For an extra special touch, melt a contrasting color of candy melts. Snip a tiny corner off a disposable candy piping bag (or use a Ziploc bag with a tiny corner cut). Drizzle delicate patterns, zigzags, or swirls over your already firmed and dried pops. Let the drizzle set before handling. Enjoy your delightful and easy Valentine’s treats!
Presentation & Serving Suggestions
These Sweetheart Oreo Pops are almost too cute to eat! Here are some creative ways to present and serve them, making them even more special:
- Gift Them: Individually wrap each pop in small cello bags, tie with a pretty ribbon, and give them as adorable gifts to friends, teachers, or colleagues.
- Party Platter Perfection: Arrange a colorful assortment of your Sweetheart Oreo Pops on a beautiful serving platter. You can use varying heights by placing some on small cake stands or risers for a visually appealing display.
- Edible Bouquet: Create a charming centerpiece by placing a block of floral foam in a decorative vase or mug. Stick the lollipop sticks into the foam, arranging the pops like a delicious bouquet. Fill any gaps with tissue paper or candy hearts.
- Dessert Bar Star: If you’re hosting a Valentine’s Day party, set up a dedicated dessert bar. These pops make a fantastic addition, standing tall alongside cupcakes, cookies, and other treats.
- Coffee & Hot Chocolate Stirrers: For an extra decadent touch, serve these pops alongside mugs of hot coffee, tea, or hot chocolate. They make a fun and flavorful stirrer!
How to Store It and How Long It Lasts
Proper storage ensures your beautiful Sweetheart Oreo Pops stay fresh and delicious for as long as possible:
- Room Temperature: Store your finished Oreo pops in an airtight container at cool room temperature (around 68-72°F or 20-22°C). Keep them away from direct sunlight or any heat sources, as this can cause the candy melts to soften or melt. When stored correctly, they will last for up to 1-2 weeks.
- Refrigeration: If your home is particularly warm, or if you want to extend their shelf life slightly, you can store them in an airtight container in the refrigerator. However, be aware that refrigeration can sometimes cause a slight “bloom” (a dull, whitish film) on the candy melts due to condensation, though it’s harmless. Let them come to room temperature for a few minutes before serving for the best taste and texture. In the fridge, they can last up to 2-3 weeks.
- Freezing: While technically possible, freezing is generally not recommended as the Oreo cookies can become a bit soggy upon thawing, and the candy melts might develop bloom more significantly.
Always ensure the candy coating is completely firm before stacking them in a container to prevent sticking and damage to your lovely decorations.
FAQs
- Can I use different types of cookies?
Yes, you can experiment with other sandwich cookies like Golden Oreos or even Nutter Butters for different flavor profiles, though the classic Oreo works best for stability. - What if my candy melts are too thick for dipping?
If your candy melts are too thick, you can add a tiny bit (about 1/2 teaspoon) of coconut oil or vegetable shortening per cup of candy melts, stirring well, until you reach a smoother consistency. Do not add water. - How can I make my Sweetheart Oreo Pops look more professional?
To achieve a smooth coating, ensure your candy melts are at the right temperature and consistency. Gently tap the stick against the side of the cup to remove excess candy. For clean sprinkles, apply them immediately while the candy is wet. - Can kids help with this recipe?
Absolutely! This is a fantastic kid-friendly recipe. Kids can help with separating cookies, dipping, and especially adding sprinkles. Adult supervision is recommended for melting candy. - How long do the pops need to chill to set the stick?
About 5-10 minutes in the freezer or 15-20 minutes in the refrigerator should be sufficient to firmly set the stick in place. - Are there nut-free options for candy melts?
Many candy melt brands are manufactured in nut-free facilities, but always check the packaging for specific allergen information if you have dietary concerns. - Can I skip separating the Oreos and just stick the lollipop in a whole cookie?
While possible, separating the cookies and “sandwiching” the stick with melted candy creates a much more stable and durable pop, preventing the cookie from twisting off the stick. - What’s the best way to melt candy melts without burning them?
Microwaving in short 20-second bursts, stirring thoroughly after each, is key. Low and slow is better than high heat, which can cause them to seize or burn. A double boiler method also works well. - Can I make these Sweetheart Oreo Pops ahead of time?
Yes, these pops are perfect for making ahead! They can be stored in an airtight container at room temperature for 1-2 weeks. - How many pops does one standard package of Oreos yield?
A standard package of 36 Oreo cookies will yield approximately 18 Sweetheart Oreo Pops, as each pop uses two cookie halves.
Sweetheart Oreo Pops
Equipment
- Microwave-Safe Cups
- Piping bag
- Parchment Paper
Ingredients
- 1 standard package Oreo Cookies (approx. 36 cookies)
- pack 4-inch Lollipop Sticks
- Assorted Candy Melts (red, bright pink, and bright white) - enough for dipping)
- Valentine's Day Sprinkles (heart shapes, sugar pearls)
Instructions
- Carefully twist each Oreo cookie apart, separating it into two halves. You'll end up with one half that has the cream filling and one plain half.
- Take a microwave-safe cup and melt a small amount of any color candy melts in 20-second bursts, stirring well until smooth. Dip the tip of a lollipop stick into this melted candy. Quickly place the candy-dipped stick onto the cream-filled side of an Oreo half, then press the plain Oreo half on top, sandwiching the stick firmly in place.
- Allow these assembled Oreo pops to cool and firm up completely. If you're in a hurry, a quick trip to the freezer for a few minutes will speed up the setting process, ensuring your pops are sturdy for the next step.
- Fill a separate microwave-safe cup about two-thirds full with your main colored candy melts (like red or pink). Melt these in the microwave using 20-second intervals, stirring thoroughly after each until the candy is smooth and ready for dipping.
- Dip each prepared Oreo pop into the melted candy, making sure the entire cookie is covered smoothly. Lift it out, letting any excess candy drip back into the cup. Immediately place the dipped pop onto a sheet of parchment paper. While the candy coating is still wet, sprinkle generously with your festive Valentine's Day sprinkles!
- Let the decorated Oreo pops cool completely on the parchment paper until the candy shell is firm and dry to the touch. Repeat this dipping and decorating process with your other chosen candy melt colors.
- For an extra fancy look, melt a contrasting color of candy melts, snip a tiny corner off an optional piping bag, and drizzle delicate patterns over your already firmed pops. Enjoy your delightful and easy Valentine's treats!
Notes
Calories: Not provided in the original recipe.
Total Carbs: Not provided in the original recipe.
Net Carbs: Not provided in the original recipe.
Fats: Not provided in the original recipe.
Protein: Not provided in the original recipe.