Get ready to fall head over heels for a dessert that’s as enchanting to look at as it is utterly delicious to devour! Forget predictable treats; this year, let your taste buds swoon over our exquisite Sweetheart Swirl Peppermint Cheesecake. Imagine a dreamy landscape of creamy white chocolate, kissed with the refreshing tingle of peppermint, all nestled atop a classic Oreo crust. It’s a symphony of flavors and textures, designed to steal hearts and make any occasion feel extra special. Whether you’re celebrating love, friendship, or simply the joy of a perfect dessert, this cheesecake is your ticket to a truly memorable sweet escape. Don’t let its fancy appearance fool you—making this masterpiece is a delightful journey that even a novice baker can conquer. Prepare for compliments galore!
Why You’ll Love This Sweetheart Swirl Peppermint Cheesecake
Irresistible Flavor Combination
This isn’t just any cheesecake; it’s a culinary hug! The rich, velvety smoothness of white chocolate perfectly complements the vibrant, cool burst of peppermint. Each bite of this Sweetheart Swirl Peppermint Cheesecake offers a delightful contrast that dances on your palate, rounded out by the familiar comfort of the dark chocolate Oreo crust. It’s a flavor profile that’s sophisticated yet universally loved, making it an instant crowd-pleaser and a truly special treat for any festive gathering or romantic evening.
Surprisingly Easy to Make
You might look at this show-stopping dessert and think it requires professional pastry chef skills, but here’s a sweet secret: it’s incredibly straightforward! Our detailed instructions guide you through each step, from the simple Oreo crust to the luscious white chocolate and peppermint filling. The techniques for a crack-free cheesecake, like the water bath and slow cooling, are demystified, making it accessible for bakers of all experience levels. You’ll be amazed at how easily you can create such an elegant and impressive dessert.
Show-Stopping Presentation
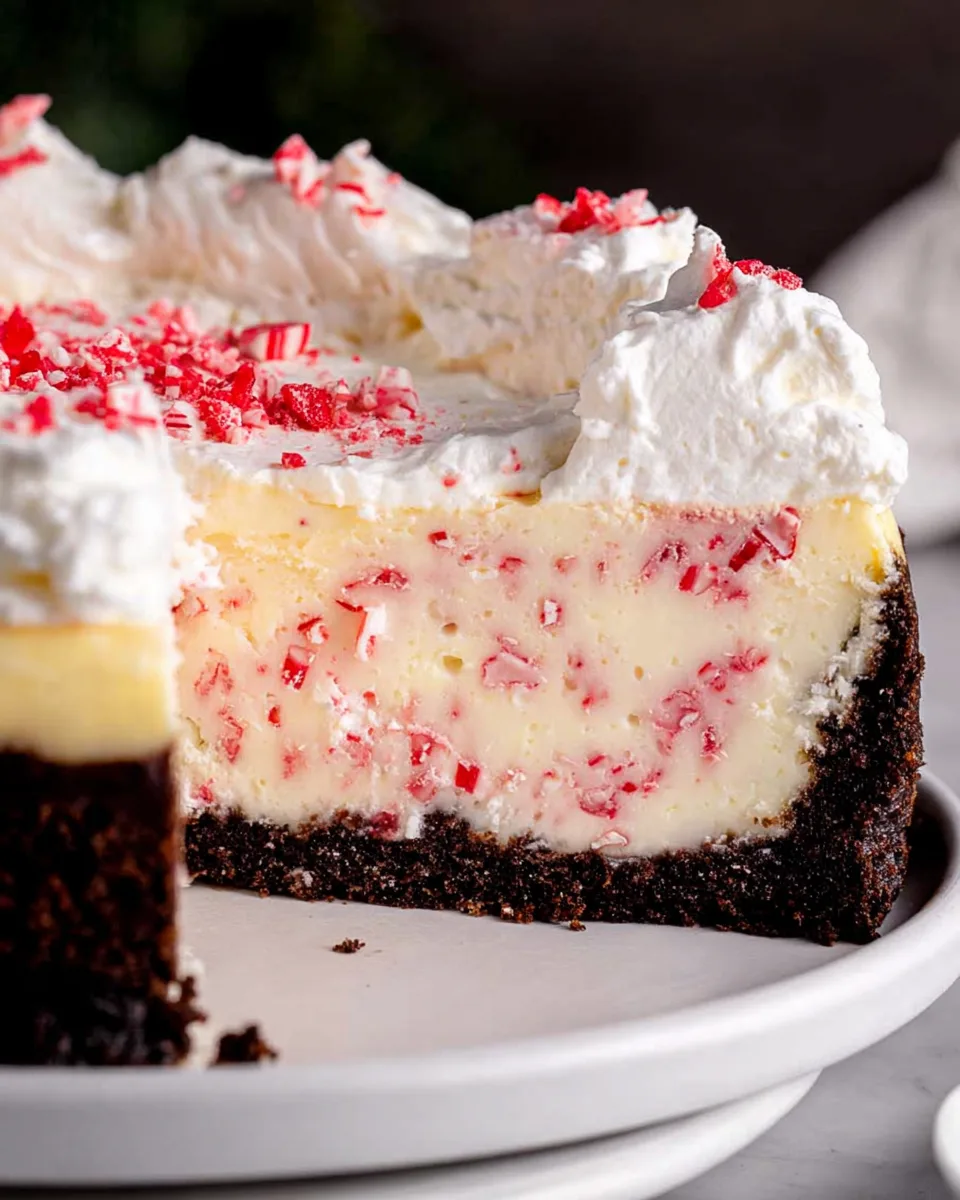
The visual appeal of this Sweetheart Swirl Peppermint Cheesecake is simply captivating. The creamy white base studded with vibrant red peppermint chips creates a festive and inviting swirl, perfect for any celebration. Dressed with a cloud of homemade whipped cream, it’s a dessert that commands attention and looks absolutely stunning on any dessert table. It’s not just a treat for the taste buds, but a feast for the eyes, guaranteed to impress your guests and add a touch of glamour to your spread.
Perfect Make-Ahead Marvel
Planning for a special occasion can be stressful, but this cheesecake takes the pressure off! One of its best qualities is that it requires a good chill time, making it an ideal make-ahead dessert. You can prepare it a day in advance, allowing the flavors to meld beautifully and the cheesecake to set perfectly. This frees up your precious time on the day of your event, letting you focus on other preparations or simply relax and enjoy the anticipation. Just pull it from the fridge, add your topping, and you’re ready to serve a perfectly chilled, delicious delight.
Ingredients with Measurements
Oreo Crust
- 🍪 3 cups Oreo crumbs (from about 35 Oreos)
- 🧈 6 tablespoons unsalted butter, melted
White Chocolate Cheesecake
- 🧀 24 ounces cream cheese, softened to room temperature
- 🍚 3/4 cup white granulated sugar
- 🍫 8 ounces white chocolate bars, melted (like Lindt)
- 🥛 1/2 cup sour cream, softened to room temperature
- 🍦 1 teaspoon pure vanilla extract
- 🧂 1/4 teaspoon salt
- 🥚 4 large eggs, softened to room temperature
- 🍬 1 1/2 cups Andes peppermint chips
Whipped Cream Topping
- 🥛 1 cup heavy cream, chilled
- 🥄 2 tablespoons powdered sugar
- 🍦 1 teaspoon pure vanilla extract
Detailed Step-by-Step Directions How to Make the Recipe
For the Oreo Crust:
- Preheat your oven to 325℉ (160°C). Lightly spray a 9-inch springform pan with baking spray, then line the bottom with a parchment paper circle and spray again.
- In a food processor, pulse the Oreos until they become fine crumbs. Transfer to a small bowl and mix these crumbs with the melted butter using a fork until well combined.
- Press the crumb mixture firmly and evenly into the bottom of your prepared pan, and halfway up the sides. Use the bottom of a measuring cup or your hands to compact it well.
- Bake the crust for 11 minutes, then let it cool slightly while you prepare the filling.
For the White Chocolate Cheesecake Filling:
- Melt the white chocolate: Place the white chocolate in a microwave-safe bowl. Microwave in short 20-second bursts, stirring thoroughly after each, until it’s completely smooth and melted. Set aside to cool a bit.
- In a large mixing bowl, using an electric mixer, beat the softened cream cheese and sugar on high speed for about 2 minutes until the mixture is beautifully smooth and lump-free. Don’t forget to scrape down the sides of the bowl with a rubber spatula!
- Add the slightly cooled melted white chocolate, room-temperature sour cream, vanilla extract, and salt to the cream cheese mixture. Mix on medium speed until everything is just combined.
- Gently mix in the eggs on low speed, just until they are fully incorporated. Be careful not to overmix, as too much air can cause cracks in your cheesecake. Remove the bowl from the mixer and use your spatula to gently fold in the Andes peppermint chips until they are evenly distributed throughout the batter.
- Carefully pour this luscious cheesecake batter over your pre-baked Oreo crust in the springform pan.
For a Smooth Bake (Water Bath):
- Prepare a water bath to give your cheesecake that perfect, crack-free finish. You have two easy options:
- Method 1 (Our favorite for a dry crust!): Place your springform pan inside a slightly larger 10-inch cake pan. Then, set this cake pan into a large roasting pan. Carefully pour hot, steaming water into the roasting pan until it reaches halfway up the sides of the cake pan.
- Method 2 (Simple Alternative): Tightly wrap the outside of your springform pan twice with aluminum foil. Place the wrapped pan directly into the large roasting pan and fill with hot water halfway up the sides of the springform pan.
- Carefully place the roasting pan with your cheesecake into the preheated oven. Bake for 75-85 minutes, or until the edges of the cheesecake are set, but the center still has a slight, gentle jiggle when moved.
- Once baked, turn off the oven, prop the door open slightly, and let the cheesecake cool slowly inside the oven for 30 minutes. This helps prevent cracks.
- Transfer the cheesecake (still in its pan) to a wire rack to cool completely at room temperature.
- Once fully cooled, wrap the entire pan tightly in foil and refrigerate for at least 6 hours, or ideally overnight, for the best set and flavor.
For the Whipped Cream Topping:
- Once your cheesecake is thoroughly chilled, it’s time for the topping! In a chilled metal bowl (or using your mixer’s whisk attachment), beat the heavy cream, powdered sugar, and vanilla extract on high speed until beautiful medium peaks form.
- Carefully release the sides of the springform pan from your chilled cheesecake. You can gently slide a thin, warm knife around the edge first if needed. Remove the parchment paper from the bottom.
- Gently spread the freshly made whipped cream over the top of your cheesecake. For a Valentine’s touch, you could sprinkle with some extra crushed peppermint candy, or even a few pink sprinkles. Serve chilled and enjoy a small, delightful slice!
Detailed Different Ways You Can Present the Recipe and How to Serve It
Elevating your Sweetheart Swirl Peppermint Cheesecake from delicious to absolutely dazzling is all about presentation! While a simple dollop of whipped cream is wonderful, here are some ideas to truly make it shine. For an extra festive touch, sprinkle the whipped cream with additional finely crushed peppermint candy or a delicate dusting of cocoa powder for a contrasting color. A drizzle of melted dark chocolate or a simple chocolate ganache creates an elegant swirl over the white topping, adding another layer of flavor. You could also garnish with a few fresh raspberries or strawberries for a pop of color and a hint of tartness, beautifully balancing the sweetness.
Consider serving individual slices with a small side of vanilla bean ice cream for a decadent à la mode experience. For a more intimate setting, accompany each slice with a steaming mug of hot chocolate or a perfectly brewed espresso, allowing the warm beverages to complement the cool, creamy cheesecake. If you’re feeling adventurous, create miniature versions by pressing the Oreo crust into a muffin tin lined with paper cups, filling with batter, and baking for a shorter time. These mini cheesecakes are perfect for portion control and easy serving at parties. Always serve your Sweetheart Swirl Peppermint Cheesecake chilled to ensure its perfect texture and refreshing flavor.
How You Can Store It and How Long Does It Last
Proper storage is key to enjoying every last scrumptious slice of your Sweetheart Swirl Peppermint Cheesecake. After cooling and chilling, ensure the cheesecake is tightly covered. The best way to do this is to wrap the entire springform pan (or the cheesecake on its base) securely with several layers of plastic wrap, followed by a layer of aluminum foil. This helps to prevent it from absorbing refrigerator odors and keeps it fresh.
When stored correctly in the refrigerator, your cheesecake will last for 3 to 5 days. For longer storage, this cheesecake freezes beautifully! You can freeze it whole or in individual slices. To freeze whole, place the chilled, uncovered cheesecake in the freezer for about an hour until firm. Then, wrap it tightly in plastic wrap, followed by aluminum foil. For slices, place them on a baking sheet to freeze until firm, then wrap each slice individually before storing them in an airtight freezer-safe container. Frozen cheesecake will maintain its quality for 1 to 2 months. To thaw, simply transfer it from the freezer to the refrigerator overnight, or for at least 6-8 hours, before serving. Avoid thawing at room temperature to preserve its texture.
FAQs Sections
1. Can I use a different type of crust for this Sweetheart Swirl Peppermint Cheesecake?
Absolutely! While the Oreo crust is a classic, you can get creative. Graham cracker crusts are a popular alternative, or you could try a shortbread cookie crust for a buttery flavor. Simply follow the same ratio of crumbs to melted butter (typically 1.5 cups crumbs to 1/4 cup butter for a 9-inch pan).
2. Can I make this cheesecake ahead of time?
Yes, and we highly recommend it! Cheesecakes benefit greatly from chilling, which allows the flavors to meld and the texture to firm up beautifully. You can prepare this Sweetheart Swirl Peppermint Cheesecake up to 2 days in advance, storing it tightly covered in the refrigerator. Add the whipped cream topping just before serving.
3. How do I prevent cracks in my cheesecake?
Our recipe incorporates key steps to prevent cracks: using room temperature ingredients, not overmixing the batter (especially after adding eggs), baking in a water bath for even heat distribution, and allowing the cheesecake to cool slowly in the oven with the door propped open. Following these steps carefully will significantly reduce the chances of cracks.
4. What if I don’t have a springform pan?
While a springform pan is ideal for cheesecakes, you can use a regular 9-inch round cake pan. Just be sure to line the bottom and sides with parchment paper, leaving an overhang to easily lift the cheesecake out once it’s chilled. Be aware that cutting and serving might be a bit trickier.
5. Can I use different peppermint candy instead of Andes chips?
Yes, you can! Crushed candy canes or other hard peppermint candies work wonderfully. Just make sure they are finely crushed so they distribute evenly throughout the batter and provide that delightful peppermint burst without being too hard to bite.
6. Is there a way to make this Sweetheart Swirl Peppermint Cheesecake less sweet?
You can try slightly reducing the granulated sugar in the cheesecake filling by about 1/4 cup. Keep in mind that white chocolate itself is sweet, so the overall sweetness will still be present. For the topping, you can also reduce or omit the powdered sugar in the whipped cream.
7. Can I skip the water bath?
While you technically can, we strongly advise against it for the best results. The water bath provides a moist, even heat that helps the cheesecake bake gently and prevents the top from cracking. Skipping it increases the risk of a dry texture and visible cracks on the surface.
8. How do I know when my cheesecake is done baking?
The cheesecake is done when the edges are set and lightly golden, but the center still has a slight, gentle wobble when you lightly jiggle the pan. It should not be liquid. The residual heat will continue to cook the center as it cools.
9. Can I make mini cheesecakes with this recipe?
Absolutely! This recipe adapts well to mini cheesecakes. Line a muffin tin with paper liners, press about 1-2 tablespoons of crust into each, fill with batter, and bake at 325℉ (160°C) for approximately 20-25 minutes, or until set. Adjust chilling time accordingly.
10. What’s the best way to cut clean slices of cheesecake?
For pristine slices of your Sweetheart Swirl Peppermint Cheesecake, use a sharp, thin-bladed knife. For the cleanest cuts, run the knife under hot water, wipe it dry, and then make each slice. Clean the knife after every cut for the most professional-looking portions.
Sweetheart Swirl Peppermint Cheesecake 💖
Equipment
- Food Processor
- 9-inch Springform Pan
- Electric Mixer
- Rubber Spatula
- Microwave-safe Bowl
- Large mixing bowl
- 10-inch Cake Pan (optional)
- Large roasting pan
- Aluminum Foil
- Wire Rack
- Chilled Metal Bowl
Ingredients
Oreo Crust
- 3 cups Oreo crumbs (from about 35 Oreos)
- 6 tablespoons unsalted butter melted
White Chocolate Cheesecake
- 24 ounces cream cheese softened to room temperature
- 3/4 cup white granulated sugar
- 8 ounces white chocolate bars melted (like Lindt)
- 1/2 cup sour cream softened to room temperature
- 1 teaspoon pure vanilla extract
- 1/4 teaspoon salt
- 4 large eggs softened to room temperature
- 1 1/2 cups Andes peppermint chips
Whipped Cream Topping
- 1 cup heavy cream chilled
- 2 tablespoons powdered sugar
- 1 teaspoon pure vanilla extract
Instructions
- Preheat your oven to 325℉ (160°C). Lightly spray a 9-inch springform pan with baking spray, then line the bottom with a parchment paper circle and spray again.
- In a food processor, pulse the Oreos until they become fine crumbs. Transfer to a small bowl and mix these crumbs with the melted butter using a fork until well combined.
- Press the crumb mixture firmly and evenly into the bottom of your prepared pan, and halfway up the sides. Use the bottom of a measuring cup or your hands to compact it well.
- Bake the crust for 11 minutes, then let it cool slightly while you prepare the filling.
- Melt the white chocolate: Place the white chocolate in a microwave-safe bowl. Microwave in short 20-second bursts, stirring thoroughly after each, until it's completely smooth and melted. Set aside to cool a bit.
- In a large mixing bowl, using an electric mixer, beat the softened cream cheese and sugar on high speed for about 2 minutes until the mixture is beautifully smooth and lump-free. Don't forget to scrape down the sides of the bowl with a rubber spatula!
- Add the slightly cooled melted white chocolate, room-temperature sour cream, vanilla extract, and salt to the cream cheese mixture. Mix on medium speed until everything is just combined.
- Gently mix in the eggs on low speed, just until they are fully incorporated. Be careful not to overmix, as too much air can cause cracks in your cheesecake. Remove the bowl from the mixer and use your spatula to gently fold in the Andes peppermint chips until they are evenly distributed throughout the batter.
- Carefully pour this luscious cheesecake batter over your pre-baked Oreo crust in the springform pan.
- Prepare a water bath to give your cheesecake that perfect, crack-free finish. You have two easy options:
- Method 1 (Our favorite for a dry crust!): Place your springform pan inside a slightly larger 10-inch cake pan. Then, set this cake pan into a large roasting pan. Carefully pour hot, steaming water into the roasting pan until it reaches halfway up the sides of the cake pan.
- Method 2 (Simple Alternative): Tightly wrap the outside of your springform pan twice with aluminum foil. Place the wrapped pan directly into the large roasting pan and fill with hot water halfway up the sides of the springform pan.
- Carefully place the roasting pan with your cheesecake into the preheated oven. Bake for 75-85 minutes, or until the edges of the cheesecake are set, but the center still has a slight, gentle jiggle when moved.
- Once baked, turn off the oven, prop the door open slightly, and let the cheesecake cool slowly inside the oven for 30 minutes. This helps prevent cracks.
- Transfer the cheesecake (still in its pan) to a wire rack to cool completely at room temperature.
- Once fully cooled, wrap the entire pan tightly in foil and refrigerate for at least 6 hours, or ideally overnight, for the best set and flavor.
- Once your cheesecake is thoroughly chilled, it's time for the topping! In a chilled metal bowl (or using your mixer's whisk attachment), beat the heavy cream, powdered sugar, and vanilla extract on high speed until beautiful medium peaks form.
- Carefully release the sides of the springform pan from your chilled cheesecake. You can gently slide a thin, warm knife around the edge first if needed. Remove the parchment paper from the bottom.
- Gently spread the freshly made whipped cream over the top of your cheesecake. For a Valentine's touch, you could sprinkle with some extra crushed peppermint candy, or even a few pink sprinkles. Serve chilled and enjoy a small, delightful slice!