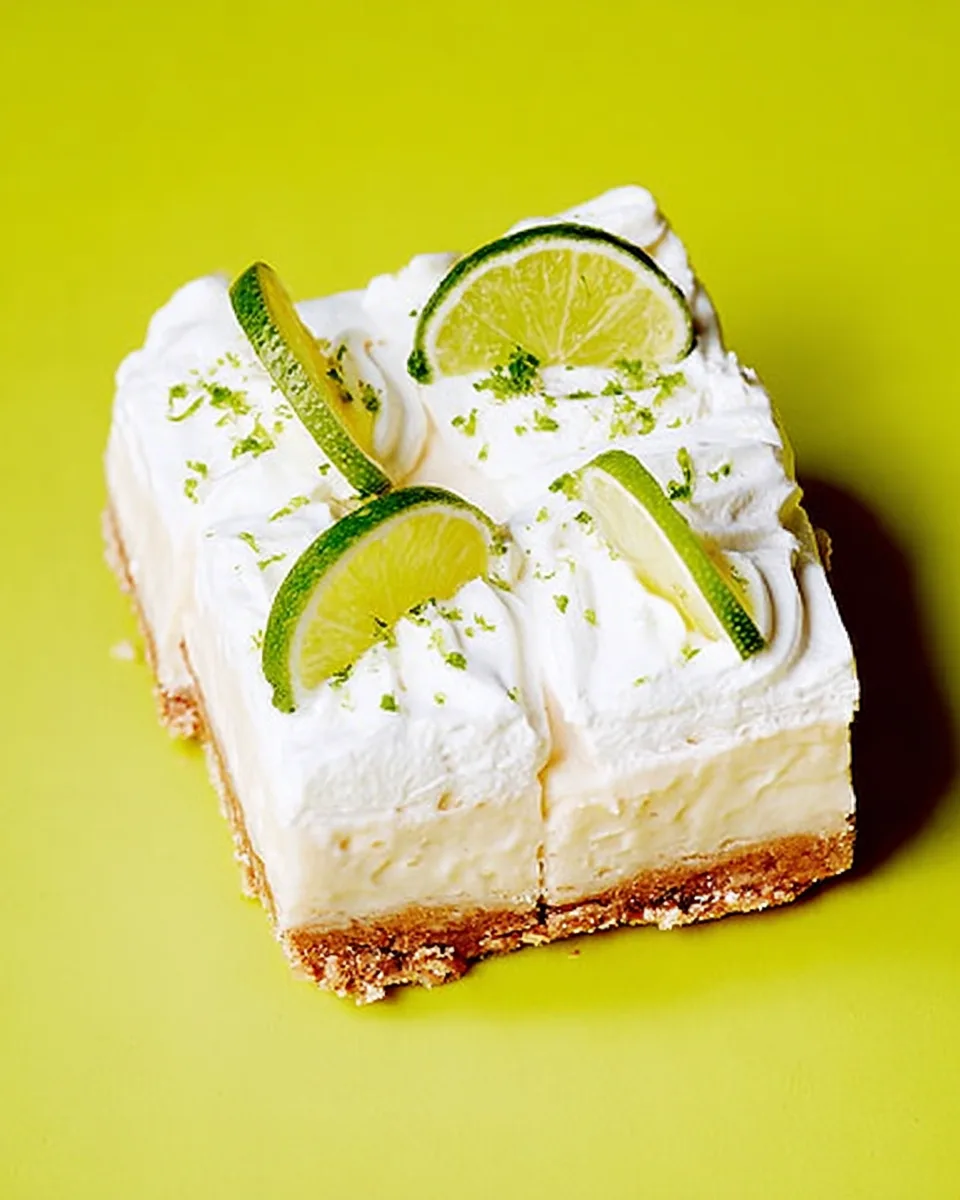
Sunshine calling? Craving a dessert that’s bright, zesty, and utterly refreshing without ever turning on your oven? Get ready to swoon over the ultimate summer treat: No-Bake Key Lime Cheesecake Bars! Imagine the tangy kiss of key lime, nestled atop a crunchy, buttery granola crust, all crowned with a cloud of fluffy, sugar-free cream. It’s a slice of paradise that’s incredibly easy to make and perfect for any warm-weather gathering (or a quiet indulgence all to yourself!). Ditch the heat, embrace the chill, and let’s dive into making these irresistible bars!
Why You’ll Love These No-Bake Key Lime Cheesecake Bars
Prepare to fall head over heels for this recipe, and here are four fantastic reasons why these No-Bake Key Lime Cheesecake Bars are about to become your new go-to dessert:
- No Oven Required, Pure Bliss Achieved: Say goodbye to heating up your kitchen on a sweltering day! These bars come together without a single moment of baking, making them the ultimate effortless summer dessert. Just mix, chill, and enjoy!
- Effortlessly Elegant & Impressively Easy: Don’t let the sophisticated look fool you. This recipe is incredibly straightforward, perfect for both novice bakers and seasoned pros. With clear, simple steps, you’ll whip up a dessert that looks like it came from a fancy bakery, but tastes even better because you made it!
- Zesty, Tangy & Perfectly Sweet: The vibrant key lime flavor is the star here, offering that delightful balance of tartness and refreshing zest that summer desserts demand. Plus, with sugar-free alternatives, you get all the sweetness without the guilt, making it a treat you can truly savor.
- Perfectly Portable & Crowd-Pleasing: Slicing these into individual bars makes them ideal for potlucks, picnics, BBQs, or simply grabbing a quick treat from the fridge. They’re easy to transport and universally loved, ensuring they’ll be a hit wherever they go!
Ingredients for Your Zesty Creation
Gather your magic makers for these divine No-Bake Key Lime Cheesecake Bars! Here’s everything you’ll need to bring this sunshine-filled dessert to life:
- 🌿 For the Crust:
- 2 cups Sola Vanilla Almond Granola
- 4 tablespoons melted butter
- 🍋 For the Filling:
- 2 tablespoons cold water
- 1 tablespoon unflavored gelatin
- 2 tablespoons hot water
- 16 ounces cream cheese, softened
- 4 ounces heavy cream
- 1/3 cup sugar-free sweetener
- 3 tablespoons key lime juice
- 1 teaspoon lime zest
- ☁️ For the Topping:
- 3/4 cup heavy cream
- 2 tablespoons powdered sugar-free alternative
- Extra lime zest for garnish
Step-by-Step Directions to Deliciousness
Let’s get this no-bake party started! Follow these easy steps to create your spectacular No-Bake Key Lime Cheesecake Bars:
- Prepare Your Pan: First things first, grab an 8×8-inch baking dish and line it with parchment paper. Be smart and leave a generous overhang on the sides – it’s your secret weapon for lifting out the finished cheesecake with zero fuss!
- Make the Crust: In the bowl of a food processor, combine the Sola granola and the melted butter. Pulse, pulse, pulse until the mixture transforms into moist, crumbly goodness. Now, press these delightful crumbs firmly and evenly into the bottom of your prepared dish. This is the foundation of your key lime dreams!
- Bloom the Gelatin: Get a small bowl and sprinkle the unflavored gelatin over the cold water. Let it hang out, undisturbed, for about 5 minutes until it thickens up nicely. Then, stir in the hot water until the gelatin completely dissolves. If any tiny undissolved chunks dare to appear, simply scoop them out.
- Create the Filling: Time for the star! Add the softened cream cheese to your food processor or a stand mixer (paddle attachment, please!). Blend until it’s unbelievably smooth – no lumps allowed. Next, pour in the dissolved gelatin, the 4 ounces of heavy cream, your sugar-free sweetener, the bright key lime juice, and that fragrant lime zest. Mix everything well until the filling is uniformly smooth and creamy. Don’t forget to scrape down the sides of the bowl to ensure everything gets incorporated.
- Chill the Cheesecake: Gently pour that luscious key lime filling over your granola crust in the dish. Take a spatula and spread it out evenly, creating a perfect canvas. Now, the hardest part: place the dish in the refrigerator and let it chill. It needs at least 3 to 4 hours, or until it’s completely firm and set. Patience, grasshopper!
- Whip the Topping: Once your cheesecake is thoroughly chilled and firm, pull it from the fridge. In a clean bowl, whip the remaining 3/4 cup of heavy cream with the powdered sugar-free alternative until it forms beautiful, light, and fluffy peaks.
- Decorate & Serve: Spread your freshly whipped topping evenly over the set key lime cheesecake. For an extra pop of color and an irresistible zing, sprinkle generously with additional fresh lime zest. Use the parchment paper overhang to gently lift the entire cheesecake out of the dish. Transfer it to a cutting board and slice it into 16 delightful bars. Get ready to enjoy your refreshing, healthy summer treat!
Presenting Your No-Bake Key Lime Cheesecake Bars
These No-Bake Key Lime Cheesecake Bars are already a showstopper, but with a little flair, you can elevate them even further! Here are a few delightful ways to present and serve your refreshing creation:
- The Classic Zest Appeal: The recipe suggests extra lime zest, and for good reason! A generous sprinkle of bright green zest over the pristine white whipped topping is not only beautiful but also enhances the aromatic key lime experience.
- Berry Bliss: Add a pop of contrasting color and flavor with fresh berries. Arrange a few raspberries, blueberries, or thinly sliced strawberries artfully on top of each bar just before serving. The tartness of the berries complements the lime perfectly.
- Minty Freshness: A small sprig of fresh mint leaf placed delicately on each bar adds a touch of gourmet elegance and a lovely herbaceous aroma that pairs wonderfully with citrus.
- Coconut Cascade: For an extra tropical twist, sprinkle some toasted coconut flakes over the topping. This adds a fantastic texture and another layer of summery flavor that harmonizes beautifully with key lime.
- Individual Servings: Instead of slicing after topping, you could pipe individual swirls of whipped cream onto each pre-sliced bar. This gives a professional, bakery-style finish. Alternatively, consider making them in individual small ramekins or silicone molds for personalized desserts.
- Edible Flowers: For a truly stunning presentation, especially for a special occasion, edible flowers like pansies or violas can add an exquisite touch of color and sophistication.
Storage & Shelf Life of Your Key Lime Delight
You’ve made these incredible No-Bake Key Lime Cheesecake Bars, and now you want to make sure they stay fresh and delicious! Here’s how to store them and how long you can expect them to last:
- In the Refrigerator: These bars are best enjoyed chilled. Store any leftovers in an airtight container in the refrigerator. This protects them from absorbing other food odors and keeps the texture perfect. They will stay fresh and delicious for up to 3-4 days. The whipped topping is quite stable due to the sugar-free alternative, but it’s always best to consume them within this timeframe for optimal taste and texture.
- Freezing for Later: Yes, you can freeze these bars! If you want to save some for a future craving, slice the bars and place them on a baking sheet lined with parchment paper. Freeze until solid (about 2 hours), then transfer the frozen bars to an airtight freezer-safe container or a freezer bag, separating layers with parchment paper to prevent sticking. They can be frozen for up to 1 month.
- Thawing Frozen Bars: When you’re ready to enjoy a frozen bar, simply transfer it from the freezer to the refrigerator and let it thaw for a few hours, or you can enjoy them slightly frozen for a firmer, almost ice cream-like texture on a hot day.
- Best Practices: Always keep the bars covered to prevent them from drying out or absorbing moisture. Avoid leaving them at room temperature for extended periods, especially on warm days, as the cream cheese and heavy cream will soften and potentially spoil.
FAQs About No-Bake Key Lime Cheesecake Bars
Got questions about these delightful No-Bake Key Lime Cheesecake Bars? We’ve got answers!
- Can I use regular sugar instead of sugar-free sweetener?
Yes, absolutely! You can substitute the sugar-free sweetener with regular granulated sugar (for the filling) and powdered sugar (for the topping) in the same quantities if preferred. - What if I don’t have a food processor for the crust?
No problem! You can place the granola in a large Ziploc bag and crush it with a rolling pin until it forms fine crumbs. Then mix with melted butter in a bowl. - Can I use bottled lime juice instead of fresh key lime juice?
While fresh key lime juice offers the best authentic flavor, bottled key lime juice can be used as a convenient substitute. Regular lime juice will also work, but key lime juice has a distinct, slightly tarter flavor. - My cheesecake filling isn’t setting. What went wrong?
The most common culprit is not fully dissolving the gelatin or not chilling the cheesecake for long enough. Ensure the gelatin is completely dissolved in hot water before adding to the mixture, and give it the full 3-4 hours (or more!) in the fridge. - Can I make this dairy-free?
You can try! Use dairy-free cream cheese alternatives, dairy-free heavy cream substitutes, and a vegan butter alternative for the crust. Results may vary slightly in texture and flavor. - How do I get clean slices?
For perfectly clean cuts, use a sharp knife and run it under hot water, wiping it clean between each slice. This prevents the filling and topping from sticking to the knife. - Can I prepare this recipe ahead of time?
Absolutely! These bars are an excellent make-ahead dessert. You can prepare them 1-2 days in advance and store them in an airtight container in the refrigerator. - What kind of granola works best for the crust?
The recipe specifies Sola Vanilla Almond Granola for its sugar-free aspect, but any vanilla or plain almond granola will work beautifully. Just ensure it’s a type that crumbles well. - Can I add more lime zest to the filling?
Yes, if you’re a big fan of lime! You can increase the lime zest to 1.5 or even 2 teaspoons for an extra burst of citrusy aroma and flavor in the filling. - Why do I need to leave parchment paper overhang?
The overhang acts as “handles” to easily lift the entire chilled cheesecake out of the pan. This makes slicing and serving much, much easier and prevents damage to the delicate bars.
No-Bake Key Lime Cheesecake Bars
Equipment
- 8x8-inch baking dish
- Parchment Paper
- Food Processor
- Stand Mixer
- Small Bowl
- Spatula
Ingredients
For the Crust
- 2 cups Sola Vanilla Almond Granola
- 4 tablespoons melted butter
For the Filling
- 2 tablespoons cold water
- 1 tablespoon unflavored gelatin
- 2 tablespoons hot water
- 16 ounces cream cheese softened
- 4 ounces heavy cream
- 1/3 cup sugar-free sweetener
- 3 tablespoons key lime juice
- 1 teaspoon lime zest
For the Topping
- 3/4 cup heavy cream
- 2 tablespoons powdered sugar-free alternative
- Extra lime zest for garnish
Instructions
- 1. Prepare Your Pan: Start by lining an 8x8-inch baking dish with parchment paper. Make sure to leave some overhang on the sides – it makes lifting the cheesecake out much easier later!
- 2. Make the Crust: In a food processor, combine the Sola granola and the melted butter. Pulse until the mixture forms moist crumbs. Press these crumbs firmly and evenly into the bottom of your prepared dish to create the base of your cheesecake bars.
- 3. Bloom the Gelatin: In a small bowl, sprinkle the gelatin over the cold water. Let it sit undisturbed for about 5 minutes until it thickens. Then, stir in the hot water until the gelatin completely dissolves. If you see any small undissolved chunks, simply remove them.
- 4. Create the Filling: Add the softened cream cheese to your food processor or a stand mixer fitted with a paddle attachment. Blend until it's perfectly smooth. Now, add the dissolved gelatin, the 4 ounces of heavy cream, sugar-free sweetener, key lime juice, and lime zest. Mix well until the entire filling is smooth and creamy, scraping down the sides of the bowl as needed.
- 5. Chill the Cheesecake: Carefully pour the luscious key lime filling over your granola crust in the dish. Gently spread it out evenly with a spatula. Place the dish in the refrigerator and let it chill for at least 3 to 4 hours, or until the cheesecake is completely firm and set.
- 6. Whip the Topping: Once the cheesecake is thoroughly chilled, remove it from the fridge. In a clean bowl, whip the remaining 3/4 cup of heavy cream with the powdered sugar-free alternative until it forms light and fluffy peaks.
- 7. Decorate & Serve: Spread the freshly whipped topping evenly over the set key lime cheesecake. For a burst of color and extra zing, sprinkle with additional fresh lime zest. Use the parchment paper overhang to gently lift the entire cheesecake out of the dish. Place it on a cutting board and slice it into 16 delightful bars. Enjoy your refreshing, healthy summer treat!
Notes
Nutrition Information (per bar):
- Calories: 230
- Total Carbs: 7g
- Fats: 18g
- Protein: 3g