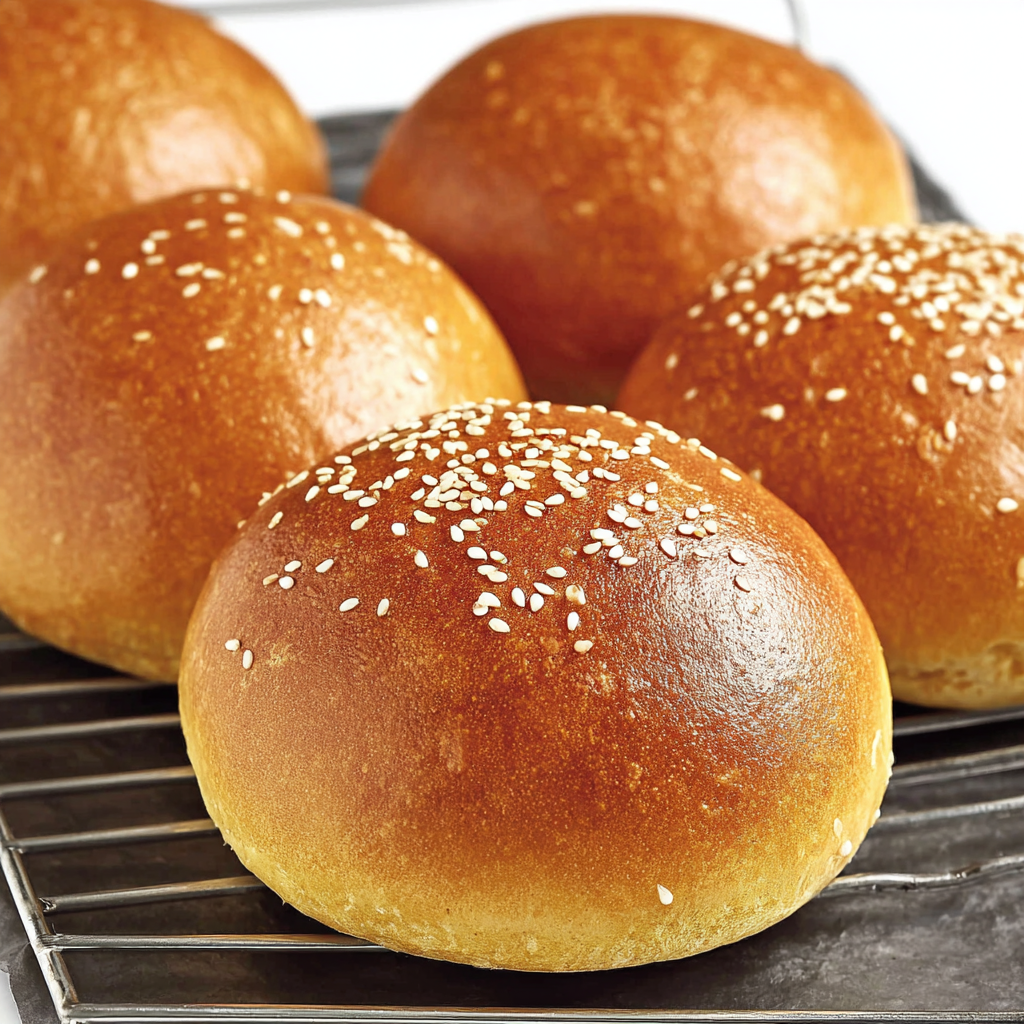
Ever found yourself staring longingly at a bakery display, wishing you could sink your teeth into a warm, soft bun without derailing your keto journey? We’ve all been there! The good news is, your carb-craving days are about to get a serious upgrade. Prepare to meet your new obsession: the ultimate Fluffy & Chewy Keto Buns that are so good, you might just forget they’re low-carb. Get ready to banish bland, crumbly keto bread from your life and welcome a bun that’s not just a substitute, but a star in its own right!
Why You’ll Love This Recipe
These aren’t just any keto buns; they’re a game-changer. Here are four irresistible reasons why these Fluffy & Chewy Keto Buns will become a staple in your low-carb kitchen:
- Unbelievable Texture Perfection: Say goodbye to dense, dry keto bread! These buns live up to their name, delivering an incredible fluffiness inside with a satisfying chewiness that mimics traditional bread. It’s the texture you’ve been dreaming of, now made keto-friendly.
- Seriously Keto & Low-Carb: With a mere 3g net carbs per bun, you can enjoy the comfort of bread without the carb overload. They fit perfectly into your ketogenic lifestyle, allowing you to indulge guilt-free.
- Incredibly Versatile: From burger buns to sandwich rolls, dinner companions, or even a base for garlic bread, these buns are ready for anything! Their neutral yet delicious flavor makes them the perfect canvas for both savory and slightly sweet applications.
- Made with Real Yeast for Authentic Flavor: Unlike many quick keto bread recipes, these buns utilize active dry yeast, giving them that classic yeasty aroma and subtle flavor that’s deeply missed on a low-carb diet. The proofing process might require a little patience, but the results are absolutely worth it!
Ingredients with measurements
Gather your ingredients, and let’s get ready to bake some magic!
- 🌾 1 1/4 cups vital wheat gluten
- 🥣 1/2 cup oat fiber
- 🌿 1/3 cup lupin flour
- 🌰 1/3 cup ground golden flax seed (plus 1-2 tablespoons extra, if needed)
- 💧 1 cup warm water (about 125°F, like a warm bath)
- 🥚 2 large eggs (beaten and at room temperature)
- sweetener 3 tablespoons keto-friendly sweetener (like monk fruit or allulose)
- 🧈 2 tablespoons unsalted butter (softened)
- 🚀 1 tablespoon active dry yeast
- 🧂 2 teaspoons baking powder
- 🍠 1 teaspoon inulin powder (or 1 teaspoon honey, to activate the yeast)
- 🧂 1 teaspoon salt
Detailed step by step on direction how to make the recipe
- In a small cup, combine the warm water and inulin (or honey). Sprinkle the yeast over top, give it a quick stir, and let it sit for 5-7 minutes until it looks foamy. This means your yeast is active and ready to make magic!
- While the yeast blooms, in a large stand mixer bowl, whisk together the vital wheat gluten, oat fiber, lupin flour, golden flaxseed, keto sweetener, salt, and baking powder. Whisk well to make sure there are no lumps.
- Once your yeast mixture is bubbly, slowly pour it into the running mixer with the dry ingredients. Then, add the beaten eggs and continue mixing until a dough starts to come together.
- Add the softened butter and mix just until it’s fully combined into the dough. Your dough should feel a bit tacky, but not super sticky. If it’s too wet, gradually mix in 1-2 tablespoons of extra ground flaxseed until it pulls cleanly away from the sides of the bowl.
- Scrape down the sides of the bowl. Swap the paddle attachment for a dough hook and knead the dough for a good 7 minutes.
- Let the dough rest in the bowl for 10 minutes. This is a perfect moment to clean up a little and get your baking sheet ready!
- Turn the rested dough onto a lightly floured surface or a silicone mat. Divide it into 8 equal portions (weighing them helps ensure they all bake evenly).
- Take each portion, flatten it slightly, then gather all the edges towards the center to form a neat ball. Pinch the seams closed, then gently roll the ball on your surface with a cupped hand until it’s smooth and round.
- Place your beautifully shaped buns on a baking sheet lined with parchment paper, lightly sprayed with nonstick spray or olive oil.
- Lightly spray a piece of plastic wrap with nonstick spray and loosely cover the buns (don’t seal tightly, they need plenty of room to expand!). To proof, place them in a very warm, preferably moist environment for 2 hours. You can use an oven with a bread proof setting, or create a warm, moist spot by placing a shallow pan of boiling water on the bottom rack of your oven. Another option is to use a microwave with a cup of hot water alongside the rolls.
- After proofing, preheat your oven to 350°F (175°C). Carefully remove the plastic wrap and bake the buns for 18-20 minutes, or until they’re beautifully golden brown and cooked through.
- Let the buns cool completely on a wire rack before serving. Store leftovers at room temperature for 1-2 days, then keep them in an airtight container in the fridge for 3-4 days. They also freeze wonderfully for later enjoyment!
Detailed different ways you can present the recipe and how to serve it
The versatility of these Fluffy & Chewy Keto Buns is truly remarkable! Once you master this recipe, a world of low-carb possibilities opens up:
- The Ultimate Burger Bun: Forget lettuce wraps! These buns are sturdy enough to hold your juiciest burgers, pulled pork, grilled chicken, or even a hefty portobello mushroom. They’re perfect for BBQ season.
- Savory Sandwich Rolls: Elevate your lunch game! Fill them with deli meats, cheese, a creamy egg salad, tuna salad, or fresh veggies for a satisfying sandwich that truly feels like the real deal.
- Fantastic Breakfast Sandwiches: Start your day right with a warm bun loaded with scrambled eggs, bacon, sausage, and a slice of melty cheese. It’s a hearty, low-carb breakfast that will keep you full for hours.
- Delicious Dinner Rolls: Serve them warm with a pat of butter alongside your favorite keto-friendly soups, stews, or salads. They’re excellent for soaking up delicious gravies too!
- Garlic Bread Goodness: Slice a bun in half, spread with softened butter mixed with minced garlic and herbs, then toast in the oven until golden. A perfect side for keto pasta dishes or grilled steak.
How you can store it and how long does it last
These Fluffy & Chewy Keto Buns are so delicious, they might not last long, but here’s how to properly store them to maximize their freshness:
- Room Temperature: For immediate enjoyment, you can keep them at room temperature in an airtight container for 1-2 days. Make sure they are completely cooled before storing to prevent condensation and sogginess.
- Refrigerator: To extend their shelf life, transfer the buns to an airtight container and store them in the fridge for up to 3-4 days. This is ideal if you’ve made a batch for the week ahead.
- Freezer: These buns freeze beautifully! Once completely cooled, place them in a freezer-safe bag or container. They can be frozen for up to 2-3 months. To reheat from frozen, simply thaw them at room temperature or warm them gently in a preheated oven (around 300°F/150°C) for 5-10 minutes, or until warmed through and soft. You can also pop them in the microwave for 15-30 seconds if you’re in a hurry.
FAQs Sections
- Q1: What makes these buns “Fluffy & Chewy”?
A1: The magic lies in vital wheat gluten, which provides the essential elasticity and structure, combined with oat fiber for bulk and moisture, and proper kneading to develop the gluten. The yeast also contributes to a light, airy rise. - Q2: Can I make these without a stand mixer?
A2: While a stand mixer with a dough hook is highly recommended for optimal kneading and texture, you can knead the dough by hand. Be prepared for a good arm workout for about 10-12 minutes to achieve the desired elasticity. - Q3: What is vital wheat gluten? Is it keto-friendly?
A3: Vital wheat gluten is the natural protein found in wheat. It’s almost pure protein, with very little starch, making it keto-friendly. It’s essential for providing the elasticity and chewiness in low-carb baking that traditional flours usually provide. - Q4: Is oat fiber keto-friendly?
A4: Yes! Oat fiber is pure insoluble fiber, meaning it passes through your system largely undigested and has zero net carbs. It adds bulk, texture, and moisture absorption without adding significant calories or carbs. - Q5: Can I substitute lupin flour for another flour?
A5: Lupin flour contributes to both the protein and the structure of these buns. While you might be able to substitute with almond flour, the texture and rise may vary significantly. For best results with these Fluffy & Chewy Keto Buns, stick to lupin flour. - Q6: How do I know if my yeast is active?
A6: After mixing the yeast with warm water and inulin (or honey), it should become visibly foamy and bubbly within 5-7 minutes. If it doesn’t foam, your yeast may be old or the water temperature might have been too hot or cold, and it’s best to start with fresh yeast. - Q7: What if my dough is too sticky or too dry?
A7: The dough should be tacky but pull away from the bowl. If it’s too wet, gradually add 1-2 tablespoons of extra ground flaxseed. If it seems too dry and crumbly, add water sparingly, a teaspoon at a time, until the desired consistency is reached. - Q8: Can I skip the proofing time?
A8: No, the 2-hour proofing time is crucial for developing the flavor, texture, and rise of these yeast-based buns. Skipping it will result in dense, heavy buns. - Q9: How can I create a warm, moist environment for proofing?
A9: You can use an oven with a “bread proof” setting. Alternatively, place a shallow pan of boiling water on the bottom rack of your oven (turned off, door closed) or place the covered buns in a microwave with a cup of hot water alongside them. - Q10: Are these buns truly low carb given they use vital wheat gluten?
A10: Absolutely! Vital wheat gluten is primarily protein and has minimal digestible carbs. Coupled with oat fiber and lupin flour, these buns achieve an impressive 3g net carbs per serving, making them perfectly suitable for a ketogenic diet.
Fluffy & Chewy Keto Buns
Equipment
- Stand Mixer
- Baking Sheet
Ingredients
- 1 1/4 cups vital wheat gluten
- 1/2 cup oat fiber
- 1/3 cup lupin flour
- 1/3 cup ground golden flax seed (plus 1-2 tablespoons extra, if needed)
- 1 cup warm water (about 125°F, like a warm bath)
- 2 large eggs (beaten and at room temperature)
- 3 tablespoons keto-friendly sweetener (like monk fruit or allulose)
- 2 tablespoons unsalted butter (softened)
- 1 tablespoon active dry yeast
- 2 teaspoons baking powder
- 1 teaspoon inulin powder (or 1 teaspoon honey, to activate the yeast)
- 1 teaspoon salt
Instructions
- In a small cup, combine the warm water and inulin (or honey). Sprinkle the yeast over top, give it a quick stir, and let it sit for 5-7 minutes until it looks foamy. This means your yeast is active and ready to make magic!
- While the yeast blooms, in a large stand mixer bowl, whisk together the vital wheat gluten, oat fiber, lupin flour, golden flaxseed, keto sweetener, salt, and baking powder. Whisk well to make sure there are no lumps.
- Once your yeast mixture is bubbly, slowly pour it into the running mixer with the dry ingredients. Then, add the beaten eggs and continue mixing until a dough starts to come together.
- Add the softened butter and mix just until it’s fully combined into the dough. Your dough should feel a bit tacky, but not super sticky. If it’s too wet, gradually mix in 1-2 tablespoons of extra ground flaxseed until it pulls cleanly away from the sides of the bowl.
- Scrape down the sides of the bowl. Swap the paddle attachment for a dough hook and knead the dough for a good 7 minutes.
- Let the dough rest in the bowl for 10 minutes. This is a perfect moment to clean up a little and get your baking sheet ready!
- Turn the rested dough onto a lightly floured surface or a silicone mat. Divide it into 8 equal portions (weighing them helps ensure they all bake evenly).
- Take each portion, flatten it slightly, then gather all the edges towards the center to form a neat ball. Pinch the seams closed, then gently roll the ball on your surface with a cupped hand until it’s smooth and round.
- Place your beautifully shaped buns on a baking sheet lined with parchment paper, lightly sprayed with nonstick spray or olive oil.
- Lightly spray a piece of plastic wrap with nonstick spray and loosely cover the buns (don’t seal tightly, they need plenty of room to expand!). To proof, place them in a very warm, preferably moist environment for 2 hours. You can use an oven with a bread proof setting, or create a warm, moist spot by placing a shallow pan of boiling water on the bottom rack of your oven. Another option is to use a microwave with a cup of hot water alongside the rolls.
- After proofing, preheat your oven to 350°F (175°C). Carefully remove the plastic wrap and bake the buns for 18-20 minutes, or until they’re beautifully golden brown and cooked through.
- Let the buns cool completely on a wire rack before serving. Store leftovers at room temperature for 1-2 days, then keep them in an airtight container in the fridge for 3-4 days. They also freeze wonderfully for later enjoyment!
Notes
Calories: 164 kcal
Total Carbs: 11 g
Net Carbs: 3 g
Fats: 8 g
Protein: 19 g Let the buns cool completely on a wire rack before serving. Store leftovers at room temperature for 1-2 days, then keep them in an airtight container in the fridge for 3-4 days. They also freeze wonderfully for later enjoyment!