Ever dreamed of a pizza that tastes amazing, satisfies your cravings, and still keeps things light and fresh for those sunny days? Well, pinch yourself, because your dream just became a delicious reality! Get ready to revolutionize your summer meal prep with a recipe that’s about to become your new obsession: the Summer Chicken Caesar Salad Pizza. Forget heavy, doughy bases; we’re talking about a crispy, savory chicken crust topped with your favorite creamy, zesty Caesar salad. It’s vibrant, it’s bursting with flavor, and it’s unbelievably easy to make. This isn’t just a meal; it’s a culinary experience designed for warm weather, outdoor dining, and impressing your taste buds without breaking a sweat. So, roll up your sleeves and prepare to dive into the ultimate guilt-free pizza indulgence!
Why You’ll Love This Recipe
1. It’s Amazingly Low-Carb & High-Protein
Say goodbye to carb crashes and hello to sustained energy! This innovative pizza swaps out traditional flour-based dough for a robust chicken crust, making it naturally low in carbs and packed with protein. It’s perfect for anyone looking for a healthier alternative without sacrificing flavor or satisfaction. Enjoy a hearty meal that keeps you full and fueled, without the guilt!
2. Quick, Easy, and Genius
Who knew canned chicken could be so transformative? This recipe leverages the convenience of pantry staples to create a gourmet-worthy meal in under 40 minutes. With minimal prep and straightforward steps, it’s ideal for busy weeknights, spontaneous gatherings, or whenever you need a delicious meal on the fly. It’s a culinary shortcut that tastes anything but!
3. A Burst of Fresh, Summery Flavor
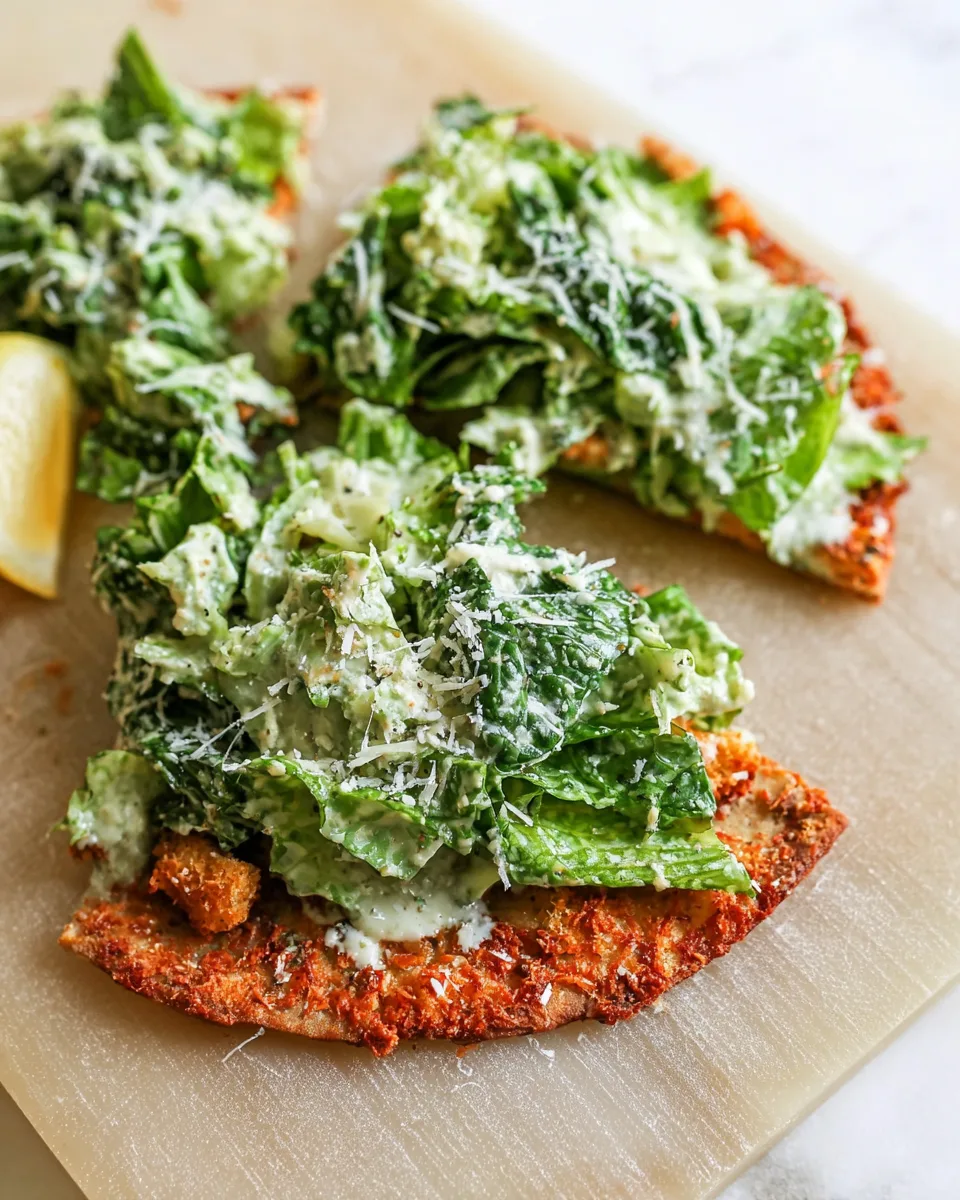
This isn’t just a pizza; it’s a fresh flavor fiesta! The warm, crispy chicken crust perfectly complements the cool, crisp romaine lettuce, creamy Caesar dressing, and zesty lemon finish. It’s a delightful contrast of textures and temperatures, making it incredibly refreshing and satisfying, especially when the temperatures rise. It truly embodies the spirit of summer dining.
4. A Fun and Unique Twist on Classics
Why choose between pizza and salad when you can have both? This recipe brilliantly merges two beloved dishes into one spectacular creation. It’s a conversation starter, a crowd-pleaser, and a fresh take on classic comfort food. Surprise your family and friends with this ingenious hybrid that’s sure to become a regular request at your table!
Ingredients with Measurements
- 🐔 1 can (about 12.5 ounces) canned chicken, well-drained and shredded
- 🥚 1 large egg
- 🧀 ⅓ cup grated Parmesan cheese
- 🧄 1 teaspoon garlic powder
- 🌶️ 1 teaspoon red chili flakes (optional)
- 🧂 A dash of salt and black pepper
- 🥗 1 ½ cups fresh salad greens (like romaine lettuce)
- 🥣 Your favorite creamy Caesar dressing (store-bought or homemade)
- 🍋 A drizzle of fresh lemon juice (optional)
- 🥖 Croutons (optional, for a little crunch)
- 🧀 Extra grated Parmesan cheese, for topping
Detailed Step-by-Step Directions How to Make the Recipe
- Get Ready: Preheat your oven to a sizzling 425°F (220°C). Grab a baking sheet and line it with parchment paper – this is your secret weapon for effortless cleanup and easy crust removal later.
- Mix the Crust Magic: In a spacious bowl, combine your well-drained, shredded chicken, the trusty egg, that glorious grated Parmesan cheese, the aromatic garlic powder, the feisty red chili flakes (if you’re feeling a little adventurous!), and a good dash of salt and black pepper. Now, get in there and mix everything thoroughly until it transforms into a uniform, pliable “dough.”
- Shape Your Pizza Masterpiece: Carefully transfer this chicken mixture onto your parchment-lined baking sheet. Press it down firmly and evenly. You’re aiming for a thin, round (or rectangular, if you prefer a sheet pan style!) pizza crust shape, roughly ¼-inch thick. The thinner, the crispier!
- Bake the Golden Crust: Slide your chicken crust into the preheated oven. Let it bake for a glorious 28-35 minutes, or until it achieves that perfect golden-brown hue and is wonderfully crispy to the touch. Once baked to perfection, carefully remove it from the oven. This next step is crucial: let it cool slightly on the baking sheet. This cooling period helps it firm up beautifully, ensuring it won’t crumble when you add your delicious toppings.
- Prepare the Zesty Salad: While your amazing crust is chilling out, grab another bowl and toss in your fresh salad greens. Drizzle liberally with your favorite Caesar dressing and toss gently until every leaf is lightly coated in creamy goodness. For an extra touch of irresistible creaminess, sprinkle in a bit more Parmesan cheese and toss one last time.
- Assemble and Enjoy Your Creation: With a gentle touch, slide the now cooled and crispy chicken crust onto your serving plate. Pile the freshly tossed Caesar salad high on top – don’t be shy! Finish off with another generous sprinkle of grated Parmesan, some optional crunchy croutons for that satisfying snap, and a bright squeeze of fresh lemon juice for a zesty, summery kick. Slice it up, serve immediately, and revel in your healthy, incredibly flavorful Summer Chicken Caesar Salad Pizza!
Detailed Different Ways You Can Present the Recipe and How to Serve It
The beauty of the Summer Chicken Caesar Salad Pizza isn’t just in its taste, but also in its versatility for presentation! For a classic “pizza night” feel, slice it into wedges while still on the serving plate and let everyone grab their own piece. You can also pre-slice it into smaller, appetizer-sized squares, making it perfect for a party platter or light finger food at your next summer gathering. To elevate the visual appeal, garnish the top with a sprinkle of finely chopped fresh parsley or chives for a pop of green and herbaceous aroma. A few extra grinds of black pepper will add a sophisticated finish.
Serving is best done immediately after assembling to ensure the chicken crust remains delightfully crispy against the cool, fresh salad. Pair this vibrant pizza with a simple side dish like a light fruit salad (think melon and berries) for a complete summery meal, or a small cup of gazpacho for an extra refreshing touch. Don’t forget those lemon wedges on the side; guests might enjoy an extra squeeze of citrus to brighten up their slice even further. It’s a dish that looks as good as it tastes, making it perfect for any casual get-together or a special weeknight treat.
How You Can Store It and How Long Does It Last
To keep your Summer Chicken Caesar Salad Pizza delicious for longer, proper storage is key! The best way to store leftovers is to keep the crispy chicken crust and the dressed Caesar salad separate. This prevents the salad from making the crust soggy. Place any leftover chicken crust in an airtight container or wrap it tightly in foil and store it in the refrigerator. It will stay good for 2-3 days.
For the salad, if you have any leftover greens already tossed with dressing, consume them within 12-24 hours, as they tend to wilt quickly. Ideally, only dress the amount of salad you plan to eat immediately. If you have undressed greens, store them separately in a sealed bag or container in the fridge for up to 3-4 days. When you’re ready for another serving, simply reheat the chicken crust in the oven (at 350°F/175°C for 5-7 minutes) or a toaster oven until crispy again, then top with fresh or leftover salad. It’s a fantastic way to enjoy this delightful meal more than once!
FAQs
- Can I use fresh chicken instead of canned?
Absolutely! If using fresh chicken, make sure it’s cooked (boiled, baked, or grilled), cooled, and very well shredded. Drain any excess moisture thoroughly before mixing it with the other crust ingredients. - Is this recipe naturally gluten-free?
Yes, with a chicken crust instead of traditional dough, this recipe is naturally gluten-free! Just ensure your Caesar dressing and croutons (if using) are also gluten-free. - Can I prepare the chicken crust ahead of time?
Yes, you can! Bake the chicken crust as directed, let it cool completely, and then store it in an airtight container in the refrigerator for up to 2 days. Reheat in the oven before assembling. - What if I don’t have parchment paper?
While parchment paper is highly recommended for easy cleanup and non-stick results, you can heavily grease your baking sheet with cooking spray or oil if you don’t have it. Just be extra careful when removing the baked crust. - Can I customize the salad greens?
Definitely! While romaine is classic for Caesar salad, feel free to use a mix of greens like spinach, kale, or even spring mix for a different flavor and nutrient profile. - What kind of Caesar dressing should I use?
Use your favorite! A good quality store-bought creamy Caesar dressing works perfectly for convenience, or you can whip up your own homemade version for an extra fresh touch. - How do I ensure the chicken crust gets truly crispy?
The key is pressing the mixture thinly and evenly, and baking it long enough until it’s golden brown and firm. Don’t be afraid to add a few extra minutes to the bake time if it’s not quite crispy enough. - Can I add other toppings to the pizza?
Of course! Once the salad is piled on, you can add extra toppings like crispy bacon bits, halved cherry tomatoes, sliced red onion, or even a sprinkle of grilled corn for more summer flavor. - How can I prevent the salad from making the crust soggy?
Ensure the chicken crust is completely cooled before adding the salad, and only assemble the pizza right before serving. This maintains the crispiness of the crust. - What’s the best way to reheat leftovers?
To reheat leftover chicken crust, place it on a baking sheet and warm it in an oven at 350°F (175°C) for 5-7 minutes, or until it’s crispy again. Then top with fresh salad ingredients.
Summer Chicken Caesar Salad Pizza ☀️
Equipment
- Baking Sheet
- Parchment Paper
Ingredients
Chicken Crust
- 1 can canned chicken about 12.5 ounces, well-drained and shredded
- 1 large egg
- 1/3 cup grated Parmesan cheese
- 1 tsp garlic powder
- 1 tsp red chili flakes (optional)
- salt and black pepper a dash of each
Salad Toppings
- 1 1/2 cups fresh salad greens (like romaine lettuce)
- creamy Caesar dressing your favorite (store-bought or homemade)
- fresh lemon juice a drizzle (optional)
- croutons (optional, for a little crunch)
- grated Parmesan cheese extra, for topping
Instructions
- Preheat your oven to 425°F (220°C). Line a baking sheet with parchment paper for effortless cleanup.
- In a large bowl, combine the well-drained shredded chicken, egg, grated Parmesan cheese, garlic powder, red chili flakes (if you like a little kick!), salt, and black pepper. Mix everything thoroughly until it forms a uniform "dough."
- Transfer this chicken mixture onto the prepared baking sheet. Press it down firmly and evenly into a thin, round (or rectangular) pizza crust shape. Aim for about ¼-inch thickness.
- Pop it into the preheated oven for 28-35 minutes, or until the chicken crust is beautifully golden brown and wonderfully crispy. Once baked, carefully remove it from the oven and let it cool slightly on the baking sheet. This cooling step helps it firm up before you add your toppings.
- While the crust is cooling, place your fresh salad greens in a bowl. Drizzle with your favorite Caesar dressing and toss gently until the greens are lightly coated. Add a sprinkle of extra Parmesan cheese and toss again for an even creamier touch.
- Carefully slide the cooled, crispy chicken crust onto a serving plate. Pile the freshly tossed Caesar salad high on top. Finish with more grated Parmesan, optional crunchy croutons, and a squeeze of fresh lemon juice for a bright, zesty finish. Slice and enjoy your healthy, summery pizza!