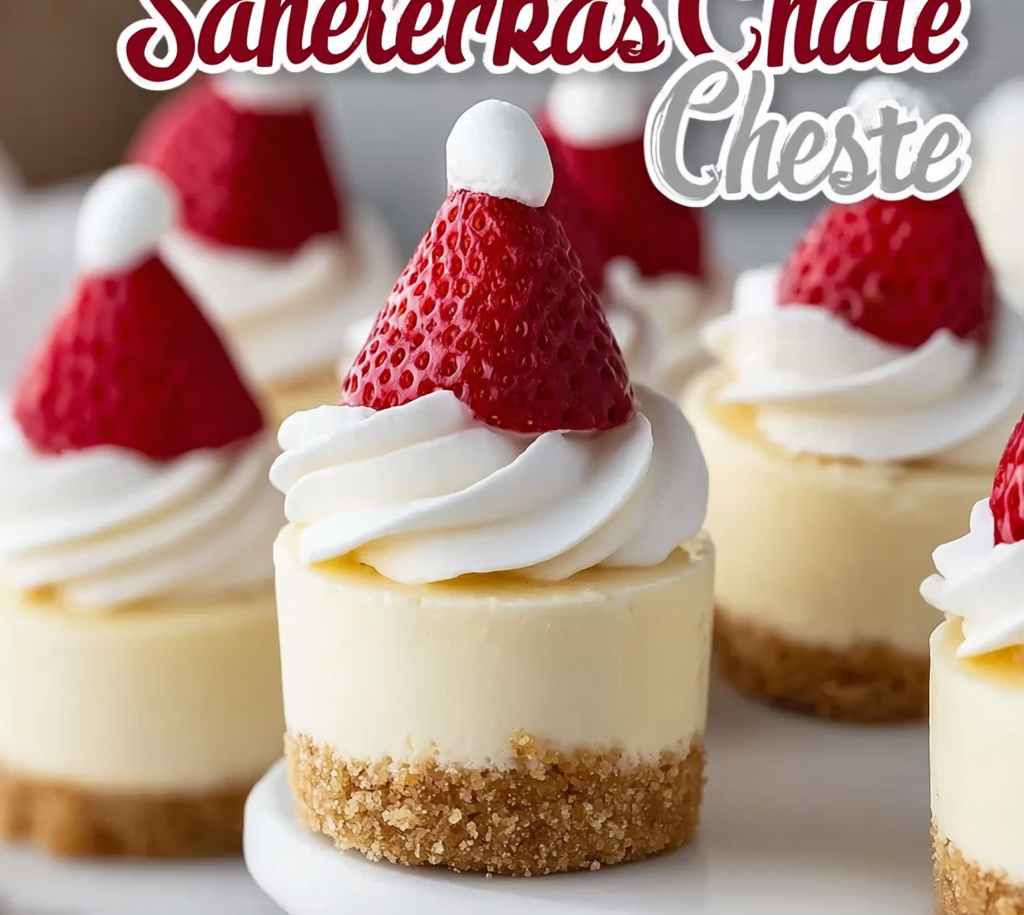
Santa Hat Cheesecake Bites
Delicious mini cheesecakes topped with whipped cream and fresh strawberries, perfect for a festive holiday treat!
Equipment
- Mini cheesecake pan
- Mini Muffin Tin
- Paper Liners
- Small Bowl
- Piping bag
- Star or round tip
- Large mixing bowl
- Wire Rack
- Chilled bowl
Ingredients
FOR THE CRUST
- 1 cup graham cracker crumbs about 8 full sheets
- 2 tablespoons granulated sugar
- 4 tablespoons unsalted butter melted
FOR THE CHEESECAKE FILLING
- 2 blocks full-fat cream cheese 8 oz each, softened at room temperature
- 1/2 cup granulated sugar
- 1 teaspoon vanilla extract
- 2 large eggs at room temperature
- 1/4 cup sour cream
- 1 tablespoon all-purpose flour
- salt Pinch of
FOR TOPPING
- 12 fresh strawberries hulled
- 1 cup heavy whipping cream well-chilled
- 2 tablespoons powdered sugar
- 1/2 teaspoon vanilla extract
Instructions
- Get Ready: Preheat your oven to 325°F (163°C). Line a mini cheesecake pan or a mini muffin tin with paper liners, or lightly grease the cavities if you're using a silicone mold.
- Make the Crust: In a small bowl, combine the graham cracker crumbs, granulated sugar, and melted butter. Stir until the mixture looks and feels like wet sand. Spoon about 1 tablespoon of this mixture into each prepared cavity and press it down firmly with the back of a spoon or a small glass. Bake for just 5 minutes, then take them out and let them cool slightly.
- Prepare the Creamy Filling: In a large mixing bowl, beat the softened cream cheese until it's wonderfully smooth. Add the granulated sugar and mix until everything is fully combined. Gently beat in the eggs one at a time, making sure to scrape down the bowl as needed. Finally, mix in the vanilla extract, sour cream, flour, and a tiny pinch of salt until just incorporated. Remember, don't overmix!
- Fill & Bake: Evenly divide the cheesecake filling among the crusts, filling each cavity almost to the top. Bake for 15–18 minutes, or until the centers look mostly set but still have a slight jiggle. Remove from the oven and let them cool in the pan for 10 minutes. Then, transfer them to a wire rack to cool completely before refrigerating for at least 2 hours, or even overnight, for best results.
- Whip the Cream: In a chilled bowl, beat the cold heavy whipping cream with powdered sugar and vanilla extract until beautiful, stiff peaks form. Transfer this delightful whipped cream to a piping bag fitted with your favorite star or round tip.
- Assemble Santa Hats: Once your mini cheesecakes are perfectly chilled, pipe a lovely swirl of whipped cream on top of each one. Carefully place a hulled strawberry, pointed side up, onto the whipped cream. For that perfect Santa hat look, add a small dot of whipped cream right on the very tip of each strawberry!
Notes
A delightful portion-controlled treat!
Nutrition (per bite):
- Calories: 220
- Total Carbs: 19g
- Net Carbs: 17g
- Fats: 16g
- Protein: 4g
