
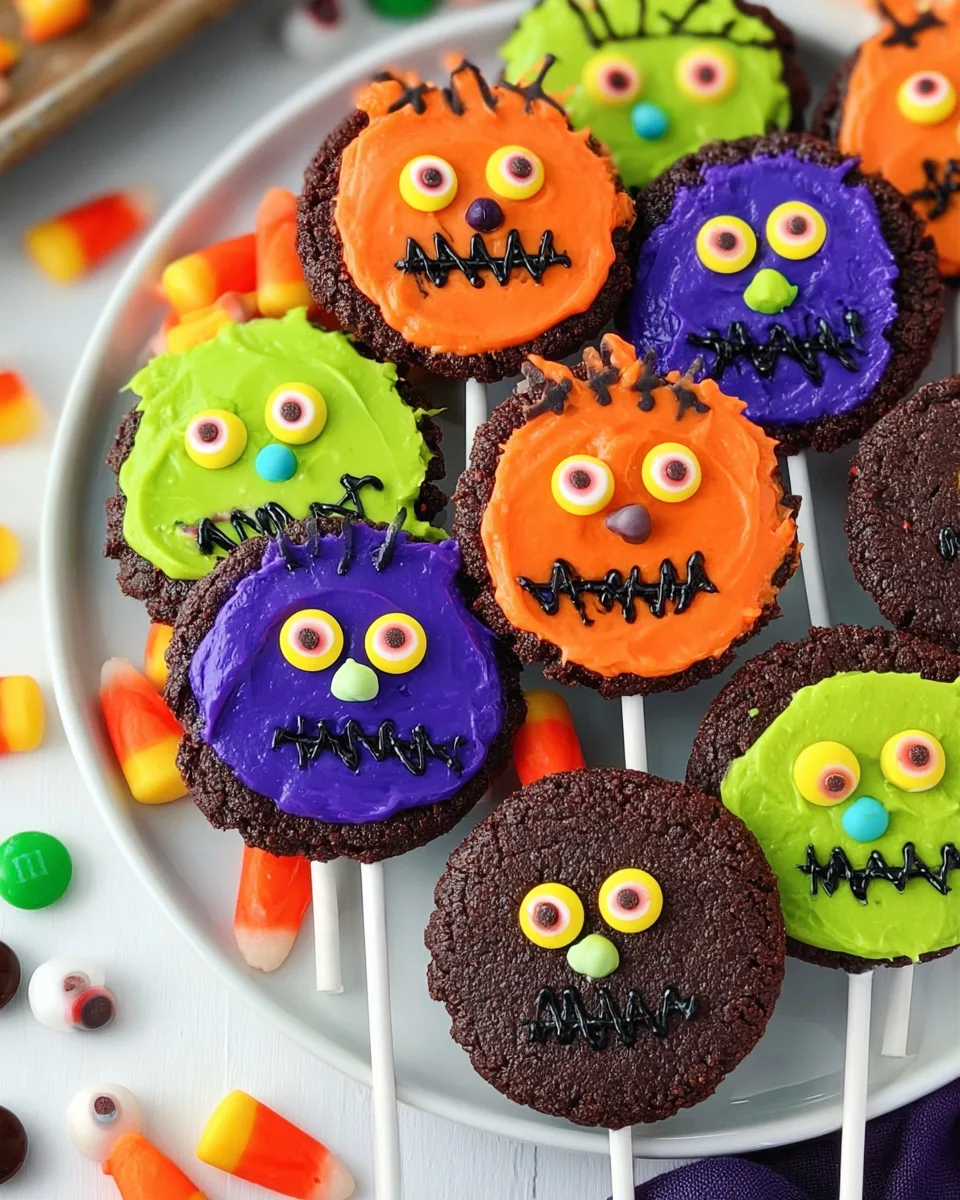
BOO! Ready for the cutest—and yummiest—Halloween treat on a stick? These 🎃 Halloween Chocolate Cookie Pops are rich, fudgy chocolate cookies dressed up like spooky little characters. They’re soft, they’re buttery, and they come alive with frosting, gel faces, and candy eyeballs. Whether you’re baking for a party, a classroom, or just a cozy night of frights, these cookie pops will steal the show (and everyone’s heart). Grab your lollipop sticks and let’s get spooky-baking!
🎯 Why You’ll Love This Recipe
🧾 Ingredients
- 🧈 1 cup butter, softened
- 🍚 2 cups sugar
- 🥚 2 large eggs, room temp
- 🌿 3 tsp vanilla extract
- 🌾 3 cups all-purpose flour
- 🍫 1 cup baking cocoa
- 🧂 ½ tsp baking powder
- 🧂 ½ tsp baking soda
- 🧂 ½ tsp salt
- 🍭 24 lollipop sticks
- 🧁 Prepared vanilla frosting
- 🎨 Food coloring (any color)
- 🖊️ Black & yellow decorating gels
- 🍬 Optional: candy corn, candy eyeballs, M&M’s minis, cinnamon hearts
👩🍳 Step-by-Step Directions
- Heat oven & mix butter + sugar. Preheat to 350°F. In a large bowl, beat softened butter and sugar until smooth and creamy. Add eggs and vanilla; beat well until combined.
- Whisk dry ingredients. In a separate bowl, whisk together flour, cocoa, baking powder, baking soda, and salt. Slowly add the dry mixture to the butter mixture, stirring until a soft dough forms. Don’t overmix.
- Roll & place. Roll dough into 1½-inch balls. Place them 3 inches apart on greased baking sheets. (You can also line with parchment.)
- Insert sticks & flatten. Push a lollipop stick into the center of each ball. Flatten each cookie slightly using a glass dipped in sugar—this gives a nice crinkly top.
- Bake to perfection. Bake for 10–12 minutes, until set but still soft. Cool on baking sheets for 5 minutes, then transfer to a wire rack to cool completely before decorating.
- Decorate! Tint vanilla frosting with food coloring. Spread over each cooled cookie. Use black and yellow gels for faces, and add candy eyes, candy corn, or M&M’s minis. Let your imagination run wild!
🎉 How to Serve & Present
🎃 Spooky character parade – Turn your cookie pops into ghosts (white frosting + black gel eyes), pumpkins (orange frosting + green stem), or mummies (drizzled white frosting with candy eyes).
🍬 Candy bar toppings – After frosting, dip the tops into sprinkles, crushed Oreos, or coconut flakes. Add candy corn for teeth, cinnamon hearts for noses, and M&M’s minis for eyes.
🎈 Party display – Stick the pops into a foam block covered in tissue paper, or arrange them in a large mason jar with candy filler. Perfect for dessert tables or Halloween buffets.
🎁 Goodie bag stars – Wrap each cooled pop in a clear cellophane bag tied with a ribbon. They’re ready for trick-or-treaters, classroom parties, or party favors.
👻 Dip & dunk bar – Set up a decorating station with bowls of frosting, gels, and toppings. Let guests decorate their own cookie pops—endless fun for kids and adults!
📦 Storage & Shelf Life
Room temperature: Store decorated cookie pops in an airtight container at room temp for up to 5–6 days. Keep them in a single layer or separated by wax paper so the decorations stay intact.
Refrigerator: If you used fresh frosting or perishable candies, you can refrigerate them for up to 1 week. Bring to room temp before serving for the best texture.
Freezer (undecorated): Freeze plain baked cookie pops (without frosting) in a freezer-safe bag for up to 3 months. Thaw at room temp, then decorate when ready. Frosted pops can also be frozen for up to 1 month, but the frosting may soften slightly upon thawing.
💡 Pro tip: For extra freshness, add a slice of bread to the container—it absorbs excess moisture and keeps cookies soft.
❓ FAQ – Everything You Need to Know
🎃👻 Happy Halloween Baking! Make these 🎃 Halloween Chocolate Cookie Pops and watch them disappear. 🍪✨
“`
Halloween Chocolate Cookie Pops
Equipment
- Mixing Bowls
- Baking Sheets
- Wire cooling rack
Ingredients
Cookie Dough
- 1 cup butter, softened
- 2 cups sugar
- 2 large eggs room temperature
- 3 tsp vanilla extract
- 3 cups all-purpose flour
- 1 cup baking cocoa
- 1/2 tsp baking powder
- 1/2 tsp baking soda
- 1/2 tsp salt
Decorations
- 24 lollipop sticks
- vanilla frosting prepared
- food coloring various colors
- decorating gels black and yellow
- optional candies candy corn, candy eyeballs, M&M’s minis, cinnamon hearts
Instructions
- Heat oven to 350°F. In a large bowl, mix softened butter and sugar until smooth. Add eggs and vanilla; beat well.
- In a separate bowl, whisk together flour, cocoa, baking powder, baking soda, and salt. Slowly add this dry mix to the butter mixture, stirring until a soft dough forms.
- Roll dough into 1½-inch balls and place them 3 inches apart on greased baking sheets.
- Push a lollipop stick into the center of each ball, then flatten each cookie slightly using a glass dipped in sugar.
- Bake for 10–12 minutes, until set. Let cookies cool on the baking sheets for a few minutes, then transfer to a wire rack to cool completely.
- Tint the vanilla frosting with food coloring, then spread it over each cooled cookie. Use decorating gels and optional candies to make fun Halloween faces.