Why You’ll Love These Boneyard Brownies
Get ready to unearth a dessert that will haunt your dreams (in the best way possible)! Our Boneyard Brownies aren’t just another treat; they’re an experience. Here are four irresistible reasons why you’ll fall head over heels for this recipe:
- Spooktacularly Delicious: Imagine the rich, velvety texture of a red velvet brownie combined with decadent chocolate toppings and the playful crunch of Oreo cookies. These aren’t just brownies; they’re a symphony of flavors that will delight every ghoulish guest.
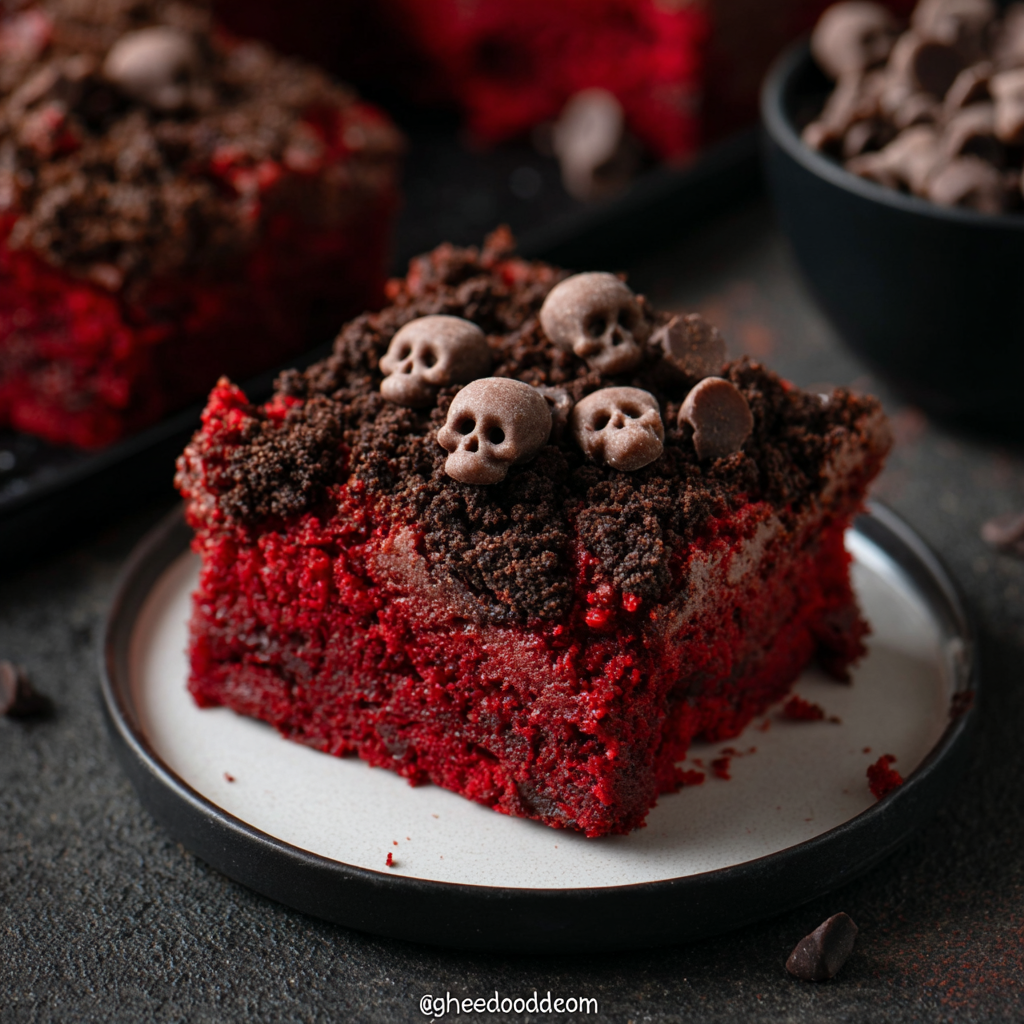
- Vibrantly Visually Stunning: The striking contrast of deep red brownie, rich dark chocolate, black Oreo crumbs, and delicate white chocolate skull chips makes these Boneyard Brownies a showstopper. They’re a feast for the eyes before they even reach your taste buds.
- Effortlessly Impressive: While they look like they took hours, this recipe is surprisingly straightforward. With clear instructions for the brownie base and simple, fun decoration, you’ll be creating bakery-quality desserts without breaking a sweat.
- Perfectly Customizable Fun: Beyond the spooky skull chips, these brownies are a canvas for your creativity. Whether you’re making them for Halloween or a themed party, the joy of decorating adds an extra layer of fun that both kids and adults will adore.
Unearth the Ultimate Spooky Sweet: Boneyard Brownies!
Are you ready to cast a spell of deliciousness this season? Forget your basic brownies; we’re diving headfirst into the deliciously eerie world of Boneyard Brownies! Imagine a brownie so rich, so moist, and so vibrant red, it practically glows in the dark. Now, picture it adorned with a velvety chocolate layer, a sprinkle of dark, mysterious Oreo crumbs, and tiny, chillingly cute chocolate skulls. This isn’t just a dessert; it’s a centerpiece, a conversation starter, and quite possibly, the most bewitching treat you’ll whip up all year. Perfect for Halloween parties, spooky movie nights, or simply satisfying that craving for something uniquely indulgent, these Boneyard Brownies are guaranteed to be a hit. Get ready to bake, decorate, and devour – because these brownies are to die for!
Gather Your Ghoulish Goodies: Ingredients for Boneyard Brownies
To craft these supernatural sweets, you’ll need a few common pantry items and a dash of spooky spirit! Our Boneyard Brownies recipe calls for the perfect balance of sweet, rich, and vibrant ingredients to create that signature red velvet experience.
- 🍫 1 cup all-purpose flour
- 🍫 3 tbsp cocoa powder
- 🧂 ½ tsp salt
- 🧈 ½ cup butter, room temperature (for that melt-in-your-mouth texture)
- 🍚 1 cup sugar
- 🍚 ½ cup brown sugar (adds depth and moisture)
- 🥚 3 large eggs
- 🌿 2 tsp vanilla extract
- 🎨 1 tbsp red food coloring (the secret to that iconic vibrant red!)
- 🍫 1 cup milk chocolate melting wafers, divided (for topping and those adorable skull chips)
- 🍪 8 Oreo cookies, crumbs (for a delightful crunch and color contrast)
- 💀 Chocolate skull chips (garnish – make them ahead for maximum impact!)
These ingredients come together to form a truly magical base for your festive creation. Fresh, quality ingredients will ensure your Boneyard Brownies are as delicious as they are visually stunning.
Conjuring the Boneyard Brownies: Step-by-Step Directions
Whipping up these delightful Boneyard Brownies is easier than raising the dead! Follow these detailed steps to bring your spooky vision to life:
- Preheat & Prepare: Preheat your oven to a welcoming 350°F (175°C). Line an 8×8-inch baking pan with parchment paper, leaving an overhang on the sides – this makes lifting your finished brownies out a breeze!
- Craft Your Skulls (Ahead of Time!): Melt ½ cup of your milk chocolate wafers. The easiest way is in a microwave-safe piping bag or a bowl, heating in 30-second intervals and stirring. Pipe small amounts into tiny skull molds. Freeze for 3-5 minutes until firm, then gently unmold. Repeat until you have enough spooky garnishes.
- Oreo Oblivion: Pulse 8 Oreo cookies in a food processor until they form coarse crumbs. Set these aside for later.
- Creamy Concoction: In a large mixing bowl, cream together the softened butter, granulated sugar, and brown sugar until the mixture is light and fluffy. This usually takes 2-3 minutes.
- The Red Revelation: In a separate small bowl, whisk together the eggs, vanilla extract, and the vibrant red food coloring. Gradually add this mixture to your creamed butter and sugars, mixing on low speed until just combined.
- Dry Ingredients Dance: Sift together the all-purpose flour, cocoa powder, and salt. Gradually add this dry mixture to your wet ingredients, mixing on low speed until just incorporated. Be careful not to overmix; overmixing can lead to tough brownies!
- Bake to Perfection: Pour the luscious red batter evenly into your prepared 8×8-inch pan. Bake for 30-40 minutes, or until a toothpick inserted into the center comes out clean or with a few moist crumbs attached.
- Chocolatey Cloak: Once the brownies are out of the oven, immediately melt the remaining ½ cup of chocolate wafers. Spread this melted chocolate evenly over the warm brownies.
- Oreo Graveyard: While the chocolate is still soft, generously sprinkle the Oreo cookie crumbs over the top.
- Cool & Decorate: Allow the brownies to cool for about 15 minutes. This helps the chocolate topping set slightly. Then, arrange your pre-made chocolate skull chips decoratively on top.
- Slice & Serve: Once completely cool, use the parchment paper overhang to lift the entire brownie slab out of the pan. Cut into 16 equal pieces. Serve your magnificent Boneyard Brownies and watch them disappear!
Presenting Your Boneyard Brownies: Spooky Serving Suggestions
Your stunning Boneyard Brownies are almost ready for their grand debut! The way you present and serve them can elevate the entire experience. Here are some fun and creative ways to showcase your ghoulishly good treats:
- The Graveyard Platter: Arrange your brownies on a dark serving platter. You can add extra crumbled Oreos around the base for a “dirt” effect, or even tiny plastic spiders for an extra creepy touch.
- Individual Coffins: For a themed party, consider placing individual brownies in small, decorative treat boxes or on a square of parchment paper, tied with a black ribbon.
- Warm & Indulgent: Serve a slightly warmed Boneyard Brownie square with a scoop of vanilla bean ice cream or a dollop of freshly whipped cream. A drizzle of chocolate syrup or a sprinkle of additional cocoa powder can add an extra layer of decadence.
- Milk & Cookies Twist: These rich brownies pair perfectly with a cold glass of milk, making them an ideal after-school or late-night treat for all ages.
- Coffee Companion: For adult gatherings, these brownies are a fantastic companion to a hot cup of coffee, espresso, or a spiced latte.
- Dessert Bar Star: If you’re hosting a dessert bar, arrange the Boneyard Brownies alongside other Halloween treats. Their vibrant color and unique toppings will make them stand out.
- Personalized Touch: For a truly special presentation, use a food-safe marker to write spooky messages or names on small white chocolate rounds placed next to each brownie.
No matter how you choose to serve them, these Boneyard Brownies are designed to impress and delight!
Preserving Your Hauntingly Good Boneyard Brownies
Once you’ve experienced the deliciousness of these Boneyard Brownies, you’ll want to make sure every last crumb is savored! Proper storage is key to maintaining their moist texture and rich flavor. Here’s how to keep your spooky treats fresh:
- Room Temperature Storage: The best way to store your Boneyard Brownies for short-term enjoyment is in an airtight container at room temperature. This helps keep them moist and prevents them from drying out. They will stay fresh and delicious for 3-4 days.
- Refrigeration (Optional): If you prefer your brownies chilled, or if your kitchen is particularly warm, you can store them in an airtight container in the refrigerator. This will extend their freshness slightly to about 5-7 days. Just be aware that chilling can sometimes alter the texture, making them a little firmer. For best taste, let them come to room temperature for about 15-20 minutes before serving.
- Freezing for Future Feasts: Yes, you can freeze Boneyard Brownies! For longer storage, wrap individual brownies tightly in plastic wrap, then place them in an airtight, freezer-safe container or freezer bag. They can be frozen for up to 2-3 months. Thaw them at room temperature for several hours or overnight in the refrigerator before serving. The chocolate skull chips might sweat a little upon thawing, but the flavor will still be fantastic.
- Maintaining Topping Integrity: The chocolate topping and Oreo crumbs hold up well. When stacking, you might want to place a sheet of parchment paper between layers to prevent sticking, especially if the chocolate hasn’t fully set or if the environment is warm.
No matter how long they last in your household (which, let’s be honest, probably won’t be very long!), these storage tips will help you enjoy every single bite of your decadent Boneyard Brownies.
FAQs: Digging Deeper into Boneyard Brownies
- Q1: Can I use regular chocolate chips instead of melting wafers?
- A1: While melting wafers are designed for easy melting and a smooth finish, you can use regular chocolate chips for the topping. You might need to add a teaspoon of coconut oil or shortening to help them melt smoothly and spread easily.
- Q2: What if I don’t have skull molds for the chocolate chips?
- A2: No skull molds? No problem! You can get creative. Use mini chocolate chips, white chocolate chunks, or pipe small white chocolate blobs that look like ghosts. Edible candy eyes or simple white chocolate drizzles would also work wonders for your Boneyard Brownies.
- Q3: Can I make these brownies ahead of time for a party?
- A3: Absolutely! These Boneyard Brownies are perfect for making a day or two in advance. Store them in an airtight container at room temperature. The flavors often deepen overnight!
- Q4: How do I get a perfect vibrant red color?
- A4: For the best vibrant red, use a gel food coloring rather than liquid. It’s more concentrated, so you’ll achieve a deeper hue without adding too much moisture to your batter.
- Q5: My brownies came out dry/too gooey. What went wrong?
- A5: Dry brownies often mean they were overbaked. Keep an eye on the baking time and remove them as soon as a toothpick comes out clean. Gooey brownies mean they were underbaked; pop them back in for a few more minutes.
- Q6: Can I use other cookie crumbs instead of Oreos?
- A6: Yes, you can! Graham cracker crumbs, chocolate wafer cookies, or even crushed shortbread cookies would make delicious alternatives for your Boneyard Brownies. Each will give a slightly different flavor and texture profile.
- Q7: How do I cut clean slices of brownies?
- A7: For super clean cuts, ensure the brownies are completely cool. Use a sharp, hot knife (dip it in hot water and wipe dry between each cut). Wipe the knife clean after every slice to prevent dragging crumbs.
- Q8: Are these Boneyard Brownies suitable for kids?
- A8: Definitely! These brownies are a fun and delicious treat for all ages. The spooky decorations make them particularly exciting for children.
- Q9: Can I double the recipe for a larger batch?
- A9: Yes, you can easily double this recipe. Bake it in a 9×13-inch pan, and you might need to increase the baking time slightly. Keep an eye on it for doneness.
- Q10: What if my red food coloring isn’t making it vibrant enough?
- A10: If your red isn’t popping, try adding a tiny drop of brown or black gel food coloring (seriously!) to deepen the red. This trick often helps achieve a richer, more vibrant red velvet hue.
Boneyard Brownies
Equipment
- 8×8-inch Pan
- Parchment Paper
- Piping bag
- Tiny skull mold
Ingredients
- 1 cup all-purpose flour
- 3 tbsp cocoa powder
- 0.5 tsp salt
- 0.5 cup butter room temperature
- 1 cup sugar
- 0.5 cup brown sugar
- 3 large eggs
- 2 tsp vanilla extract
- 1 tbsp red food coloring
- 1 cup milk chocolate melting wafers divided
- 8 Oreo cookies for crumbs
- chocolate skull chips for garnish
Instructions
- Preheat your oven to 350°F and line an 8×8-inch pan with parchment paper.
- Make the skull chips ahead by melting ½ cup of chocolate wafers in a piping bag, piping small amounts into a tiny skull mold, then freezing for 3-5 minutes. Unmold and repeat as needed.
- Pulse Oreo cookies into coarse crumbs and set aside.
- Cream butter and sugars until fluffy.
- In a small bowl, whisk eggs, vanilla, and red food coloring, then add to the creamed mixture, mixing on low.
- Sift flour, cocoa, and salt, then gradually add to the mixture on low speed, avoiding overmixing.
- Pour batter into the prepared pan and bake for 30-40 minutes until a toothpick comes out clean.
- Melt remaining chocolate chips, spread over warm brownies, then sprinkle cookie crumbs.
- Cool for 15 minutes, then decorate with chocolate skull chips.
- Cut into 16 pieces and serve.
Notes
Calories: 250
Total Carbs: 35g (Net Carbs: 30g, Fiber: 5g)
Fats: 12g
Protein: 4g