Ever find yourself dreaming of a scoop of rich, velvety chocolate ice cream but your keto lifestyle whispers, “Hold your horses!”? Well, get ready to unleash those horses because your dreams are about to come true! Imagine a dessert so simple, so quick, and so utterly decadent that it feels almost too good to be true. Say hello to your new favorite obsession: the incredibly easy and utterly delightful Chilled Chocolate Keto Dream Ice Cream. No fancy machines, no endless churning – just a mason jar, a few ingredients, and a little shake-shake-shake to whisk you away to chocolate heaven. Get ready to indulge without the guilt, because this is the keto treat you’ve been waiting for!
Why You’ll Love This Recipe
- Lightning-Fast Prep: Seriously, we’re talking about 5 minutes of actual hands-on work. That’s less time than it takes to decide what to watch next! Perfect for those spontaneous sweet cravings.
- No Special Equipment Needed: Forget about bulky ice cream makers taking up precious counter space. All you need is a mason jar (or a similar sealable container) and your own two hands. It’s DIY dessert at its finest!
- Keto-Friendly Indulgence: With just 3g net carbs per serving, this ice cream is a guilt-free pleasure that fits perfectly into your low-carb lifestyle. Enjoy the creamy, chocolatey goodness without derailing your progress.
- Customizable Dream: While delicious on its own, this recipe is a fantastic base for your creative culinary experiments. Add a sprinkle of nuts, a dash of mint extract, or a swirl of sugar-free caramel – the possibilities are endless!
Ingredients for Your Chilled Chocolate Keto Dream Ice Cream
Gather these simple ingredients to create your dreamy treat:
- 🥛 1 cup Heavy Cream
- ✨ 2 tablespoons Granular Erythritol (or your preferred granulated sugar-free sweetener)
- 🍫 1 tablespoon Unsweetened Cocoa Powder (good quality for rich flavor)
- 🌰 1 teaspoon Vanilla Extract
Detailed Directions: How to Make Your Dream Come True
Let’s get shaking! Here’s a step-by-step guide to crafting your perfect Chilled Chocolate Keto Dream Ice Cream:
- Combine All Goodness: Start by grabbing a spacious, clean mason jar (a quart-sized jar works perfectly, giving you plenty of room to shake). Carefully pour in the star of the show, the heavy cream. Follow that with your chosen granulated sweetener – erythritol is fantastic for its subtle sweetness and lack of aftertaste. Next, spoon in the unsweetened cocoa powder; a good quality brand will truly elevate the chocolate experience. Finish with the fragrant vanilla extract.
- Shake It Up, Baby!: Securely fasten the lid onto your mason jar. Double-check that it’s tight! Now, for the fun part: give it a good, vigorous shake. Don’t be shy! Shake for about 5 minutes straight. You’ll feel the mixture thickening as you go. This energetic shaking isn’t just a good arm workout; it’s crucial for incorporating air, which helps create that wonderfully smooth, slightly thickened texture we’re aiming for. It’s the secret to no-churn magic!
- Chill to Perfection: Once your mixture is beautifully combined and slightly thickened, it’s time for the freezer. You can either place your sealed jar directly into the freezer, or for easier scooping later, transfer the mixture into a shallow metal bread pan or a similar freezer-safe container.
- For Soft-Serve Bliss: If you’re craving a delightful, spoonable soft-serve texture, freeze for approximately 3 hours. It’ll be wonderfully creamy and ready to enjoy.
- For Firm, Scoopable Ice Cream: Prefer a classic, firmer scoop? Let it freeze overnight. Remember, if it becomes extra firm, just let it sit out on the counter for 5-10 minutes before scooping to achieve that perfect consistency.
Presenting and Serving Your Chilled Chocolate Keto Dream Ice Cream
Your homemade Chilled Chocolate Keto Dream Ice Cream is a masterpiece, and serving it should be just as delightful! Here are some fun ways to present and enjoy your treat:
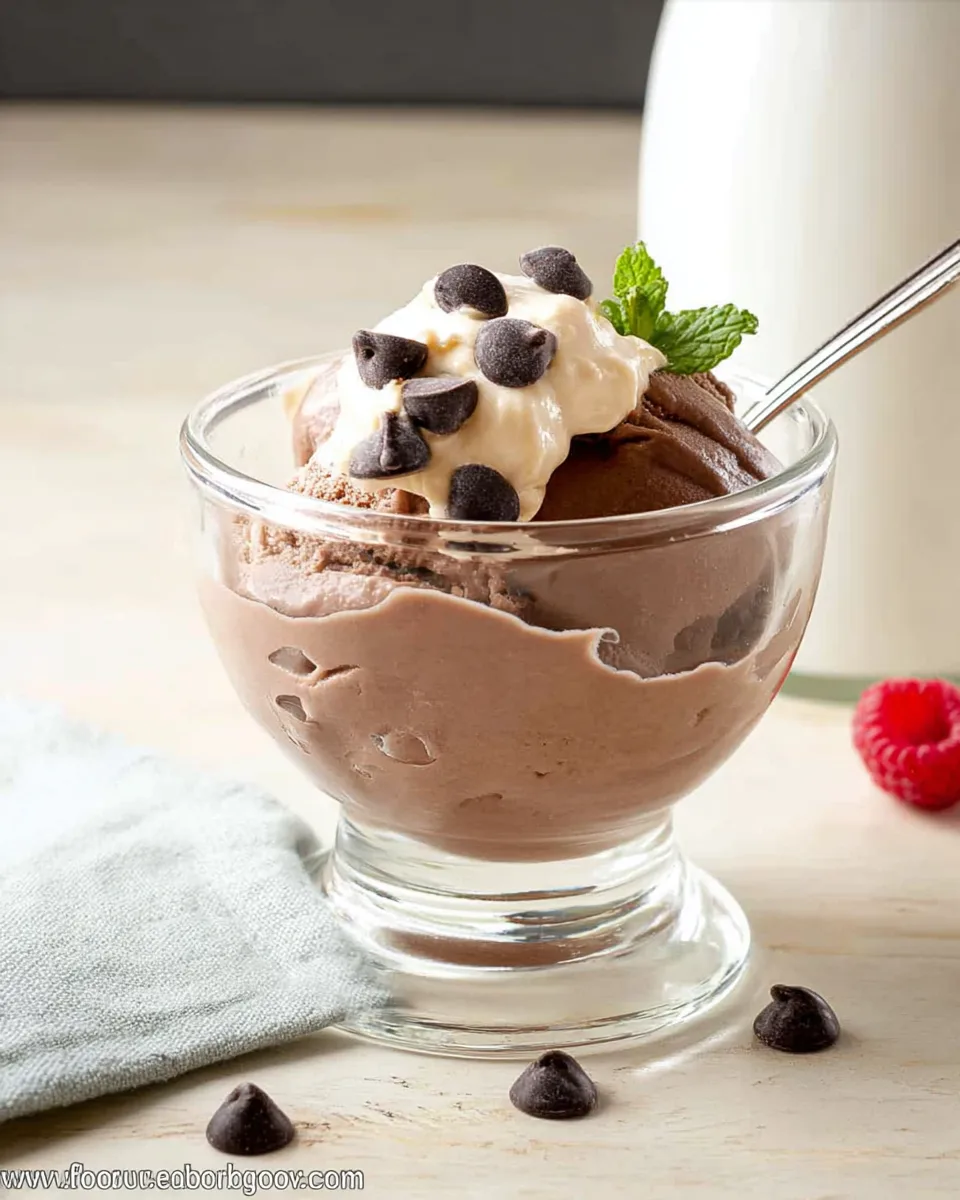
- Classic Scoop: Simple, elegant, and always satisfying. Scoop into small dessert bowls or classic ice cream dishes.
- Sundae Station: Create a keto-friendly sundae bar! Offer sugar-free chocolate syrup, a dollop of fresh whipped cream, a sprinkle of chopped pecans or almonds, and a few fresh raspberries or strawberries (in moderation for keto).
- Keto Affogato: For coffee lovers, place a scoop of your frozen dream into a mug and pour a shot of hot espresso over it. The warm coffee slowly melts the cold ice cream, creating a heavenly concoction.
- Mini Ice Cream Sandwiches: If you have some keto chocolate chip cookies or brownies on hand, spread a softened layer of the ice cream between two cookies for a delightful sandwich.
- Dessert Parfait: Layer your Chilled Chocolate Keto Dream Ice Cream with sugar-free granola, keto brownie crumbles, or a few berries in a tall glass for an impressive parfait.
Remember to let firmer ice cream sit out for a few minutes to soften slightly for easier scooping and a creamier mouthfeel. Enjoy your dreamy creation!
How to Store Your Chilled Chocolate Keto Dream Ice Cream and How Long it Lasts
To keep your delicious Chilled Chocolate Keto Dream Ice Cream fresh and ready for your next craving, proper storage is key:
- Airtight is Right: Always store your ice cream in an airtight container in the freezer. This prevents freezer burn, which can lead to ice crystals forming and an unpleasant texture. If you’re keeping it in the original mason jar, ensure the lid is tightly sealed. If you transferred it to a bread pan, cover it tightly with plastic wrap and then aluminum foil.
- Shelf Life: When stored correctly in an airtight container, your homemade keto ice cream will stay fresh and delicious in the freezer for up to 2-3 weeks. Beyond that, while it will still be safe to eat, the texture and flavor might start to degrade slightly.
- Thawing Tips: If your ice cream is rock hard from extended freezing, simply let it sit on the counter for 5-10 minutes before serving. This allows it to soften to the perfect scoopable consistency without melting completely.
FAQs About Your Chilled Chocolate Keto Dream Ice Cream
- Can I use a different sugar-free sweetener?
Yes! While granular erythritol is recommended for its texture and taste, you can experiment with other granulated sugar-free sweeteners like allulose or a monk fruit/erythritol blend. Adjust to taste, as sweetness levels can vary. - Why do I need to shake it for 5 minutes?
Shaking vigorously incorporates air into the heavy cream and other ingredients. This aeration is what helps create a light, fluffy, and smooth texture, preventing it from freezing into a solid block and giving it that desired soft-serve consistency without an ice cream maker. - My ice cream turned out too hard. What went wrong?
It’s likely frozen too long, or your freezer is extra cold! This is common for no-churn ice creams due to the lack of stabilizers found in commercial varieties. Simply let it sit out on the counter for 5-10 minutes before scooping to soften it to the perfect consistency. - Can I make this dairy-free?
Potentially, yes. You would need to substitute the heavy cream with a full-fat dairy-free alternative like full-fat canned coconut cream (chilled overnight and scooped from the top) or a heavy whipping cream substitute made from almonds or cashews. The texture may vary slightly. - What are “Net Carbs”?
Net carbs are the total carbohydrates in a food minus fiber and sugar alcohols (like erythritol), as these generally don’t impact blood sugar. For keto, focusing on net carbs helps you stay within your daily carb limit. - Can I add mix-ins to this recipe?
Absolutely! Once the mixture is thickened from shaking, gently fold in keto-friendly mix-ins like sugar-free chocolate chips, chopped nuts (pecans, walnuts), a swirl of sugar-free peanut butter, or a dash of mint extract before freezing. - Is a mason jar essential, or can I use another container?
A mason jar is ideal because of its tight-sealing lid and sturdy construction, which allows for vigorous shaking. However, any container with a secure, leak-proof lid that allows for ample shaking space will work. A large protein shaker bottle could be an alternative. - How can I prevent ice crystals?
Using an airtight container is crucial. Also, adding a tiny amount (1/4 teaspoon) of vodka or another alcohol can help slightly lower the freezing point and contribute to a smoother texture, though it’s not strictly necessary. Ensure thorough shaking for good aeration. - Can I double the recipe?
Yes, you can easily double the recipe! Just make sure you use a larger mason jar or container that still allows for plenty of space for shaking and aeration. You might need to shake for a slightly longer period. - What’s the best way to get a rich chocolate flavor?
Using a good quality unsweetened cocoa powder makes a big difference. Dutch-processed cocoa powder often provides a darker color and milder, less bitter chocolate flavor that’s excellent for desserts like this.
Chilled Chocolate Keto Dream Ice Cream 🍦
Equipment
- Mason Jar
- Freezer
- Metal Bread Pan (optional)
Ingredients
- 1 cup Heavy Cream
- 2 tablespoons Granular Erythritol or your preferred granulated sugar-free sweetener
- 1 tablespoon Unsweetened Cocoa Powder good quality for rich flavor
- 1 teaspoon Vanilla Extract
Instructions
- Combine All Goodness: Grab a spacious mason jar and carefully pour in the heavy cream, your chosen granulated sweetener, unsweetened cocoa powder, and vanilla extract.
- Shake It Up: Securely fasten the lid onto the mason jar. Now, give it a good, vigorous shake for about 5 minutes until everything is well combined and slightly thickened. This aeration helps create a smooth texture!
- Chill to Perfection: Place your sealed jar (or transfer the mixture to a metal bread pan for easier scooping later) into the freezer. For a delightful soft-serve texture, freeze for about 3 hours. If you prefer a firmer, scoopable ice cream, let it freeze overnight. Remember to let it sit out for 5-10 minutes before scooping if it's extra firm!
Notes
Calories: 284kcal
Total Carbs: 4g
Net Carbs: 3g
Fats: 29g
Protein: 3g