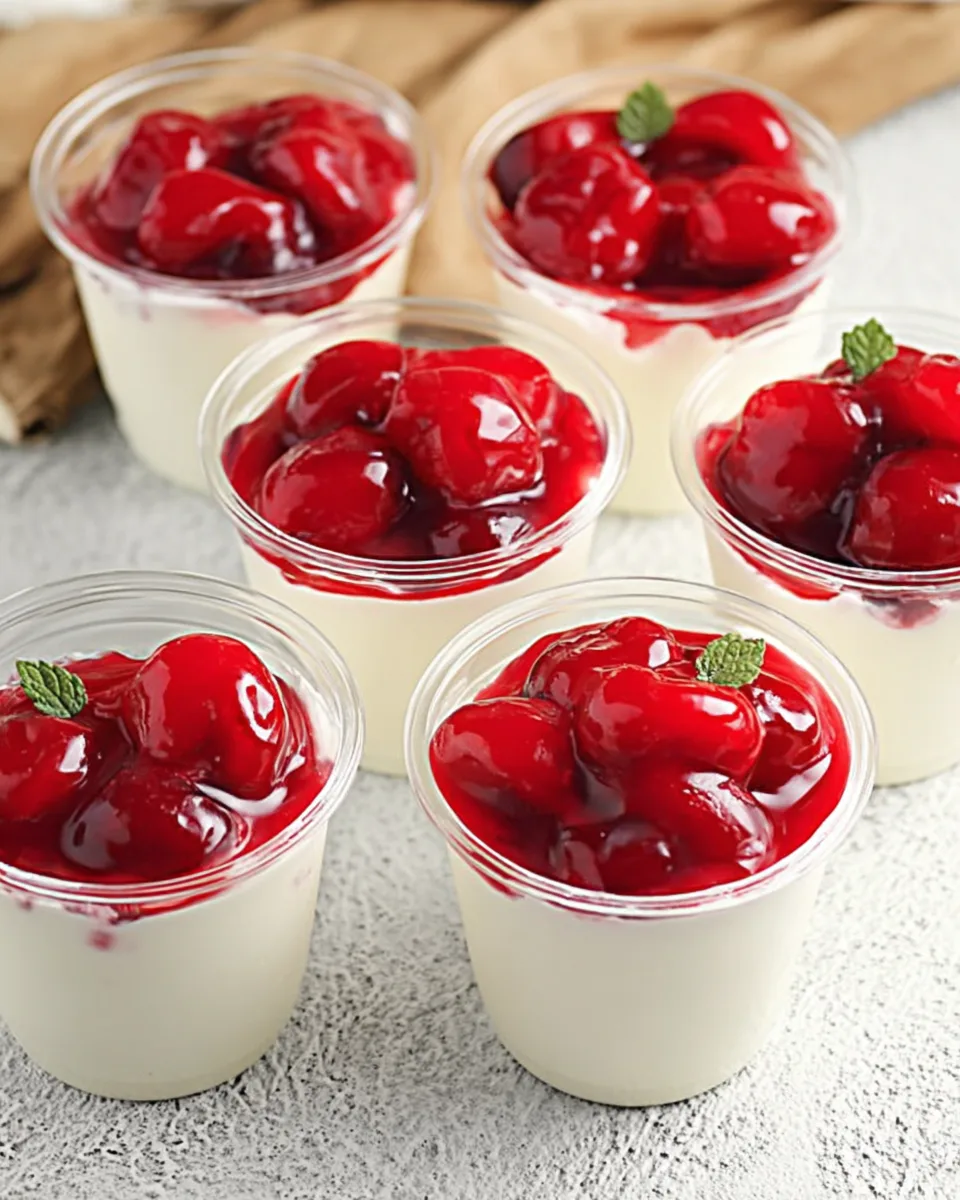
The sun is high, the temperature is soaring, and all you crave is something cool, creamy, and utterly delicious without turning on your oven. Sound familiar? Forget the kitchen inferno and say hello to your new summer obsession! We’re talking about a dessert so light, so refreshing, and so ridiculously easy to make, it’ll become your go-to treat for every sunny occasion. Get ready to dive spoon-first into the delightful world of Refreshing No-Bake Cherry Cheesecake Cups!
Imagine a silky-smooth, tangy cheesecake base, kissed with a hint of vanilla, and topped with vibrant, sweet-tart cherry goodness. Now imagine doing all that in mere minutes of active prep time. Yes, dreams do come true, especially when they involve a no-bake wonder that’s also remarkably low-carb. Perfect for satisfying those sweet cravings without the guilt, these individual cups are a breeze to whip up and even easier to devour. Let’s get started on creating your ultimate summer dessert!
Why You’ll Love These Refreshing No-Bake Cherry Cheesecake Cups
These aren’t just any dessert cups; they’re a revelation! Here are four irresistible reasons why this recipe will earn a permanent spot in your culinary repertoire:
-
1. Effortless Elegance (No-Bake Bliss)
Hate heating up your kitchen during summer? Us too! This recipe requires absolutely no oven time. Simply mix, whip, fold, and chill. It’s the ultimate shortcut to sophisticated dessert perfection, giving you more time to enjoy the sunshine and less time slaving over a hot stove. Perfect for novice bakers and seasoned pros alike!
-
2. Guilt-Free Goodness (Low-Carb & Delicious)
Indulge without the splurge! By using Splenda and zero-sugar cherry pie filling, these cheesecake cups offer all the rich, creamy flavor you crave from a classic cheesecake with a fraction of the carbs. It’s the ideal treat for those managing their sugar intake or simply looking for a lighter dessert option that doesn’t compromise on taste.
-
3. Swift & Simple (Quick Prep)
With just 5 minutes of active preparation, these Refreshing No-Bake Cherry Cheesecake Cups are perfect for last-minute gatherings or when a sudden dessert craving strikes. Most of the “cook time” is chilling, which means you can assemble them quickly and let your refrigerator do all the hard work while you relax.
-
4. Pure Refreshment (Taste Sensation)
Chilled to perfection, these cups deliver a wonderfully cool and invigorating experience. The creamy, tangy cheesecake base beautifully balances the sweet and slightly tart cherry topping, creating a harmonious symphony of flavors that is incredibly satisfying on a warm day. It’s truly the epitome of a refreshing summer dessert!
Ingredients for Your Refreshing No-Bake Cherry Cheesecake Cups
Gather your simple ingredients, and let the magic begin!
- 🧀 8 ounces cream cheese, softened
- 🥣 10 ounces Greek yogurt (or two 5.3-ounce containers)
- 🍬 1/2 cup Splenda sweetener
- 🌿 1 teaspoon vanilla extract
- 🥛 1 cup heavy whipping cream
- 🍒 Zero sugar cherry pie filling, for topping (optional)

Detailed Directions: How to Make Your Refreshing No-Bake Cherry Cheesecake Cups
Follow these easy steps to create your delightful no-bake dessert:
-
Step 1: Create the Cheesecake Base
In a spacious mixing bowl, combine your softened cream cheese, Greek yogurt, Splenda sweetener, and vanilla extract. It’s crucial for the cream cheese to be properly softened to ensure a lump-free mixture. Using an electric mixer on medium speed, beat these ingredients together until the mixture is utterly smooth, light, and creamy. Scrape down the sides of the bowl occasionally to ensure everything is thoroughly incorporated. Set this velvety base aside for a moment.
-
Step 2: Whip the Heavy Cream
Grab a separate, smaller, and very clean mixing bowl (preferably chilled for best results). Pour in your cold heavy whipping cream. Using an electric mixer on high speed, whip the cream until it transforms into beautiful, firm, and stiff peaks. This means when you lift the beaters, the peaks hold their shape without collapsing. Be careful not to over-whip, or it might turn grainy.
-
Step 3: Combine for Lightness
Now for the magic touch! Gently, and we mean gently, fold the freshly whipped cream into your cream cheese mixture. The goal here is to maintain all that wonderful air you just whipped into the cream, which contributes to the cheesecake’s light and airy texture. Use a spatula to scoop from the bottom and fold over, turning the bowl as you go, until everything is just combined and no streaks of white cream remain.
-
Step 4: Portion into Cups
Divide the luscious cheesecake mixture evenly among six small dessert cups, ramekins, or even small Mason jars. You can use a spoon or, for a neater presentation, pipe the mixture into the cups using a large Ziploc bag with the corner snipped off.
-
Step 5: Top with Cherry Goodness (Optional)
If you’re opting for the classic cherry experience, dollop about 2 tablespoons of zero sugar cherry pie filling onto the top of each cheesecake cup. You can spread it gently or leave it as a vibrant mound. Feel free to get creative with other toppings too!
-
Step 6: Chill to Perfection
Place your prepared Refreshing No-Bake Cherry Cheesecake Cups into the refrigerator. It’s essential to chill them for at least 2 hours, and preferably longer (up to 4 hours), to allow them to set beautifully and achieve that perfect cheesecake consistency. This also ensures they are wonderfully cold and refreshing when served. Once set, they are ready to impress!

Presentation Perfection: How to Serve Your Cheesecake Cups
These Refreshing No-Bake Cherry Cheesecake Cups are naturally elegant in their individual servings, making them ideal for parties or a personal treat. Here are some fun ways to present and serve them:
-
Classic Individual Cups:
The simplest and most popular way! Serve them in clear glass dessert cups or ramekins so guests can admire the layers. A small dessert spoon is all you need.
-
Mini Cheesecake Parfaits:
For an extra touch of flair, layer the cheesecake mixture with crumbled low-carb graham crackers, sugar-free shortbread, or even toasted shredded coconut at the bottom of a taller parfait glass. Then add your cherry topping, and repeat the layers for a more dynamic look.
-
Topping Bar Fun:
Lay out a variety of zero-sugar toppings and let your guests customize their own cups! Think fresh mixed berries (strawberries, blueberries, raspberries), sugar-free chocolate shavings, a drizzle of sugar-free caramel or hot fudge sauce, or even a sprinkle of chopped nuts (pecans or almonds).
-
Garnish with Freshness:
Even if you’re using cherry pie filling, a fresh mint leaf or a whole fresh cherry on top can elevate the presentation significantly, adding a pop of color and an aromatic touch.
-
Serving Suggestions:
Always serve these cheesecake cups well-chilled. They are perfect as a light ending to a summer BBQ, a delightful treat for a picnic, or simply a refreshing afternoon snack. Their portion control makes them excellent for calorie-conscious entertaining.
Storage & Shelf Life: Keeping Your Cheesecake Cups Fresh
You’ve put in the effort (minimal as it was!), so you’ll want to ensure your delightful Refreshing No-Bake Cherry Cheesecake Cups stay fresh and delicious. Proper storage is key!
-
Refrigerator Storage:
These cheesecake cups must be stored in the refrigerator due to their dairy content. It’s best to cover them individually with plastic wrap, pressing the wrap gently onto the surface of the cheesecake to prevent a skin from forming and to keep them from absorbing any odors from the fridge. Alternatively, place them in an airtight container.
-
How Long Do They Last?
When stored correctly in the refrigerator, your no-bake cheesecake cups will remain fresh and delicious for about 3 to 4 days. The texture and flavor are best enjoyed within the first 2-3 days.
-
Can You Freeze Them?
While technically you *can* freeze them, it’s generally not recommended for optimal texture. The dairy components (cream cheese, yogurt, whipped cream) can sometimes separate slightly or become a bit grainy upon thawing, especially the whipped cream. For the creamiest, most refreshing experience, stick to refrigerator storage.
Always remember to keep them chilled until just before serving to maintain their perfect refreshing quality!
FAQs About Refreshing No-Bake Cherry Cheesecake Cups
-
1. Can I use regular sugar instead of Splenda?
Yes, you can substitute regular granulated sugar for Splenda in equal amounts (1/2 cup). However, please note that doing so will significantly increase the total carbohydrates and calories of the dessert, making it no longer low-carb.
-
2. Can I use non-fat Greek yogurt?
While you can use non-fat Greek yogurt, full-fat Greek yogurt is highly recommended. The higher fat content contributes significantly to the creamy texture and rich flavor of the cheesecake, making it more satisfying.
-
3. Can I use a different topping than cherry pie filling?
Absolutely! This recipe is incredibly versatile. Feel free to top your cups with fresh berries (strawberries, blueberries, raspberries), a drizzle of sugar-free chocolate syrup, sugar-free caramel, or even other zero-sugar pie fillings like blueberry or apple.
-
4. How far in advance can I make these?
You can prepare these cheesecake cups up to 2-3 days in advance. They need a minimum of 2 hours to chill, but an overnight chill often results in an even better-set and more delicious dessert.
-
5. Is this recipe truly low carb?
Yes, by using Splenda sweetener and zero-sugar cherry pie filling, this recipe is designed to be low in carbohydrates. Always check the labels of your specific ingredients to confirm their carb content.
-
6. Can I freeze these cheesecake cups?
Freezing is not recommended for these specific no-bake cheesecake cups. The texture of the whipped cream and cream cheese can change significantly after freezing and thawing, potentially becoming grainy or watery. They are best enjoyed fresh and chilled from the refrigerator.
-
7. What if my heavy cream isn’t whipping to stiff peaks?
Ensure your heavy cream is very cold, and ideally, your mixing bowl and beaters are also chilled. Overfilling the bowl can also hinder whipping. If it’s still not stiffening, it might be a problem with the cream’s fat content or age. Start with very cold ingredients!
-
8. Do I need an electric mixer for this recipe?
While technically possible to whisk by hand, an electric mixer is highly recommended. It ensures a smooth, lump-free cream cheese mixture and is essential for achieving stiff peaks with the heavy whipping cream, which is crucial for the light, airy texture.
-
9. Can I make a bigger batch?
Yes, this recipe scales up very easily! Simply double or triple the ingredients as needed and use more dessert cups. Just ensure you have enough refrigerator space for chilling!
-
10. What kind of cream cheese should I use?
For the best results, use full-fat block cream cheese (like Philadelphia brand). Avoid using whipped or spreadable cream cheese varieties, as they have a different consistency and can lead to a less firm set.
Refreshing No-Bake Cherry Cheesecake Cups
Equipment
- Large mixing bowl
- Small Mixing Bowl
- Electric Mixer
- Dessert cups or ramekins
Ingredients
- 8 ounces cream cheese softened
- 10 ounces Greek yogurt (or two 5.3-ounce containers)
- 1/2 cup Splenda sweetener
- 1 teaspoon vanilla extract
- 1 cup heavy whipping cream
- Zero sugar cherry pie filling for topping (optional)
Instructions
- In a large mixing bowl, beat together the softened cream cheese, Greek yogurt, Splenda, and vanilla extract until the mixture is completely smooth and creamy. Set this bowl aside.
- In a separate, smaller bowl, use an electric mixer to whip the heavy whipping cream until it forms firm, stiff peaks.
- Gently fold the whipped cream into the cream cheese mixture until everything is well combined and has a light, airy texture.
- Divide the cheesecake mixture evenly among six small dessert cups or ramekins.
- If desired, top each cup with about 2 tablespoons of zero sugar cherry pie filling.
- Place the cups in the refrigerator and chill them for at least 2 hours before serving, allowing them to set perfectly.
Notes
Calories: 472
Net Carbs: 6g
Total Carbs: N/A
Fats: N/A
Protein: N/A