
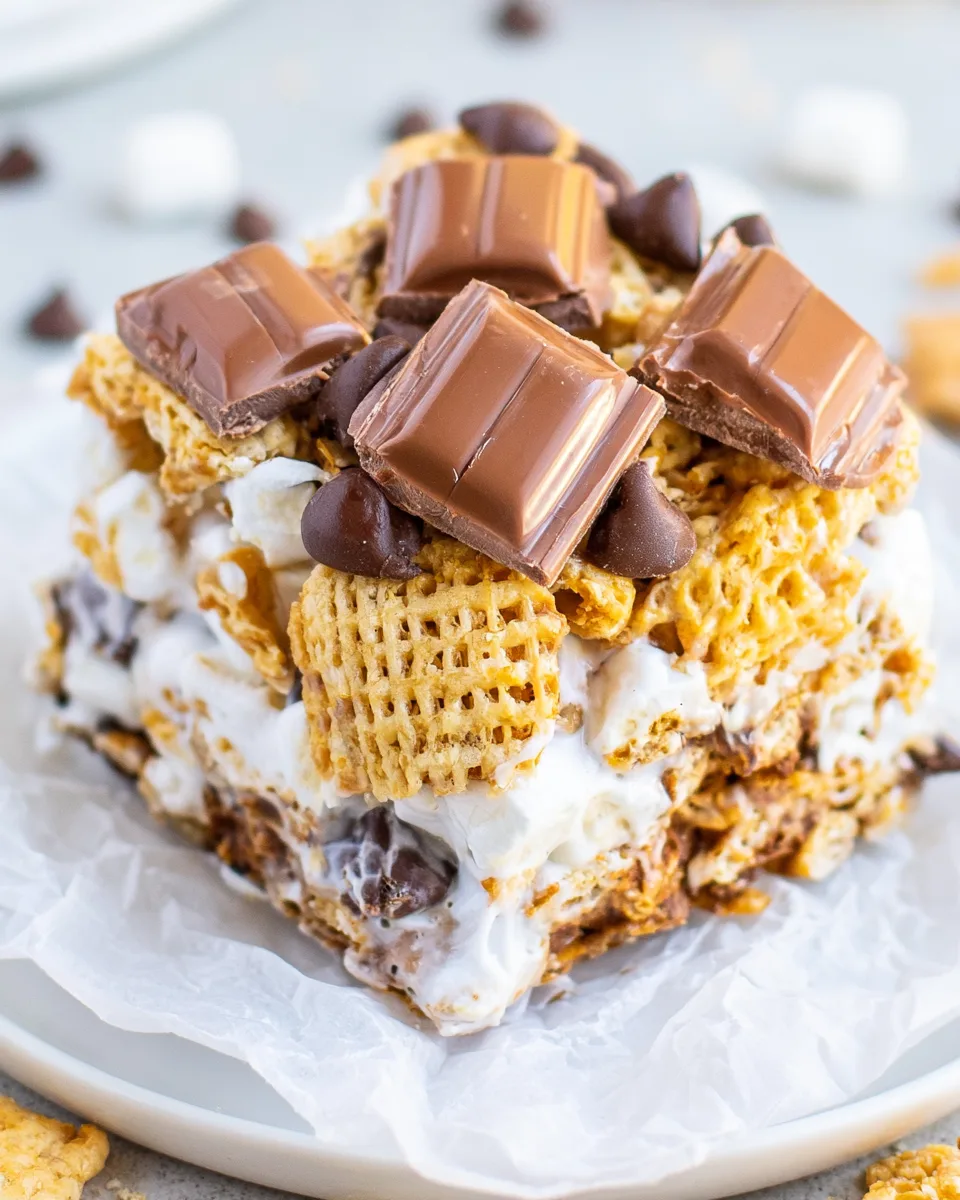
🔥 Campfire vibes without the campfire? Yes, please!
These Easy No-Bake S’mores Krispie Bars! are the ultimate mash-up of crunchy cereal, gooey marshmallow, and melty chocolate — all in one ridiculously simple bar. No oven, no grill, no sweat. Just 5 minutes of prep and you’re 2 hours away from the most epic s’mores experience inside your kitchen. Grab a glass of cold milk and let’s get messy! 🍪✨
💛 Why You’ll Love This Recipe
- 🌞 No oven, no stress: It’s truly no‑bake! The microwave does all the melting, and you never turn on the oven. Perfect for hot summer days or dorm rooms.
- ⏱️ 5‑minute prep, 2‑hour chill: Whipped up faster than you can roast a marshmallow. The hardest part is waiting for them to set!
- 🍫 All the s’mores feels: Golden Grahams crunch, pockets of mini marshmallows, semi‑sweet chips, and Hershey’s pieces on top – it’s a bonanza of textures.
- 👩🍳 Kid‑friendly & foolproof: No complicated techniques. Stir, press, chill. Even the littlest helpers can join in (and snack on chocolate chips).
🛒 Ingredients
- 🍦 6 Tablespoons unsalted butter, cut into cubes
- 🍬 10 ounces jumbo marshmallows (about 40 regular or 20 jumbo)
- ✨ 1 teaspoon vanilla extract
- 🥣 8 cups Golden Grahams cereal (standard 12‑oz box works perfectly)
- 🍫 1 cup mini marshmallows (for those gooey pockets!)
- 🍪 1 cup semi‑sweet chocolate chips
- 🍫 2 Hershey’s chocolate bars, broken into pieces
📝 Tip: Use *jumbo* marshmallows for the base – they melt silkier than minis.
📋 Step-by-Step Directions
- Prepare Your Pan: Lightly spray a 13×9‑inch baking dish with non‑stick spray. Set aside – this is your s’mores canvas.
- Melt the Gooey Base: In a large microwave‑safe bowl, combine the jumbo marshmallows and cubed butter. Microwave for 60 seconds. Stir until completely melted and smooth. If needed, zap in 20‑second bursts. Get it silky!
- Add Flavor: Stir in the vanilla extract. The smell alone will make you grin.
- Mix in the Crunch: Add the Golden Grahams cereal. Fold gently until every piece is coated in marshmallow goodness.
- Fold in the Fun: Carefully stir in the mini marshmallows and semi‑sweet chocolate chips. Distribute evenly – you want a treasure in every bite.
- Press into the Pan: Transfer mixture to the prepared dish. Lightly spray a spatula with non‑stick spray, then press everything down firmly into an even, compact layer.
- Top it Off: Arrange the broken Hershey’s chocolate pieces over the top. Gently press them so they stick. Hello, chocolate crown!
- Chill and Enjoy: Let the bars cool and set at room temperature for about 2 hours. No fridge needed! Then slice into 16 glorious squares.
🔥 Pro move: For extra gooeyness, sprinkle a few extra mini marshmallows on top before the Hershey’s pieces.
🎉 How to Serve & Present These Bars
- Classic picnic style: Arrange bars on a wooden board with a pile of napkins and a pitcher of lemonade or iced tea.
- Dessert kabobs: Cut bars into cubes and thread onto skewers with strawberries and marshmallows – fun for parties.
- Ice cream sundae topper: Crumble a bar over vanilla ice cream, drizzle with chocolate sauce and a cherry.
- Giftable treats: Wrap individually in parchment paper, tie with baker’s twine, and give as “campfire in a box” gifts.
- Camping hack: Make ahead, pack in a cooler, and indulge around a real fire for double the s’mores action.
🧊 Storage & Shelf Life
Store your Easy No-Bake S’mores Krispie Bars! in an airtight container at room temperature – no refrigeration needed. They’ll stay fresh and chewy for up to 5 days. If your kitchen is warm, you can refrigerate, but bring them to room temp before serving for the perfect texture. Pro tip: Layer bars between sheets of wax paper so they don’t stick together. And good luck keeping them around that long! 😅
❓ FAQs – Everything You Need to Know
Absolutely! Cinnamon Toast Crunch, Honey Bunches of Oats, or even crushed graham crackers (mixed with puffed rice) work – but the toasty flavor of Golden Grahams is the s’mores MVP.
Over‑microwaving the marshmallow mixture can make it too stiff. Heat just until melted, and press gently – don’t compact like concrete!
Yes! Use vegan butter, vegan marshmallows (Dandies are great), and dairy‑free chocolate chips. The rest is naturally dairy‑free.
Generously spray the dish with non‑stick spray, and also spray your spatula before pressing. Parchment paper with overhang works even better for easy lifting.
Definitely! Wrap them tightly in plastic wrap, then foil, and freeze for up to 3 months. Thaw 30 minutes at room temp before serving.
Melt the butter and jumbo marshmallows in a heavy saucepan over low heat, stirring constantly until smooth. Proceed with the recipe.
Fold them in gently after the cereal is coated – if you stir too hard, they’ll fall. Also, press the mixture evenly so chips stay suspended.
For sure! Stir in ½ cup chopped peanuts, pecans, or a swirl of peanut butter just before pressing. Peanut butter + s’mores = heaven.
Use a long sharp knife, wipe it clean between cuts, and cut while the bars are fully set (after 2 hours). For extra clean cuts, chill 30 minutes in the fridge.
Golden Grahams contain wheat, so substitute with a gluten‑free crispy rice cereal (like Nature’s Path). Check your marshmallows and chocolate – most are GF!
🔥 Now go make these Easy No-Bake S’mores Krispie Bars! and taste the magic of summer, any day of the year. Happy snacking! 🍫✨
“`
Easy No-Bake S'mores Krispie Bars
Equipment
- 13x9-inch baking dish
- Large microwave-safe bowl
- Spatula
Ingredients
- 6 Tablespoons unsalted butter cut into cubes
- 10 ounces jumbo marshmallows
- 1 teaspoon vanilla extract
- 8 cups Golden Grahams cereal
- 1 cup mini marshmallows
- 1 cup semi-sweet chocolate chips
- 2 Hershey's chocolate bars broken into pieces
Instructions
- Prepare Your Pan: Lightly spray a 13x9 inch baking dish with non-stick spray and set it aside. This helps prevent sticking and makes cleanup a breeze!
- Melt the Gooey Base: In a large microwave-safe bowl, combine the jumbo marshmallows and cubed butter. Microwave for 60 seconds. Remove the bowl and stir well until the mixture is completely melted and smooth. If you need a little more time, microwave in additional 20-second intervals until perfectly smooth.
- Add Flavor: Stir in the vanilla extract until it's fully combined with the warm marshmallow mixture, adding a lovely aroma.
- Mix in the Crunch: Add the Golden Grahams cereal to the bowl. Gently fold everything together until all the cereal is beautifully coated with the marshmallow goodness.
- Fold in the Fun: Carefully stir in the mini marshmallows and semi-sweet chocolate chips. Mix until they are evenly distributed throughout the cereal, ensuring a bite of s'mores in every piece!
- Press into the Pan: Transfer the entire mixture to your prepared baking dish. Grab a spatula, lightly spray it with non-stick spray, and press the mixture down firmly into an even, compact layer.
- Top it Off: Arrange the broken Hershey's chocolate pieces over the top of the bars. Gently press them into the surface so they stick, adding that classic s'mores finish.
- Chill and Enjoy: Let the bars cool and set at room temperature for about 2 hours before slicing them into delicious, ready-to-eat treats. No refrigeration needed!
Notes
Calories: 242 kcal
Total Carbs: 38g
Net Carbs: 36g
Fats: 10g
Protein: 2g
Fiber: 2g (calculated from Total Carbs - Net Carbs)