Why You’ll Love This Festive Holiday Layered Dessert
Get ready to discover your new favorite holiday showstopper! This Festive Holiday Layered Dessert isn’t just a treat for the taste buds; it’s a feast for the eyes and a joy to create. Here are four sparkling reasons why this recipe will become a cherished part of your festive traditions:
- Effortlessly Impressive: It looks like you spent hours slaving away, but with instant pudding and a cookie mix, it comes together surprisingly quickly. You’ll be basking in compliments with minimal fuss!
- A Symphony of Holiday Flavors: Imagine a buttery sugar cookie crust, creamy peppermint cheesecake, vibrant white chocolate (or vanilla/cheesecake) pudding, and light whipped topping. Each layer offers a delightful texture and taste that screams holiday cheer.
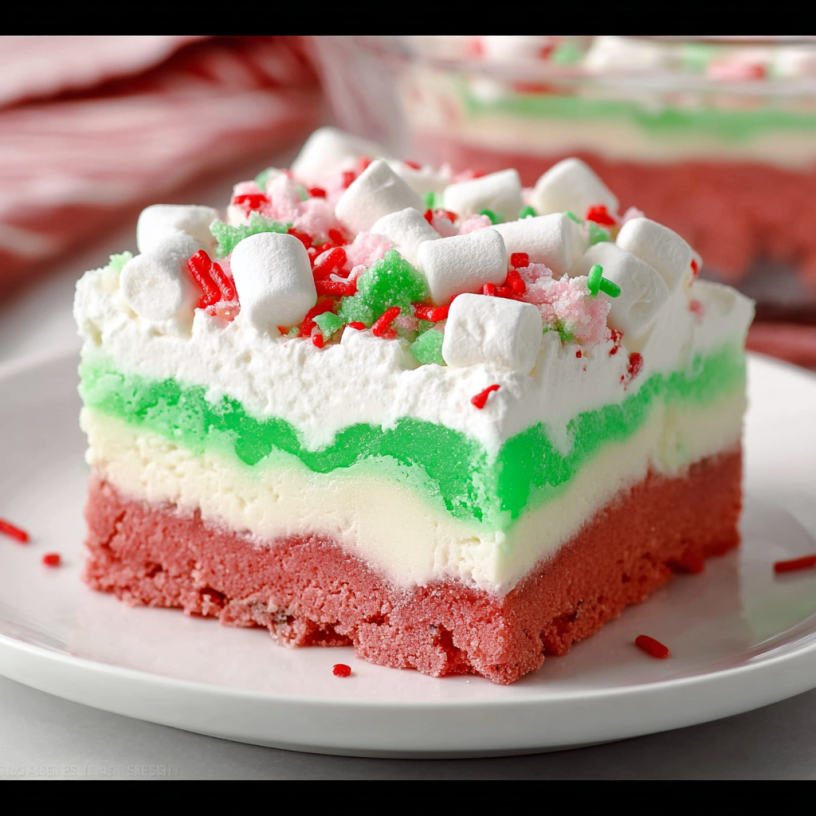
- Picture-Perfect Presentation: With its striking red, white, and green layers, this Festive Holiday Layered Dessert is a visual masterpiece. It’s guaranteed to bright-en up any holiday table and make your guests gasp with delight.
- Crowd-Pleasing & Customizable: Serving 24 people, it’s ideal for large gatherings. Plus, with options for lighter ingredients and various toppings, you can easily tailor it to your dietary needs or personal preferences, making it a hit for everyone!
Unwrap the Magic: Your New Favorite Festive Holiday Layered Dessert!
The holiday season is a time for twinkling lights, cozy evenings, and, of course, absolutely delicious desserts! But let’s be honest, sometimes the idea of baking something spectacular can feel a little… daunting. Fret not, fellow festive foodies! We’re about to introduce you to the ultimate secret weapon for holiday entertaining: the Festive Holiday Layered Dessert.
Imagine a dessert that’s not only vibrant, bursting with holiday colors and flavors, but also deceptively easy to make. This show-stopping creation features a delightful trio of red, white, and green layers, each offering a unique texture and taste that will have your guests reaching for seconds. From its festive sugar cookie base to its creamy peppermint cheesecake layer and luscious green pudding, topped with fluffy whipped cream and a sprinkle of holiday magic, this dessert is designed to bring joy and sparkle to your table. Get ready to bake, chill, and impress!
Gather Your Holiday Baking Essentials
Before we dive into the fun of creating this magnificent Festive Holiday Layered Dessert, let’s make sure you have all the ingredients ready to go. Quality ingredients are the secret to a truly spectacular treat!
- Cookie Base: 1 ½ boxes (approx. 26 ounces) dry sugar cookie mix (opt for a lighter version if available)
- Butter: 1 cup (2 sticks) unsalted butter, softened
- Eggs: 2 large eggs
- Cream Cheese Layer: 4 ounces cream cheese, softened (light cream cheese works well)
- Powdered Sugar: 1 cup powdered sugar
- Whipped Topping: 3 cups whipped topping, thawed (light or sugar-free option recommended)
- Peppermint Extract: 1 teaspoon peppermint extract
- Pudding Layer: 7.8 ounces (two standard 3.9 oz boxes) instant white chocolate pudding mix (or sugar-free vanilla/cheesecake)
- Milk: 3 cups milk (any type, low-fat or almond milk for a lighter option)
- Food Coloring: Red and green food coloring
- Optional Toppings: Mini marshmallows, festive sprinkles, crushed candy canes (for holiday flair)
Your Step-by-Step Guide to a Dazzling Festive Holiday Layered Dessert
Creating this Festive Holiday Layered Dessert is a journey of fun and flavor! Follow these detailed steps to build your beautiful, edible masterpiece.
- The Red Cookie Canvas (Prep & Bake): Begin by preheating your oven to 350°F (175°C). Lightly grease a 9×13 inch baking dish – this is where all the magic will happen! In a roomy bowl, combine your sugar cookie mix, the delightfully softened butter, and the two large eggs. Mix these until they’re perfectly blended into a cohesive dough. Now for the festive touch: stir in a few drops of red food coloring until you achieve a vibrant, holiday-ready shade. Press this red dough evenly into your prepared pan. Bake it for about 35-40 minutes, or until its edges are beautifully golden. Patience is key here – let it cool completely.
- The White Wonderland (Cheesecake Layer): While your cookie base cools, grab a clean bowl and beat the softened cream cheese until it’s wonderfully smooth and creamy, about a minute. Next, mix in the powdered sugar until it’s fully combined. Now for the light and airy part: gently fold in 1 ½ cups of your thawed whipped topping and the peppermint extract until everything is smoothly integrated. Carefully spread this luscious white peppermint cheesecake layer over your completely cooled red cookie base. Once spread, pop the dish into the freezer for a quick set.
- The Green Glee (Pudding Layer): In another bowl, whisk together the instant pudding mix and milk. Keep whisking until it thickens to a lovely pudding consistency. Time for more holiday color! Add green food coloring, a few drops at a time, until your pudding reaches a vibrant, festive green. Remove your dessert from the freezer and carefully spread this green pudding over the white cheesecake layer. Back to the freezer it goes for about 5 minutes, just to help it firm up slightly.
- The Grand Finale (Topping & Chill): Take your gorgeous creation out of the freezer. Gently spread the remaining whipped topping evenly over the bright green pudding layer. For the best, most perfectly set layers, chill your Festive Holiday Layered Dessert in the refrigerator for a good 3-4 hours. This allows all the flavors to meld and the layers to become firm and sliceable.
- Sparkle, Slice & Serve: Just before it’s time to dazzle your guests, unleash your creativity! Sprinkle your chilled dessert with mini marshmallows, an array of festive sprinkles, or crushed candy canes for that extra holiday sparkle and a touch of minty crunch. Slice into neat squares and prepare for applause!
Presentation Perfection: Serving Your Festive Holiday Layered Dessert
Presenting your Festive Holiday Layered Dessert is almost as fun as eating it! This vibrant creation is a natural showstopper, but with a few extra touches, you can elevate its appeal even further. Once chilled and firm, slice your dessert into neat 2×3-inch squares to maximize the display of those stunning red, white, and green layers.
For an individual serving flair, place each square on a small dessert plate. You can add a dollop of extra whipped topping, a single perfect mini marshmallow, or a sprig of fresh mint for an elegant garnish. For a more dramatic effect, create a dessert bar! Arrange the squares on a beautiful festive platter or cake stand, then surround them with small bowls of your optional toppings: more crushed candy canes for an extra zing, iridescent holiday sprinkles for sparkle, chocolate shavings, or even a drizzle of white chocolate syrup. For a truly unique touch, you could use a cookie cutter (if the dessert is very firm) to create festive shapes like stars or trees, though squares typically hold up best to showcase the distinct layers. The key is to let the dessert’s natural beauty shine through, enhanced by thoughtful, holiday-inspired embellishments!
Storing Your Holiday Masterpiece: Festive Holiday Layered Dessert
One of the best things about this Festive Holiday Layered Dessert is that it’s fantastic for making ahead, and it stores beautifully! After its initial chill, any leftovers (if there are any!) should be stored in the refrigerator. To ensure freshness and prevent it from absorbing other fridge odors, cover the baking dish tightly with plastic wrap or aluminum foil. An airtight container is even better if you can transfer slices.
Properly stored in the refrigerator, this delightful dessert will last for 3 to 5 days. The layers will remain distinct and the flavors will stay vibrant. While it’s best enjoyed within the first few days, it will still be delicious a little longer. Freezing is generally not recommended for this particular dessert due to the delicate texture of the whipped topping and pudding, which can become watery upon thawing. Stick to refrigeration for the best quality and enjoyment!
Frequently Asked Questions About the Festive Holiday Layered Dessert
- Q: Can I make this Festive Holiday Layered Dessert ahead of time?
A: Absolutely! This dessert is perfect for making ahead. In fact, it requires several hours of chilling, so preparing it the day before your event is ideal. It allows the layers to set perfectly and flavors to meld beautifully. - Q: Can I use a different type of cookie mix for the base?
A: While a dry sugar cookie mix is recommended for its neutral flavor and firm texture, you could experiment with other dry cookie mixes like shortbread or even a vanilla cake mix (though this might result in a softer base). Ensure it’s a “mix” intended for baking. - Q: I’m not a big fan of peppermint. Can I omit the peppermint extract?
A: Yes, certainly! If peppermint isn’t your favorite, simply leave out the peppermint extract. The cheesecake layer will still be wonderfully creamy, and you can add a touch of vanilla or almond extract instead for a different flavor profile. - Q: Can I use real whipped cream instead of thawed whipped topping?
A: You can, but keep in mind that real whipped cream is less stable than thawed whipped topping. It might not hold its shape as firmly over several days. If you use real whipped cream, stabilize it with a bit of powdered sugar and cream cheese, and plan to serve the dessert sooner. - Q: Is there a gluten-free option for this dessert?
A: Yes! To make this dessert gluten-free, substitute the dry sugar cookie mix with a gluten-free sugar cookie mix. Always double-check that your instant pudding mix and other ingredients are certified gluten-free. - Q: Can I make this Festive Holiday Layered Dessert in a different size pan?
A: While a 9×13 inch pan is ideal for the specified layers, you could potentially use a slightly smaller or larger pan. Be aware that a smaller pan will result in thicker layers and may require a longer baking time for the cookie base, while a larger pan will yield thinner layers. Adjust accordingly. - Q: Why do I need to freeze the layers in between?
A: Freezing the layers for short periods helps them set quickly and prevents them from mixing together when you add the next layer. It ensures clean, distinct lines between your red, white, and green layers. - Q: Can I use regular cooked pudding mix instead of instant pudding?
A: No, it’s essential to use instant pudding mix for this recipe. Regular pudding mix requires cooking and often doesn’t set as firmly or quickly, which is crucial for the layered structure of this Festive Holiday Layered Dessert. - Q: What are the nutritional facts for this dessert?
A: For 24 servings, each serving of this Festive Holiday Layered Dessert is approximately 312 kcal, with 45g Total Carbs (44g Net Carbs), 14g Fats, and 3g Protein. Remember these values can vary slightly based on specific brands and optional toppings used. - Q: What if my cookie base is too crumbly or too soft?
A: If your cookie base is too crumbly, it might be slightly underbaked or didn’t have enough butter/egg. If it’s too soft, it might be overbaked or spread too thin. Ensure you mix the dough well, press it evenly, and bake until the edges are golden, then cool completely for a firm foundation.
“`
Festive Holiday Layered Dessert
Equipment
- 9x13 inch Baking Dish
Ingredients
For the Cookie Base (Red)
- 1.5 boxes dry sugar cookie mix approx. 26 ounces, opt for a lighter version if available
- 1 cup unsalted butter 2 sticks, softened
- 2 large eggs
- red food coloring a few drops
For the Cheesecake Layer (White)
- 4 ounces cream cheese softened, light cream cheese works well
- 1 cup powdered sugar
- 1.5 cups whipped topping thawed, light or sugar-free option recommended
- 1 tsp peppermint extract
For the Pudding Layer (Green)
- 7.8 ounces instant white chocolate pudding mix two standard 3.9 oz boxes, or sugar-free vanilla/cheesecake
- 3 cups milk any type, low-fat or almond milk for a lighter option
- green food coloring a few drops
For the Topping & Decoration
- 1.5 cups whipped topping remaining from the total 3 cups
- mini marshmallows optional
- festive sprinkles optional
- crushed candy canes optional
Instructions
- Prep the Pan & Oven: Get your oven ready at 350°F (175°C). Lightly grease a 9x13 inch baking dish.
- Craft the Cookie Base (Red): In a large bowl, combine the cookie mix, softened butter, and eggs. Mix until well blended. Stir in a few drops of red food coloring to get a festive shade. Press this dough evenly into your prepared pan. Bake for about 35-40 minutes, or until the edges are golden. Let it cool completely.
- Whip up the Cheesecake Layer (White): In a clean bowl, beat the softened cream cheese until smooth and creamy (about 1 minute). Mix in the powdered sugar until fully combined. Gently fold in 1 ½ cups of thawed whipped topping and the peppermint extract until smooth. Spread this creamy layer over the cooled cookie base and pop it into the freezer to set.
- Create the Pudding Layer (Green): Whisk together the instant pudding mix and milk in a bowl until thickened. Add green food coloring, a few drops at a time, until you reach a vibrant green. Carefully spread this green pudding over the cheesecake layer. Return the dish to the freezer for about 5 minutes to firm up slightly.
- Add the Festive Topping & Chill: Remove the dish from the freezer. Spread the remaining whipped topping evenly over the green pudding layer. For best results, chill the dessert in the refrigerator for 3-4 hours before serving to allow all the layers to set perfectly.
- Decorate & Serve: Just before serving, get creative with your toppings! Sprinkle with mini marshmallows, festive sprinkles, or crushed candy canes for that extra holiday sparkle. Slice into squares and enjoy!
Notes
Calories: 312 kcal
Total Carbs: 45g
Fats: 14g
Protein: 3g