Why You’ll Love This Easy Pumpkin Pull Apart Bread Recipe
Get ready to fall head over heels for this incredible Easy Pumpkin Pull Apart Bread! It’s not just a recipe; it’s an experience, a cozy hug in bread form. Here are four irresistible reasons why this will become your new autumn favorite:
- Effortlessly Delicious: Using pre-made refrigerated biscuits means less fuss and more fun! You’ll be amazed at how such simple steps lead to such a show-stopping treat.
- Ultimate Fall Flavor: Packed with real pumpkin puree and a generous helping of warm pumpkin pie spice, every bite screams autumn. It’s the perfect way to welcome the season!
- Perfect for Sharing (or Not!): Whether you’re hosting a brunch, need a quick dessert, or just want a cozy snack, this pull-apart bread is designed for easy sharing. Just grab and tear!
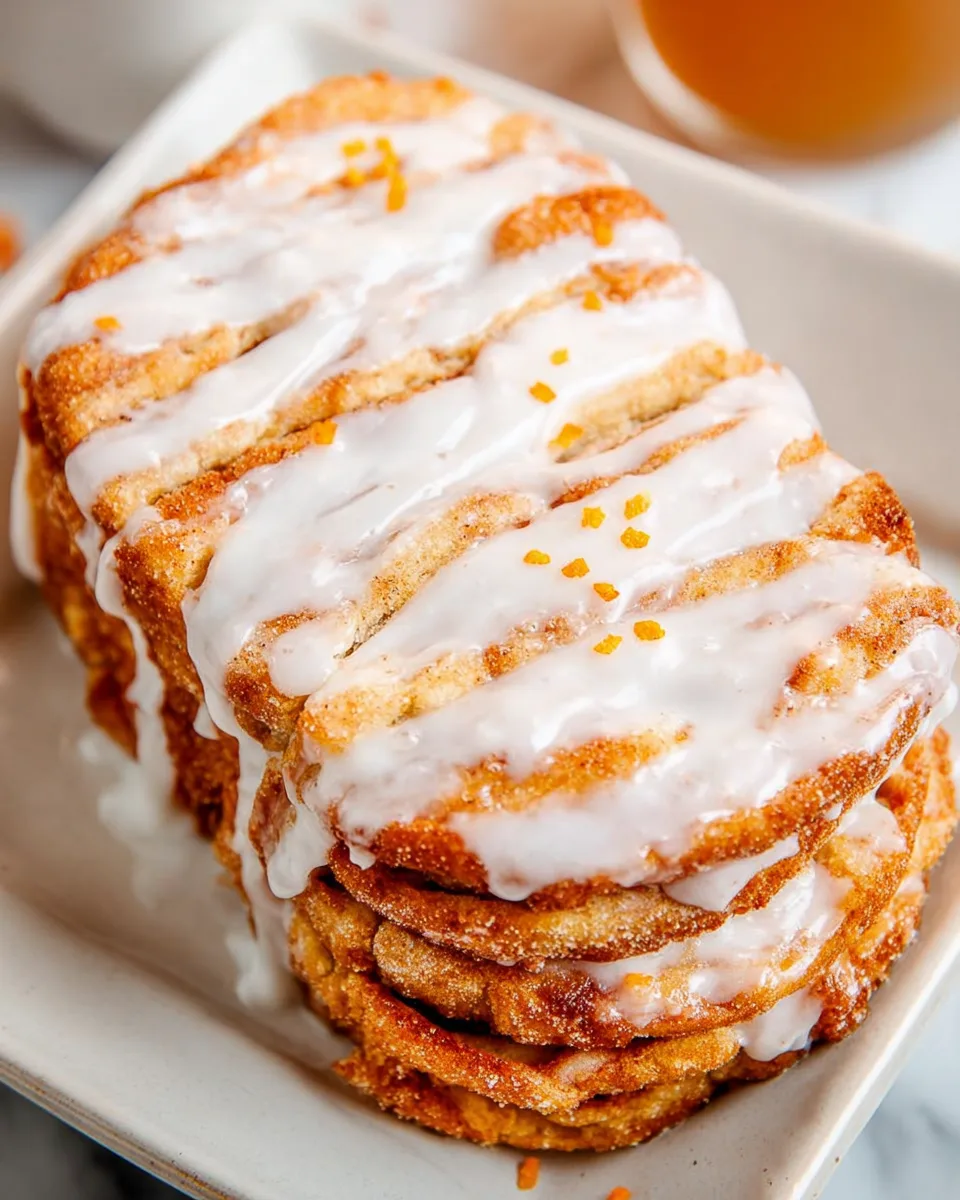
- Impressive & Beautiful: Despite its simplicity, the finished loaf looks absolutely stunning with its golden crust, luscious filling, and sweet drizzle. Your guests will think you spent hours in the kitchen!
Welcome Fall with the Ultimate Easy Pumpkin Pull Apart Bread!
The air is crisp, leaves are beginning to paint the landscape in hues of gold and crimson, and there’s that undeniable craving for all things warm, spicy, and pumpkin. If you’re anything like us, your kitchen counter is practically begging for a seasonal masterpiece, but who has hours to spend slaving away? Fear not, fellow fall flavor fanatics! We’re about to introduce you to the holy grail of autumn baking: the Easy Pumpkin Pull Apart Bread. This recipe is your ticket to a magical fall experience, combining the comforting warmth of pumpkin and spice with the sheer joy of a gooey, tear-apart bread. It’s so simple, so satisfying, and utterly irresistible – prepare to become a pumpkin pull-apart bread baking legend!
Gather Your Goodies: Ingredients for Easy Pumpkin Pull Apart Bread
Before we dive into the fun, let’s make sure you have all the essentials for creating your dreamy Easy Pumpkin Pull Apart Bread. Good news: most of these are likely already in your pantry!
- 1 (16.3 ounce) can refrigerated biscuits (8 count) 🍞
- 8 tablespoons (1 stick) salted butter, melted 🧈
- 1 cup granulated sugar 🍚
- 2 teaspoons pumpkin pie spice 🍂
- ½ cup pure pumpkin puree 🎃
- 2 tablespoons brown sugar (or extra granulated sugar) 🍯
- ½ teaspoon pumpkin pie spice (for pumpkin filling) ✨
- 1 cup powdered sugar ❄️
- 1 to 2 tablespoons milk (or half and half) 🥛
- ½ teaspoon vanilla extract 🌿
Your Step-by-Step Guide to Baking Easy Pumpkin Pull Apart Bread
Ready to transform simple ingredients into a fall masterpiece? Follow these detailed steps to create your very own Easy Pumpkin Pull Apart Bread that will have everyone reaching for more!
- Get Ready for Action: First things first, preheat your oven to a cozy 350°F (175°C). While it’s warming up, grab a 9×5 inch loaf pan and give it a light greasing. This small step is a big deal – it ensures your gorgeous bread slides out easily.
- Biscuits, Transformed: Carefully pop open that can of refrigerated biscuits. Separate each biscuit, then, with a sharp knife, slice each one neatly in half lengthwise. Voilà! You’ll now have 16 smaller, perfect-for-layering biscuit pieces.
- The Flavor Stations: Set up your assembly line! In your first small bowl, melt the salted butter until it’s smooth and glistening. In a second bowl, whisk together the 1 cup of granulated sugar and 2 teaspoons of pumpkin pie spice – this is your flavorful coating. For the star of the show, the delicious pumpkin filling, combine the pure pumpkin puree, brown sugar, and the remaining ½ teaspoon of pumpkin pie spice in a third bowl. Mix until everything is beautifully combined.
- Assemble with Love: This is where the magic happens! Take one of your biscuit halves, give it a quick dip in the melted butter, ensuring both sides get a little love. Next, gently dredge it in the sugar-spice mixture until it’s wonderfully coated. Now, spread about 1 to 2 teaspoons of that heavenly pumpkin filling onto one side of your coated biscuit.
- Build Your Loaf of Dreams: Carefully place your prepared biscuit piece into the greased loaf pan, leaning it gently against one side. Continue this delightful process with all the remaining biscuit pieces, stacking them neatly and somewhat upright in the pan. The goal is to create a lovely “pull-apart” effect once baked.
- Bake to Golden Perfection: Slide your masterpiece into the preheated oven and let it bake for 40 to 45 minutes. Keep an eye on it – you’re looking for a beautiful golden brown color on top. If you notice it browning a little too enthusiastically, simply tent it loosely with a piece of aluminum foil to prevent over-browning.
- Patience, My Friend: Once baked, carefully remove the bread from the oven. The hardest part? Letting it cool completely in the pan on a wire rack. We know it smells amazing, but this crucial step allows the bread to set properly, making for a perfect pull-apart experience.
- Whip Up the Sweet Drizzle: While your bread cools, let’s make the crowning glory! In a small bowl, whisk together the powdered sugar, 1 tablespoon of milk (or half and half), and vanilla extract until you have a smooth, creamy glaze. If it feels a bit too thick, add the second tablespoon of milk, just a little at a time, until it reaches that perfect, pourable drizzling consistency.
- Drizzle & Delight: Once your Easy Pumpkin Pull Apart Bread is completely cool, it’s time for the grand finale! Generously drizzle that sweet vanilla glaze all over the top. Now, it’s truly ready to be torn apart and savored, bite by cozy bite. Enjoy!
Serve It Up! Creative Ways to Enjoy Your Easy Pumpkin Pull Apart Bread
Your Easy Pumpkin Pull Apart Bread is a versatile star, ready to shine in many different settings! While it’s absolutely fantastic on its own, here are some delightful ways to present and serve this fall-favorite:
- Brunch Centerpiece: Make it the star of your weekend brunch! Serve it warm with a side of fresh fruit, a dollop of whipped cream, or even a scoop of vanilla bean ice cream for a truly decadent start to the day.
- Cozy Coffee Break Companion: There’s nothing quite like a slice (or several pulled-apart pieces) of this pumpkin bread with a hot mug of coffee, tea, or a pumpkin spice latte. It’s the ultimate afternoon pick-me-up!
- Autumn Dessert: Elevate it to dessert status! Serve warm slices with a scoop of vanilla or cinnamon ice cream, a sprinkle of toasted pecans, or a light dusting of extra pumpkin pie spice.
- Holiday Gathering Treat: This bread makes a wonderful addition to any holiday table, from Thanksgiving breakfast to a casual fall get-together. Its pull-apart nature encourages sharing and conversation.
- Customize Your Drizzle: Feeling adventurous? Try adding a pinch of cinnamon or nutmeg to your glaze, or even a tiny splash of maple extract for a maple-vanilla twist.
- Garnish with Flair: A few candied pecans, a light dusting of powdered sugar, or even some edible glitter can make your loaf look extra special.
Storing Your Delicious Easy Pumpkin Pull Apart Bread
You’ve baked a masterpiece, and while it’s tempting to devour it all in one sitting, here’s how to properly store your Easy Pumpkin Pull Apart Bread to keep it fresh and delicious for longer:
- Room Temperature: If you plan to enjoy the bread within 2-3 days, it’s best to store it in an airtight container at room temperature. This helps maintain its soft texture. Make sure it’s completely cooled before storing to prevent condensation, which can make it soggy.
- Refrigeration: To extend its freshness, you can store the pull-apart bread in an airtight container in the refrigerator for up to 5 days. Be aware that refrigeration can sometimes alter the texture slightly, making it a bit firmer.
- Freezing for Longer: For longer storage, this bread freezes wonderfully! Once completely cooled, wrap the entire loaf (or individual slices) tightly in plastic wrap, then an additional layer of aluminum foil. Store in the freezer for up to 2-3 months. Thaw at room temperature or warm gently in the oven before serving.
- Reheating: To enjoy warm slices, simply pop individual pieces into the microwave for 15-30 seconds, or wrap the whole loaf loosely in foil and reheat in a 300°F (150°C) oven for about 10-15 minutes, or until warmed through.
FAQs About Easy Pumpkin Pull Apart Bread
- Q1: Can I use unsalted butter instead of salted butter?
- A1: Yes, you can! If using unsalted butter, simply add a pinch of salt (about ¼ teaspoon) to your sugar-spice mixture to enhance the flavors.
- Q2: What if I don’t have pumpkin pie spice?
- A2: No problem! You can create your own blend. For 1 teaspoon of pumpkin pie spice, mix ½ teaspoon cinnamon, ¼ teaspoon ginger, ⅛ teaspoon nutmeg, and a tiny pinch of cloves.
- Q3: Can I use a different size loaf pan?
- A3: A 9×5 inch loaf pan is ideal. If you use a larger pan, the bread might be flatter and bake quicker. A smaller pan might overflow or require more baking time. Adjust baking time and monitor closely if you use a different size.
- Q4: How do I know when the Easy Pumpkin Pull Apart Bread is fully baked?
- A4: Look for a deep golden brown color on top. You can also insert a thin knife or skewer into the center; if it comes out mostly clean (a few moist crumbs are okay), it’s likely done.
- Q5: Can I make this Easy Pumpkin Pull Apart Bread ahead of time?
- A5: Yes, you can bake it the day before and store it at room temperature. Glaze just before serving for the freshest look. The glaze can be made ahead and stored in the fridge, then whisked again before drizzling.
- Q6: Is canned pumpkin puree okay, or do I need fresh?
- A6: This recipe is designed for canned pure pumpkin puree (not pumpkin pie filling). Fresh pumpkin puree can be used, but ensure it’s thick and well-drained to avoid making the bread too moist.
- Q7: Can I add nuts or other mix-ins to the Easy Pumpkin Pull Apart Bread?
- A7: Absolutely! A sprinkle of chopped pecans or walnuts in the sugar-spice mixture or on top of the pumpkin filling would be delicious. Just be mindful of the added bulk in the pan.
- Q8: What if I don’t like the vanilla glaze?
- A8: You can omit it entirely, or try a different glaze! A simple cream cheese glaze (powdered sugar, cream cheese, milk, vanilla) or a maple glaze would also be fantastic.
- Q9: Can I use gluten-free biscuits for this recipe?
- A9: While the recipe hasn’t been tested with gluten-free biscuits, you could try using your favorite brand. Baking times and texture might vary, so keep a close eye on it.
- Q10: How do I prevent the Easy Pumpkin Pull Apart Bread from sticking to the pan?
- A10: Thoroughly greasing your loaf pan (with butter, cooking spray, or a non-stick baking spray) is key. Don’t skip this step! Allowing it to cool completely in the pan also helps it release cleanly.
Easy Pumpkin Pull Apart Bread 🎃
Equipment
- Loaf Pan
- Wire Rack
Ingredients
- 1 can refrigerated biscuits (16.3 ounce, 8 count)
- 8 tablespoons salted butter (1 stick), melted
- 1 cup granulated sugar
- 2 teaspoons pumpkin pie spice
Pumpkin Filling
- 0.5 cup pure pumpkin puree
- 2 tablespoons brown sugar (or extra granulated sugar)
- 0.5 teaspoon pumpkin pie spice
Glaze
- 1 cup powdered sugar
- 1 to 2 tablespoons milk (or half and half)
- 0.5 teaspoon vanilla extract
Instructions
- Preheat your oven to 350°F (175°C) and lightly grease a 9x5 inch loaf pan. This simple step ensures your beautiful bread won't stick!
- Carefully separate each biscuit and then slice each one in half lengthwise. You'll end up with 16 smaller biscuit pieces, perfect for layering.
- In one small bowl, melt the butter until smooth. In a separate bowl, stir together the 1 cup granulated sugar and 2 teaspoons pumpkin pie spice. For your delicious pumpkin filling, combine the pumpkin puree, brown sugar, and the remaining ½ teaspoon pumpkin pie spice in a third small bowl, mixing until everything is well combined.
- Take one biscuit half, dip it briefly into the melted butter, then gently dredge it in the sugar-spice mixture until coated. Next, spread about 1 to 2 teaspoons of the pumpkin filling onto one side of the coated biscuit.
- Place the prepared biscuit piece in your greased loaf pan, leaning it against one side. Continue this process with all the remaining biscuit pieces, stacking them neatly in the pan to create your "pull-apart" loaf.
- Pop the loaf pan into your preheated oven and bake for 40 to 45 minutes. Look for a gorgeous golden brown color on top. If it starts browning too quickly, you can lightly cover it with aluminum foil.
- Once baked, remove the bread from the oven and let it cool completely in the pan on a wire rack. This is an important step to allow the bread to set before glazing.
- In a small bowl, whisk together the powdered sugar, 1 tablespoon of milk, and vanilla extract until you have a smooth, creamy glaze. If it seems too thick, add the second tablespoon of milk, a little at a time, until it reaches a perfect drizzle consistency.
- Generously drizzle the sweet vanilla glaze over your cooled pumpkin pull-apart bread. Now it’s ready to tear apart and savor every cozy bite!
Notes
Nutrition Information (per serving):
- Calories: 486 kcal
- Total Carbs: 73 g
- Fats: 21 g
- Protein: 4 g