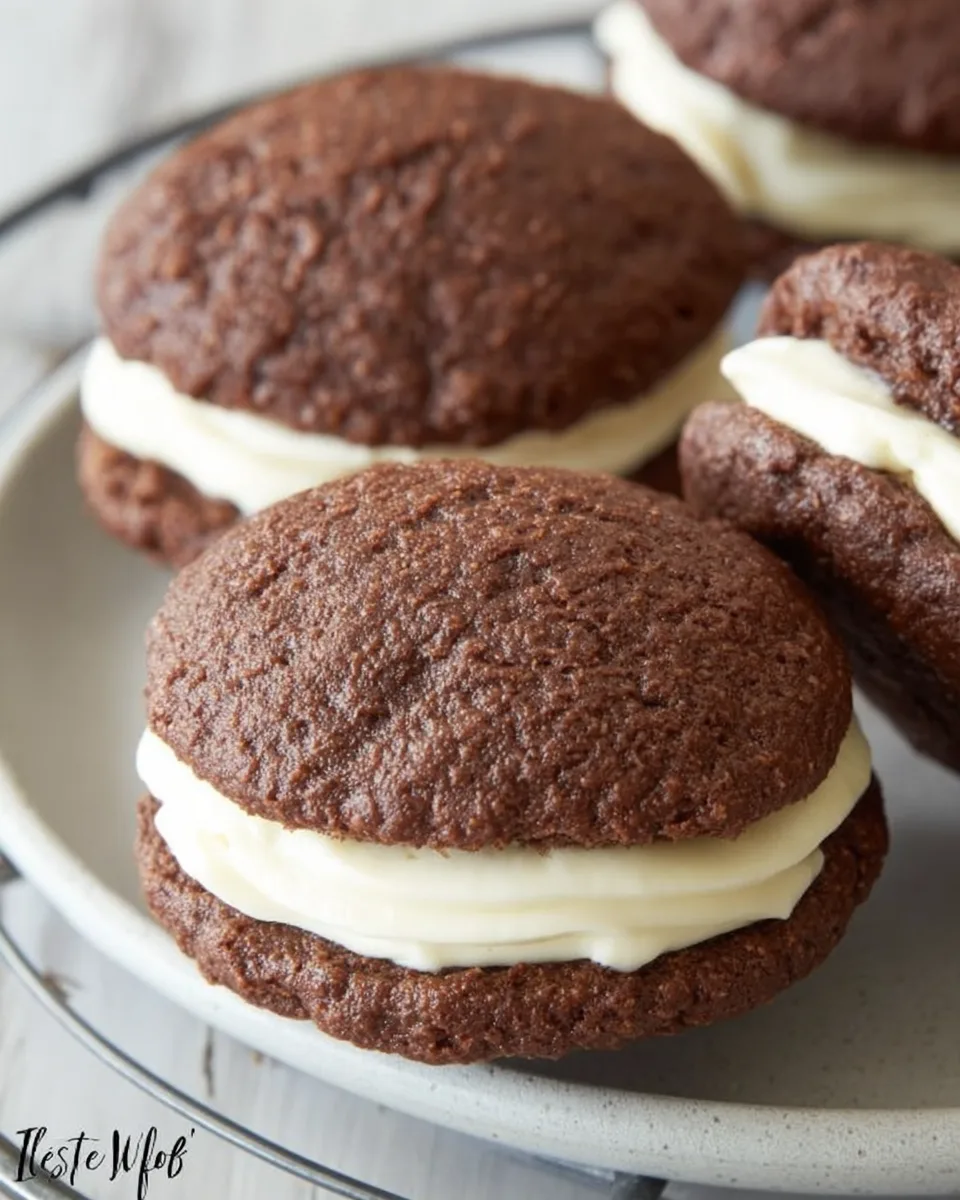
Get ready to rediscover a childhood classic, but with a grown-up, health-conscious twist! If you’ve been yearning for a rich, chocolatey treat that won’t derail your keto journey, then prepare to have your taste buds sing with joy. Imagine two soft, fudgy chocolate cookies embracing a luscious, creamy filling – yes, we’re talking about the legendary whoopie pie, reimagined for your low-carb lifestyle. These aren’t just any desserts; these are your new go-to Keto Chocolate Whoopie Pies, designed to satisfy your deepest cravings without the carb crash. Dive in and discover the magic!
Why You’ll Love This Recipe
There are countless reasons why these Keto Chocolate Whoopie Pies are about to become your favorite keto indulgence. Here are just four to get you excited:
- Guilt-Free Indulgence: Finally, a dessert that truly feels decadent without the guilt! With only 5g net carbs per serving, you can enjoy this chocolatey delight knowing you’re staying perfectly on track with your keto goals. It’s the ultimate low-carb treat.
- Protein-Packed Goodness: Thanks to the clever addition of chocolate bone broth powder (or your favorite protein powder), these whoopie pies aren’t just delicious, they also offer a satisfying protein boost. Who knew dessert could be so beneficial?
- Effortlessly Delicious: Don’t let their gourmet appearance fool you – these Keto Chocolate Whoopie Pies are surprisingly simple to make! With clear, step-by-step instructions, even novice bakers can whip up a batch of these beauties in no time.
- Nostalgic Comfort: Revisit the heartwarming flavors of your youth without compromising your current lifestyle. These whoopie pies capture all the comfort and joy of the original, proving that healthy eating doesn’t mean sacrificing flavor or fun.
Ingredients with measurements
🍪 For the Cookies:
- 🧈 6 ounces salted butter, softened
- 🍚 ½ cup sweetener (like erythritol blend)
- 🥣 ½ cup sour cream, room temperature
- 🥚 2 large eggs, room temperature
- 💧 ¼ cup hot water
- 🌰 1 cup almond flour
- 🍫 ½ cup unsweetened cocoa powder
- 💪 ½ cup Ancient Nutrition Chocolate Bone Broth Powder (or your favorite chocolate protein powder)
- 🥥 ¼ cup coconut flour
- 🥄 1 teaspoon baking powder
- 🌿 1 teaspoon vanilla extract
🍦 For the Creamy Filling:
- 🧀 4 ounces cream cheese, softened
- 🧈 4 tablespoons butter, softened
- ✨ 1 cup powdered sweetener (like powdered erythritol)
Detailed step by step on direction how to make the recipe
- Get Ready: Preheat your oven to a cozy 350°F (175°C). Line a baking sheet with parchment paper – this makes cleanup a breeze and prevents sticking.
- Whip the Cookie Batter: In a large mixing bowl, combine the softened butter, your chosen sweetener, room-temperature sour cream, and the eggs. Using an electric mixer, beat these ingredients together until the mixture is wonderfully smooth and light. Scrape down the sides of the bowl as needed to ensure everything is fully incorporated.
- Fold in Dry Goodness: Now, gently add the hot water, almond flour, unsweetened cocoa powder, the chocolate bone broth powder (or protein powder), coconut flour, baking powder, and vanilla extract to the wet ingredients. Mix everything on a low speed or by hand, just until it’s combined and no dry streaks remain. Be careful not to overmix the batter, as this helps to keep your cookies tender and delightfully fluffy!
- Bake to Perfection: Using a spoon or a small ice cream scoop, drop 18 generous portions of cookie dough onto your prepared baking sheet, leaving a little space between each one to allow for spreading. Pop them into the preheated oven for 15-20 minutes. The cookies are done when they feel firm and spring back slightly when you lightly press them in the center. Once baked, let them cool completely on the baking sheet before moving them – this is crucial for them to set properly.
- Craft the Creamy Filling: While your beautiful chocolate cookies are cooling, grab another clean bowl. Add the softened cream cheese, softened butter, and the powdered sweetener. Using an electric mixer, beat these ingredients together until you achieve a smooth, creamy, and truly delightful filling that’s ready to be sandwiched!
- Assemble Your Masterpiece: Once the cookies are entirely cool, take one cookie and spread a lovely dollop (about 1-2 tablespoons) of the creamy filling onto its flat side. Gently top it with another cookie, pressing down slightly to create a delicious sandwich. Repeat this process with the remaining cookies and filling, and then get ready to enjoy your homemade, healthy, and incredibly satisfying Keto Chocolate Whoopie Pies!
Detailed different ways you can present the recipe and how to serve it
These Keto Chocolate Whoopie Pies are already showstoppers on their own, but with a little extra flair, you can turn them into an unforgettable dessert experience:
- Classic Dusting: For a simple yet elegant touch, dust the finished whoopie pies lightly with a sprinkle of unsweetened cocoa powder or a touch more powdered erythritol using a fine-mesh sieve. This adds visual appeal and a delicate hint of extra flavor.
- Chocolate Drizzle: Melt some keto-friendly chocolate (sugar-free chocolate chips with a tiny bit of coconut oil work perfectly) and drizzle it artistically over the tops of the assembled whoopie pies. Let it set for a few minutes for a beautiful finish.
- Berry Bliss: Serve your whoopie pies alongside a small handful of fresh, low-carb berries like raspberries or a few sliced strawberries. The tartness of the berries provides a lovely contrast to the rich chocolate and creamy filling.
- Dessert Platter: Arrange your whoopie pies on a beautiful serving platter, perhaps interspersed with some keto chocolate truffles or a few squares of your favorite sugar-free dark chocolate for a varied dessert spread.
- Coffee Companion: These whoopie pies are the perfect partner for a cup of black coffee, an espresso, or a frothy keto latte. The bitterness of the coffee beautifully complements the sweetness of the pies.
- Mini Whoopie Pops: For a fun party idea, insert a lollipop stick into the filling of each pie before serving. You can even dip them halfway into melted keto chocolate and sprinkles for an extra festive look!
How you can store it and how long does it last
Proper storage is key to keeping your delicious Keto Chocolate Whoopie Pies fresh and delightful for as long as possible:
- Refrigeration is Best: Due to the cream cheese and butter in the filling, these whoopie pies should always be stored in the refrigerator. Place them in an airtight container to prevent them from drying out or absorbing any odors from other foods.
- Duration in the Fridge: When stored correctly in the refrigerator, your whoopie pies will last beautifully for up to 5-7 days. The flavors tend to meld even more over time, making them potentially even more delicious the day after!
- Freezing for Longer Storage: If you want to make a larger batch or save some for later, these whoopie pies freeze wonderfully. Place the assembled pies in a single layer on a baking sheet and freeze until firm (about 1-2 hours). Once firm, transfer them to a freezer-safe airtight container or a heavy-duty freezer bag, separating layers with parchment paper to prevent sticking. They can be frozen for up to 2-3 months.
- Thawing Instructions: To enjoy frozen whoopie pies, simply remove them from the freezer and let them thaw in the refrigerator for a few hours, or at room temperature for about 30-60 minutes, until softened to your desired consistency.
FAQs Sections
- Can I use a different sweetener for the cookies or filling?
Yes, you can use your preferred keto-friendly granulated or powdered sweetener (like monk fruit or stevia blends) as long as it measures cup-for-cup like erythritol. Adjust to your taste, as sweetness levels vary. - What if I don’t have Ancient Nutrition Chocolate Bone Broth Powder?
You can substitute it with any unflavored or chocolate-flavored keto-friendly protein powder. Just ensure it’s a type you enjoy, as it contributes to the texture and flavor. - Can I make these Keto Chocolate Whoopie Pies dairy-free?
Yes, with some substitutions. Use plant-based butter (like Miyoko’s Kitchen), dairy-free sour cream, and dairy-free cream cheese alternatives. Ensure your protein powder is also dairy-free. - Why did my cookies turn out dry or crumbly?
This could be due to overbaking or too much flour. Ensure your oven temperature is accurate and mix the batter just until combined. Coconut flour is very absorbent, so accurate measurement is important. - Can I freeze the cookie dough ahead of time?
Yes, you can scoop the cookie dough onto a baking sheet and freeze the portions until solid. Then transfer them to a freezer-safe bag. Thaw slightly before baking, or add a few extra minutes to the bake time. - What’s the best way to get uniform cookie sizes?
Using a small cookie scoop or an ice cream scoop (like a 1.5-inch diameter scoop) is ideal for consistent sizing, which helps with even baking and easy assembly. - Can I use only almond flour instead of almond and coconut flour?
It’s not recommended. Coconut flour absorbs a lot of liquid and provides structure. Substituting it directly with almond flour would drastically change the texture and require significant adjustments to liquid content. - Is this recipe suitable for gluten-free diets?
Yes, absolutely! This recipe is naturally gluten-free as it uses almond and coconut flour instead of traditional wheat flour. - How can I make the filling stiffer?
If your filling is too soft, try chilling it in the refrigerator for 20-30 minutes. You can also add a tablespoon or two more of powdered sweetener, which helps absorb moisture and firm it up. - Can I add other flavor variations to the Keto Chocolate Whoopie Pies?
Certainly! A few drops of peppermint extract for a mint chocolate whoopie pie, orange zest for a chocolate-orange twist, or even a pinch of cinnamon can add delightful new dimensions.
Keto Chocolate Whoopie Pies 🍫
Ingredients
For the Cookies
- 6 ounces salted butter softened
- 0.5 cup sweetener (like erythritol blend)
- 0.5 cup sour cream room temperature
- 2 large eggs room temperature
- 0.25 cup hot water
- 1 cup almond flour
- 0.5 cup unsweetened cocoa powder
- 0.5 cup Ancient Nutrition Chocolate Bone Broth Powder (or your favorite chocolate protein powder)
- 0.25 cup coconut flour
- 1 teaspoon baking powder
- 1 teaspoon vanilla extract
For the Creamy Filling
- 4 ounces cream cheese softened
- 4 tablespoons butter softened
- 1 cup powdered sweetener (like powdered erythritol)
Instructions
- Preheat your oven to a cozy 350°F (175°C). Line a baking sheet with parchment paper – this makes cleanup a breeze!
- In a large bowl, combine the softened butter, sweetener, room-temperature sour cream, and eggs. Use an electric mixer to beat them until wonderfully smooth.
- Now, gently add the hot water, almond flour, cocoa powder, chocolate bone broth powder (or protein powder), coconut flour, baking powder, and vanilla extract. Mix everything just until it’s combined – be careful not to overmix, as this helps keep your cookies light and fluffy!
- Scoop 18 generous portions of cookie dough onto your prepared baking sheet. Pop them into the oven for 15-20 minutes, or until they feel firm when you lightly press them. Let them cool completely on the baking sheet.
- While the cookies cool, grab another bowl and beat together the softened cream cheese, butter, and powdered sweetener until you have a smooth, creamy, and delightful filling.
- Take one cooled cookie and spread a lovely dollop of the creamy filling onto its flat side. Top it with another cookie to create a delicious sandwich. Repeat with the remaining cookies and filling, and get ready to enjoy your homemade, healthy whoopie pies!
Notes
- Calories: 386
- Total Carbs: 9g
- Net Carbs: 5g
- Fats: 36g
- Protein: 12g