Why You’ll Love This Recipe
Get ready to fall head over heels for this incredible dessert that’s about to become your new healthy obsession! Our Easy Chocolate Protein Pudding isn’t just a treat; it’s a guilt-free pleasure designed to fit seamlessly into your busy lifestyle and health goals. Here are four irresistible reasons why you’ll absolutely adore it:
- Effortlessly Quick & Simple: Forget complicated baking or endless ingredient lists. With just 5 minutes of active prep time, you can whip up this delightful pudding. It’s perfect for those busy weekdays when you need a healthy snack or dessert without the fuss.
- Packed with Protein Power: Fuel your body and satisfy your hunger! This pudding isn’t just sweet; it’s loaded with protein, making it an excellent post-workout snack, a satisfying breakfast addition, or a smart way to curb those afternoon cravings and keep you feeling full.
- Low-Carb & Guilt-Free Indulgence: Watching your sugar intake or following a low-carb lifestyle? This recipe is your dream come true! Thanks to chia seeds and a sugar-free sweetener, you can enjoy a rich, chocolatey dessert without derailing your dietary goals.
- Seriously Delicious & Creamy: Who said healthy can’t be heavenly? This Easy Chocolate Protein Pudding boasts a luscious, creamy texture and a deep chocolate flavor that will tantalize your taste buds. It’s so good, you’ll forget it’s packed with good-for-you ingredients!
Craving a rich, velvety chocolate treat but don’t want to sabotage your health goals? Dream no more! We’re about to introduce you to your new favorite healthy indulgence: the most delicious and incredibly Easy Chocolate Protein Pudding you’ll ever make. Imagine a dessert that’s packed with muscle-building protein, gut-friendly fiber, and irresistible chocolate flavor, all without the added sugar or a mountain of carbs. Sounds too good to be true? Think again! This isn’t just a recipe; it’s a revelation for your sweet tooth and your well-being. Get ready to dive into creamy, dreamy goodness that takes mere minutes to prepare, leaving you more time to enjoy life and less time in the kitchen. Let’s make some magic!
Ingredients with Measurements
Gather your simple ingredients to create this fantastic Easy Chocolate Protein Pudding. You’ll be surprised how a few pantry staples can transform into something so delicious!
- 1/2 cup unsweetened cocoa powder
- 1/2 cup chia seeds
- 1/4 cup egg white protein powder (or your favorite protein powder for a boost)
- 1/4 cup your preferred sugar-free sweetener blend (adjust to taste)
- 13.5 ounces full-fat canned coconut milk (shaken well)
- 1 cup unsweetened vanilla almond milk
Detailed Step-by-Step Directions to Make the Recipe
Whipping up this Easy Chocolate Protein Pudding is so simple, you’ll wonder why you haven’t made it sooner! Follow these straightforward steps to create your perfect healthy dessert:
- Get Your Dry Ingredients Ready: Grab a large mixing bowl – this will be the home for your delicious pudding. Into this bowl, measure and add your unsweetened cocoa powder, chia seeds, your chosen protein powder (whether egg white or another favorite), and your sugar-free sweetener blend.
- Whisk Until Smooth: Using a whisk, gently but thoroughly combine all these dry ingredients. Make sure there are no lumps of cocoa or protein powder, and everything is evenly distributed. This ensures a smooth, consistent flavor throughout your pudding.
- Introduce the Liquids: Now, it’s time to add the creamy goodness! Pour in the entire can of well-shaken full-fat coconut milk. Don’t forget to shake it first to combine the cream and water layers. Follow that with the unsweetened vanilla almond milk.
- Stir It Up: With your whisk or a sturdy spoon, stir everything together thoroughly. Keep stirring until the dry ingredients are fully incorporated into the milks, and you have a completely smooth and uniform mixture. You’ll notice the pudding starts to thicken almost immediately as the chia seeds begin to absorb the liquid.
- Chill for Creaminess: While the pudding will start thickening right away, the magic truly happens in the refrigerator. For that ultimate thick, creamy, and irresistible texture, transfer your mixture into individual mason jars (perfect for grab-and-go portions!) or simply cover your mixing bowl tightly with a lid or plastic wrap.
- Patience Pays Off: Pop your pudding into the refrigerator and let it chill for a minimum of 2 hours. However, for the absolute best, dreamiest consistency, we highly recommend chilling it overnight. The longer it chills, the thicker and creamier your Easy Chocolate Protein Pudding will become.
- Enjoy! Once perfectly chilled, give it a quick stir if needed, and dive into your healthy, protein-packed, and utterly delicious treat!
Detailed Ways You Can Present and Serve the Recipe
Making your Easy Chocolate Protein Pudding is just the beginning! Here are some fun and delicious ways to present and serve it, turning a simple snack into a gourmet experience:
- Elegant Parfaits: Layer your chilled chocolate protein pudding with fresh berries (raspberries, strawberries, blueberries are fantastic!), a sprinkle of sugar-free granola, or chopped nuts in a clear glass. Repeat layers for a beautiful, vibrant presentation that’s perfect for guests or a special breakfast.
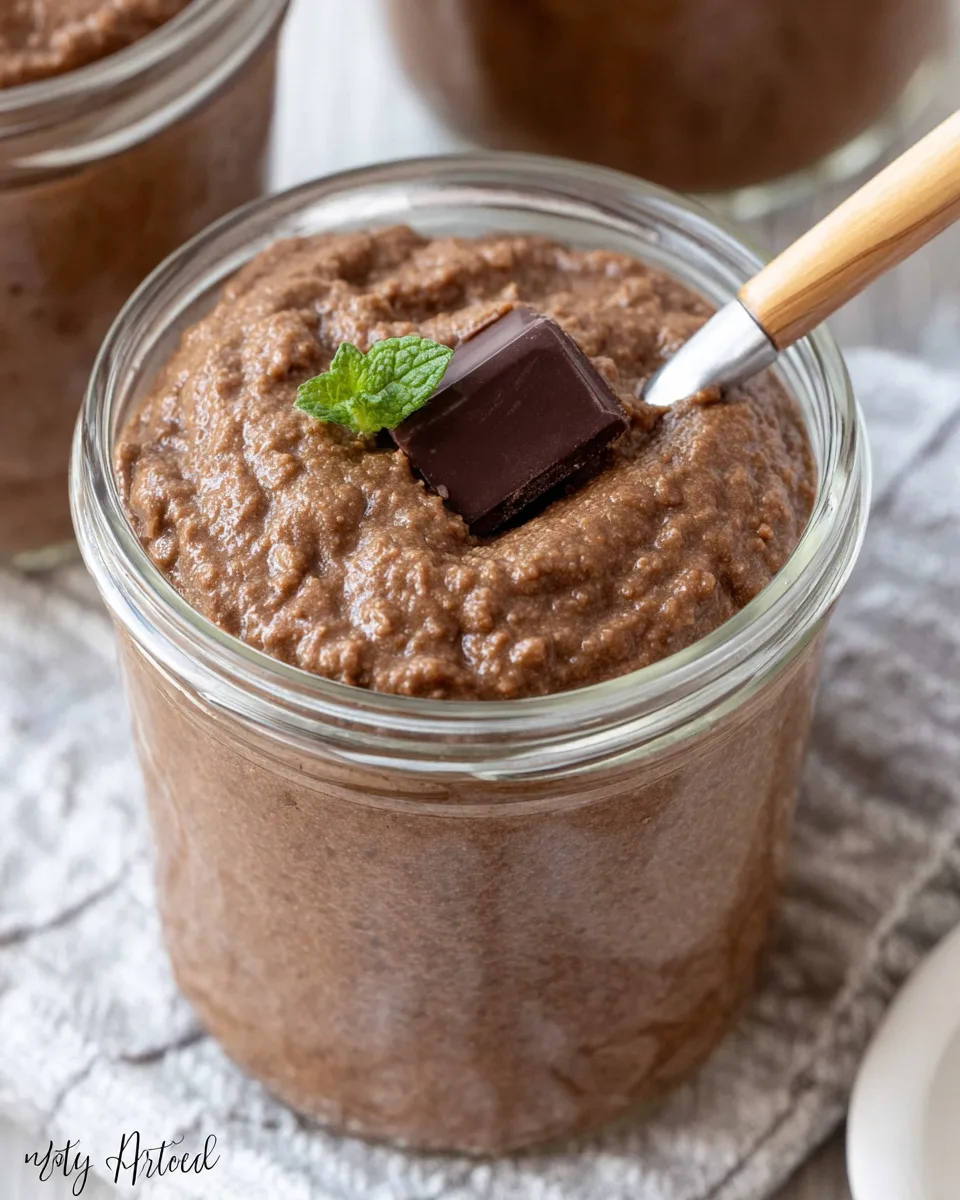
- Mason Jar Magic: As suggested, individual mason jars are ideal. They’re not only charming but also incredibly practical for meal prepping your snacks or desserts for the week. Just grab and go! Add a lid and a cute label for an extra touch.
- Whipped Topping Dream: Top your pudding with a dollop of sugar-free whipped cream or a homemade coconut cream whip. A dusting of extra cocoa powder or some chocolate shavings (sugar-free, of course!) will elevate the presentation and taste.
- Nutty Crunch: Sprinkle a handful of chopped almonds, walnuts, pecans, or pistachios over the top just before serving. The contrast in texture adds another dimension to the creamy pudding. For an extra treat, toast the nuts lightly first!
- Fruit Fiesta: Beyond berries, consider sliced banana (use sparingly if watching carbs), kiwi, or even a few orange segments. The citrus zest pairs wonderfully with chocolate.
- Breakfast Boost: Serve it in a bowl topped with a spoonful of Greek yogurt for an extra protein punch, or with a sprinkle of your favorite low-carb granola for a satisfying morning meal.
- Peanut Butter Swirl: For a classic combo, drizzle a little melted natural peanut butter or almond butter over your pudding. A quick swirl with a knife creates a lovely marbled effect.
- Mini Pudding Cups: For portion control or a dessert spread, serve the pudding in small shot glasses or espresso cups, perhaps with a single berry or mint leaf on top.
How You Can Store It and How Long Does It Last
One of the best things about this Easy Chocolate Protein Pudding is how well it stores, making it perfect for meal prepping and enjoying throughout the week. Here’s how to keep it fresh and delicious:
- Airtight Containers are Key: Whether you’ve portioned it into individual mason jars or kept it in a large bowl, ensure it’s stored in an airtight container. This prevents it from absorbing refrigerator odors and keeps it fresh.
- Refrigeration is a Must: Always keep your pudding refrigerated. The chia seeds and milk components require cold temperatures to maintain their texture and prevent spoilage.
- Shelf Life: When stored properly in the refrigerator, your Easy Chocolate Protein Pudding will last for a good 3 to 5 days. This makes it an excellent option for making ahead on Sunday and enjoying as snacks or desserts all week long.
- Stir Before Serving (Optional): Sometimes, a tiny bit of liquid might separate from the pudding after a few days in the fridge. Don’t worry, this is completely normal! Just give it a gentle stir before serving to restore its creamy consistency.
- Freezing Not Recommended: While some puddings can be frozen, chia seed puddings, especially with coconut milk, tend to change texture significantly upon thawing. The consistency can become watery or grainy. For the best experience, stick to refrigeration.
FAQs Sections
- What makes this pudding “protein pudding”?
It earns its name from the addition of protein powder (like egg white protein) and the natural protein found in chia seeds, making it a more satiating and muscle-supporting treat than regular pudding. - Can I use a different type of protein powder?
Absolutely! While egg white protein is suggested, you can use your favorite whey, casein, pea, or collagen protein powder. Just be aware that different protein powders can slightly alter the texture and flavor. - Is this recipe suitable for vegans?
Yes, if you use a plant-based protein powder (like pea, soy, or hemp) instead of egg white protein. The coconut milk, almond milk, chia seeds, and cocoa powder are all vegan-friendly. - Can I use regular sugar instead of sugar-free sweetener?
You can, but it will increase the carb and sugar content, changing the nutritional profile significantly. Use your preferred sweetener, adjusting to your taste. - Why do I need to shake the canned coconut milk?
Full-fat canned coconut milk often separates into a thick cream layer and a watery layer. Shaking it well ensures you get a smooth, consistent blend for a creamy pudding texture. - What if my pudding isn’t thickening enough?
Ensure you’ve given it enough time to chill (preferably overnight). Chia seeds need time to fully absorb the liquid. If it’s still too thin after extended chilling, you can try adding an extra tablespoon of chia seeds, stirring, and chilling again. - Can I make this nut-free?
Yes! Simply substitute the almond milk with another nut-free plant-based milk like soy milk, oat milk, or rice milk. - What are “net carbs” and why are they lower than “total carbs”?
Net carbs are total carbohydrates minus dietary fiber and sugar alcohols. Fiber and many sugar alcohols aren’t fully digested and absorbed by the body, so they have less impact on blood sugar, making net carbs a key metric for low-carb diets. - Can I add other flavorings?
Definitely! A dash of pure vanilla extract, a pinch of cinnamon, a tiny bit of instant coffee powder (to enhance chocolate flavor), or a few drops of peppermint extract can elevate your pudding. - Is this suitable for a ketogenic diet?
Given the low net carb count (4.9g per serving) and high fat content (21g), this recipe is generally suitable for a ketogenic diet, especially when using a keto-friendly sweetener and protein powder.
Easy Chocolate Protein Pudding 🍫
Ingredients
- 0.5 cup unsweetened cocoa powder
- 0.5 cup chia seeds
- 0.25 cup egg white protein powder (or your favorite protein powder for a boost)
- 0.25 cup sugar-free sweetener blend (adjust to taste)
- 13.5 ounces full-fat canned coconut milk (shaken well)
- 1 cup unsweetened vanilla almond milk
Instructions
- In a large bowl, combine the cocoa powder, chia seeds, protein powder, and sweetener. Whisk gently until all the dry ingredients are fully mixed and smooth.
- Next, pour in the well-shaken canned coconut milk and the unsweetened vanilla almond milk. Stir everything thoroughly until completely smooth and well combined.
- The pudding will start to thicken right away, but for the best creamy texture, it needs time to chill.
- Transfer your pudding into individual mason jars or simply cover the mixing bowl. Chill in the refrigerator for at least 2 hours, or preferably overnight, to achieve a perfect thick and creamy consistency. Enjoy your healthy, protein-packed treat!
Notes
- Calories: 255.1
- Total Carbs: 14g
- Net Carbs: 4.9g
- Fats: 21g
- Protein: 9.3g