
🔥 Say Goodbye to the Campfire, Hello to the Perfect Labor Day Bar
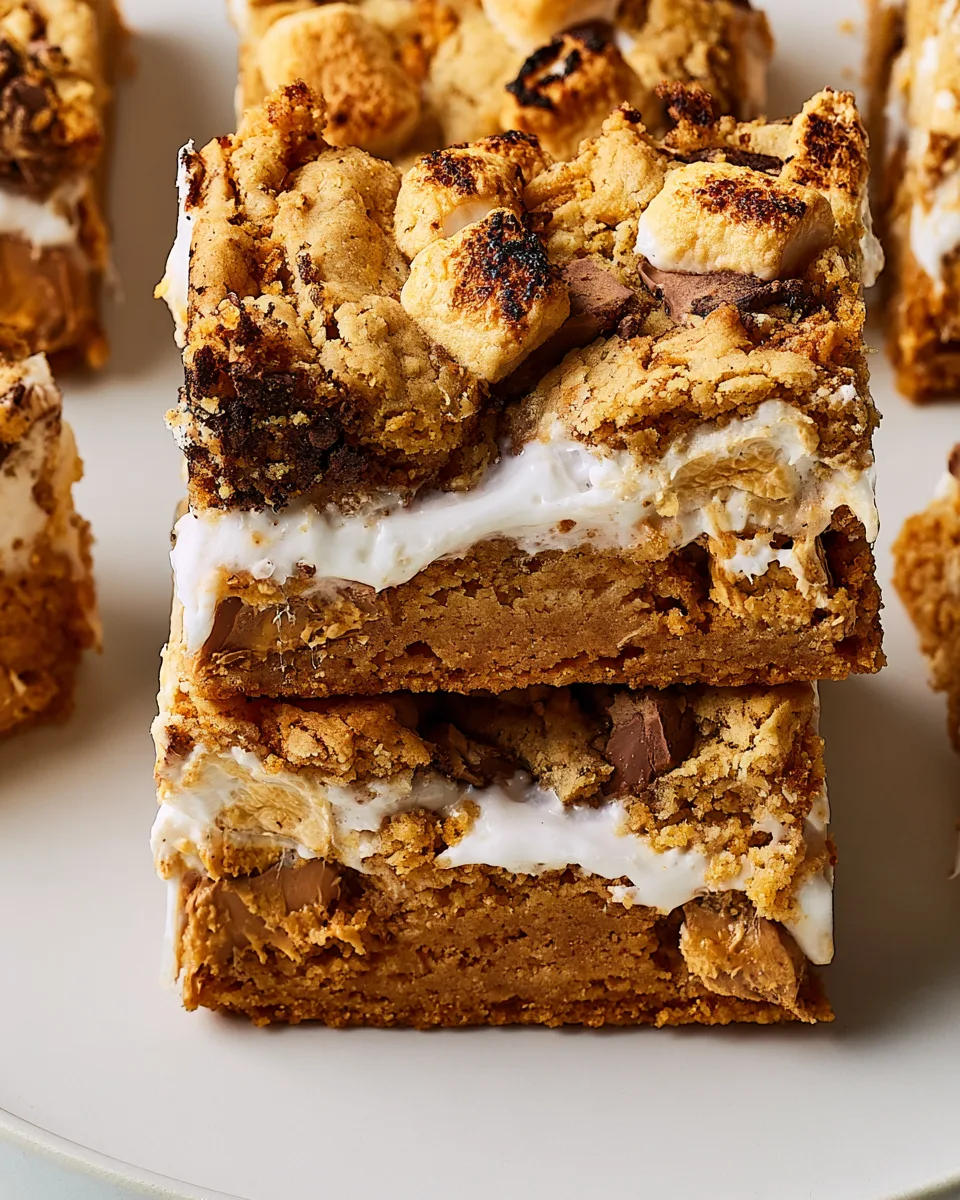
You know that feeling when summer is waving goodbye, and you want just one more fiery, gooey, chocolate‑loaded dessert before the leaves turn? That’s exactly what these 🏖️ Labor Day S’mores Bars deliver. No campfire, no skewer, no singed eyebrows—just a 9×9 dish packed with crunchy graham, melty Hershey’s chocolate, and a secret layer of Marshmallow Fluff that turns into pure gold in the oven.
Whether you’re hosting a backyard BBQ, chilling at the lake, or just counting down to fall, these bars bring the s’mores magic without the mess. Freeze them, bake them, share them—and suddenly you’re everyone’s favorite person at the picnic table. Ready to get sticky? Let’s go.
Why You’ll Love This Recipe
- No campfire required. Seriously—zero flames, zero ashes. Just your trusty oven and a freezer. You get that same nostalgic s’mores taste without risking a marshmallow catastrophe. Perfect for Labor Day city dwellers, porch sitters, and anyone who prefers a cool kitchen to a smoky fire pit.
- Three different chocolate textures. Chopped Hershey bars melt into rich puddles, mini marshmallows stay soft and chewy, and the Marshmallow Fluff layer creates a gooey, almost‑marshmallow‑toast surprise in the middle. Every bite is a little adventure.
- Make‑ahead magic. The bars freeze beautifully before baking—you can prep them Thursday night, pull them out of the freezer Saturday afternoon, and bake while everyone’s grilling burgers. Fresh, hot, and ready in under an hour. Stress‑free entertaining? Yes, please.
- Perfectly shareable size. Twelve squares—big enough to satisfy, small enough to justify a second one. They stack neatly on a tray, survive a cooler for a picnic, and disappear faster than the last chip in the bag. You’ll want to double the batch immediately.
Ingredients
- 🛒 Cooking spray
- 🛒 2 cups (240 g) all-purpose flour
- 🛒 ½ cup crushed graham crackers
- 🛒 1 tsp kosher salt
- 🛒 ½ tsp baking soda
- 🛒 ¾ cup (1½ sticks) unsalted butter, softened
- 🛒 ½ cup packed light brown sugar
- 🛒 ½ cup granulated sugar
- 🛒 1 large egg
- 🛒 1 tsp pure vanilla extract
- 🛒 3 (1.55-oz) Hershey bars, coarsely chopped
- 🛒 3 graham crackers, coarsely chopped
- 🛒 ¾ cup mini marshmallows
- 🛒 ¾ cup Marshmallow Fluff
Directions (How to Make the Magic Happen)
- Line it up. Grab a 9″x9″ baking dish. Line with parchment paper (let it hang over two sides for easy lifting) and give it a light spray of cooking spray. This little trick means zero stuck bars and perfect squares later.
- Whisk the dry crew. In a medium bowl, whisk together the all‑purpose flour, crushed graham crackers, kosher salt, and baking soda. Set aside. This blend gives you that s’mores flavor from the very first bite.
- Cream the good stuff. In a large bowl, beat the softened butter, brown sugar, and granulated sugar until light and fluffy—about 2 minutes. Add the egg and vanilla, then beat until smooth and unified. Your kitchen will smell like a bakery already.
- Bring it together. Gradually mix the dry ingredients into the wet mixture. Stop when just a few streaks of flour remain—don’t overmix! Then fold in the chopped Hershey bars, coarsely chopped graham crackers, and mini marshmallows. Be gentle; you want chunks of chocolate and marshmallow in every bite.
- Layer the fluff. Press about two‑thirds of the dough evenly into your prepared dish. Spread the ¾ cup Marshmallow Fluff over the dough, leaving a tiny border if you like. Don’t stress about perfection—it’s fine if some fluff touches the edges.
- Dollop and freeze. Drop the remaining dough in small dollops over the Marshmallow Fluff. It’s totally okay if patches of fluff peek through—that’s the caramelized treasure. Pop the dish into the freezer for at least 45 minutes (or up to overnight). Do not skip this step; it prevents the bars from spreading into a flat mess.
- Bake from frozen. Preheat oven to 350°F (175°C). Bake the frozen bars directly (no thawing) until the edges are golden brown and the center feels just set—about 45 to 50 minutes. Your house will smell like a summer campfire.
- Cool, lift, and slice. Let the bars cool in the pan for 15–20 minutes. Then use the parchment sling to lift the whole block onto a cutting board. Cut into 12 squares. Serve warm, room temp, or even straight from the fridge (we won’t judge).
How to Serve & Present Your S’mores Bars
Classic picnic style: Arrange the bars on a wooden board or a big platter. Dust with a little powdered sugar (for that “I tried” look) and add a few extra mini marshmallows on top. Serve with cold milk, lemonade, or your favorite iced coffee.
Ice cream sundae twist: Warm a bar for 10 seconds in the microwave, plop it in a bowl, and top with a scoop of vanilla bean ice cream. Drizzle with chocolate sauce and a sprinkle of graham cracker crumbs. Your holiday weekend just peaked.
Party platter version: Cut the bars into smaller 1.5‑inch bites and stack them on a skewer with fresh strawberries, banana slices, and a drizzle of melted dark chocolate. Perfect for Labor Day potlucks or grazing tables.
Grill & chill: After grilling burgers, place the baking dish directly on the grill (turn off the burners and use residual heat) for a couple of minutes. The bottom gets a tiny crackle, and the top stays ooey‑gooey. Serve with a dollop of whipped cream and a dusting of cinnamon.
Storage & Shelf Life
Room temperature: Keep your 🏖️ Labor Day S’mores Bars in an airtight container at room temperature for up to 3 days. Place a sheet of parchment between layers to keep them from sticking. They’ll stay soft and chewy.
Refrigerator: For longer storage, pop them in the fridge for up to 1 week. The texture becomes a bit firmer—almost like a s’mores cookie bar. Let them sit at room temperature for 15 minutes before serving, or give a quick 10‑second microwave zap for that fresh‑baked feel.
Freezer (unbaked or baked): You can freeze the assembled but unbaked bar (right after step 6) for up to 3 months. Bake directly from frozen, adding 5–10 extra minutes. Already baked bars freeze beautifully too—wrap them individually in plastic wrap, then place in a freezer bag for up to 2 months. Thaw at room temperature for 30 minutes.
Frequently Asked Questions
- 1. Can I use regular marshmallows instead of mini marshmallows?
- Yes, but chop them into halves or quarters first. Large marshmallows can create big air pockets and uneven melting. Mini marshmallows give you more even distribution.
- 2. Do I really have to freeze the bars for 45 minutes? Can I skip it?
- Don’t skip it! Freezing solidifies the butter and Marshmallow Fluff, preventing the dough from spreading too thin and keeping that beautiful layered structure. If you’re in a rush, try at least 20–25 minutes, but 45 is best.
- 3. Can I use a different pan size?
- Absolutely. A 9×13 pan will give you thinner, crispier bars—reduce baking time to about 30–35 minutes. An 8×8 pan makes thicker bars; bake 50–55 minutes and check doneness with a toothpick.
- 4. Can I make these gluten‑free?
- Yes! Substitute the all‑purpose flour with a 1:1 gluten‑free baking blend, and use certified gluten‑free graham crackers. Everything else is naturally gluten‑free. The texture might be slightly more delicate, but still delicious.
- 5. Can I use dark chocolate or milk chocolate instead of Hershey bars?
- Of course. Use 4.5 oz of your favorite chocolate bar. Dark chocolate (60–70%) gives a more sophisticated s’mores flavor, milk chocolate is sweeter and more classic. Both work perfectly.
- 6. Can I add nuts or other mix‑ins?
- Sure. Fold in ½ cup of chopped toasted pecans, walnuts, or even a handful of toffee bits. Just be careful not to overload the dough—keep the total add‑ins under 1 cup so the bars hold together.
- 7. Why did my Marshmallow Fluff bubble over?
- This can happen if the fluff layer is too thick or if the pan is overfilled. Spread the fluff in an even layer, leaving a ½‑inch border around the edges. The freeze step helps contain it too.
- 8. Can I use homemade graham cracker crumbs?
- Yes! Pulse 4–5 full graham crackers in a food processor until you get about ½ cup of fine crumbs. It’s actually more flavorful than store‑bought crumbs. Just make sure no large chunks remain.
- 9. Can I double the recipe?
- Absolutely. Double all ingredients and bake in a 9×13 pan, or two 9×9 pans. If using a 9×13, bake for 50–55 minutes. The bars will be slightly thicker—check with a toothpick for doneness.
- 10. What if I don’t have Marshmallow Fluff?
- You can use an additional ¾ cup of mini marshmallows scattered over the dough, or make a quick homemade fluff (egg whites, sugar, corn syrup, vanilla). But store‑bought fluff is the easiest and most stable for this recipe.
“`
Labor Day S'mores Bars
Equipment
- 9x9 Baking Dish
Ingredients
- 2 cups all-purpose flour
- 1/2 cup crushed graham crackers
- 1 tsp kosher salt
- 1/2 tsp baking soda
- 3/4 cup unsalted butter softened
- 1/2 cup light brown sugar packed
- 1/2 cup granulated sugar
- 1 large egg
- 1 tsp pure vanilla extract
- 3 Hershey bars coarsely chopped
- 3 graham crackers coarsely chopped
- 3/4 cup mini marshmallows
- 3/4 cup Marshmallow Fluff
Instructions
- Line a 9"x9" dish with parchment and coat with cooking spray.
- In a bowl, whisk flour, crushed crackers, salt, and baking soda.
- Beat butter, brown sugar, and granulated sugar until fluffy. Add egg and vanilla; beat until smooth.
- Mix in dry ingredients until just a few streaks remain. Fold in chopped chocolate, chopped graham crackers, and mini marshmallows.
- Press about two-thirds of the dough into the dish. Spread Marshmallow Fluff on top.
- Drop remaining dough in dollops over the fluff. Freeze for at least 45 minutes.
- Preheat oven to 350°F. Bake from frozen until edges are golden and center is just set, 45–50 minutes.
- Let cool slightly, then lift out using parchment. Cut into squares.