
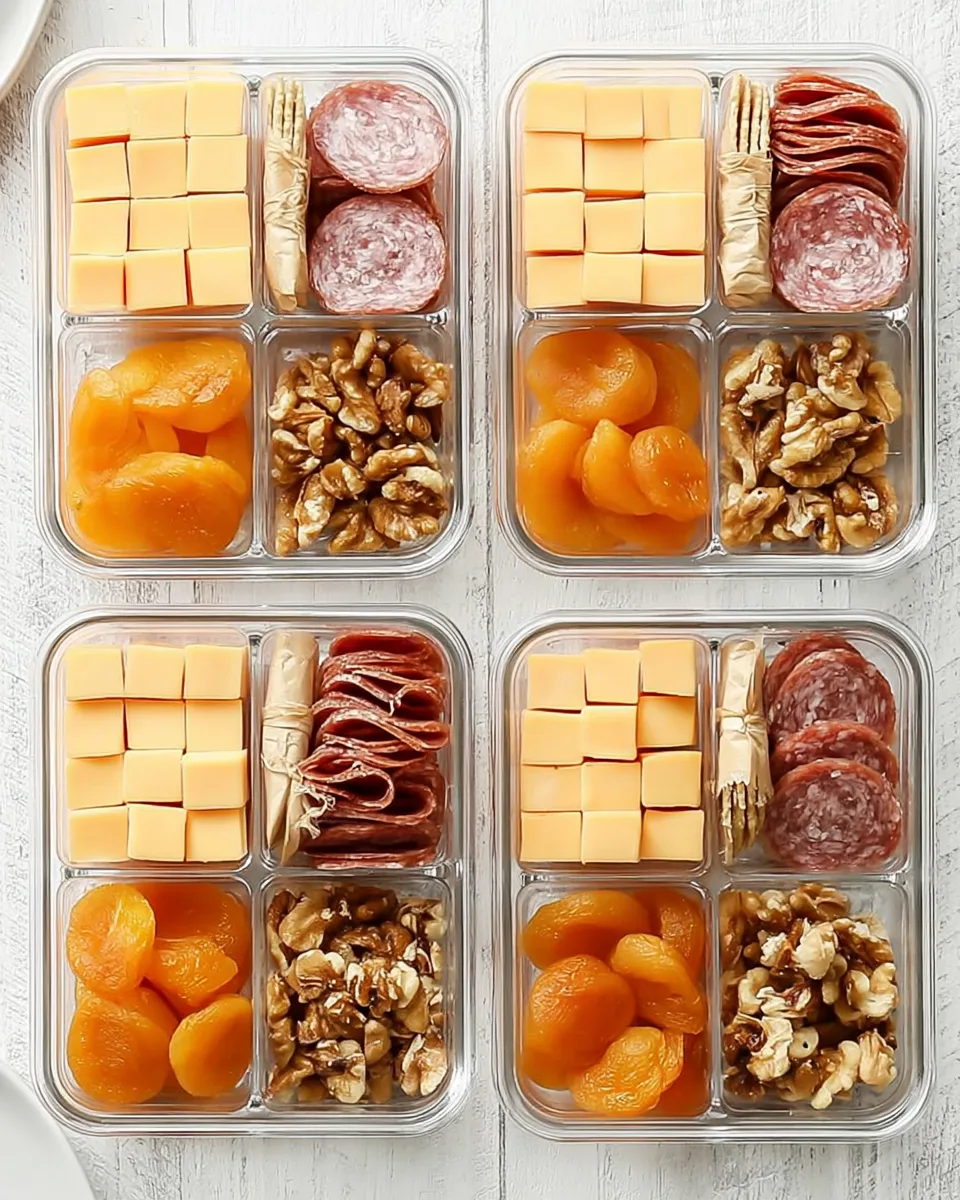
Your Lunch Box Just Got a Board Game Makeover 🎲🧀
Let’s be real—packing the same old sandwich day after day is boring. You, your kids, and your taste buds are all craving something different. Something that feels like a treat but is secretly super simple. Enter the Back-to-School Cheese Board Lunch Box. It’s not a meal prep chore; it’s a tiny, portable charcuterie party! With no cooking, zero fuss, and maximum flavor, this lunch idea combines crunchy crackers, savory salami, sweet apricots, and creamy cheese. It looks like a fancy school snack but only takes 5 minutes to make. Ready to level up your lunch game? Let’s get snacking! 🚀
Why You’ll Love This Recipe ❤️
1. No Cooking Required 🔥❌ – Yes, you read that right! There’s zero cook time. Just slice cheese, bag some crackers, and you’re done. Perfect for busy mornings or lazy meal preps.
2. Balanced & Satisfying 🥇 – With protein from cheese and salami, healthy fats from walnuts, and natural sweetness from apricots, this lunch keeps energy steady all afternoon. No sugar crash here!
3. Kid-Friendly & Fun 🎒 – It feels like a bento box of goodies. Kids love picking through their little boards, and you’ll love that they’re eating real food without any complaints.
4. Stays Fresh for Days 🧊 – Prep it on Sunday and grab a container every morning. It keeps for up to 5 days in the fridge, making your week a breeze.
What You’ll Need 🛒
- 🧀 8 oz. cheese (your favorite kind – cheddar, gouda, or mozzarella work great)
- 🥩 4 oz. salami
- 🍘 20 crackers (choose sturdy ones like whole wheat or mini rice crackers)
- 🍑 16 dried apricots
- 🌰 1 cup walnuts
All ingredients are easy to customize – see the serving ideas below!
Let’s Build Your Lunch Board 👩🍳
- Slice the cheese: Cut your 8 oz. of cheese into bite-sized cubes or small triangles. Keep them uniform so every container gets the same amount.
- Wrap the crackers: Place sets of 5 crackers in small sandwich bags or wrap them tightly in waxed paper. This keeps them crunchy and separate from the other ingredients.
- Divide everything evenly: Grab 4 lunch containers. In each one, place a portion of cheese cubes, salami (you can roll them or leave them flat), the wrapped crackers, 4 dried apricots, and a generous sprinkle of walnuts (about ¼ cup per container).
- Chill & enjoy: Store the containers in the refrigerator. That’s it! Each lunch box is ready to grab and go whenever hunger strikes.
Ways to Serve & Present 🎨
Classic Bento Style: Use a divided lunch container to keep crackers separate from softer items. Perfect for school or office.
DIY Snack Board: Pack all ingredients in one large container and let the person assemble their own mini board at lunchtime. Fun for older kids!
Skewer It: Thread cheese cubes, salami folds, and apricots onto small skewers. Add crackers on the side. Great for little hands or picnics.
Add Fresh Fruit: Swap dried apricots for fresh apple slices or grapes. Just store them separately so they don’t get soggy.
Make It a Dip Board: Include a tiny container of honey mustard or ranch for dipping the salami and cheese.
How to Store It & How Long It Lasts 🧊
Keep your assembled lunch boxes in an airtight container in the refrigerator. The crackers should stay in separate bags or waxed paper inside the box to prevent them from getting soft. Stored properly, these back-to-school cheese board lunch boxes will remain fresh for up to 5 days. Do not freeze the walnuts or cheese—they lose their texture. For best crunch, add the walnuts right before serving if you’re prepping far in advance.
Your Lunch Box Questions, Answered 🙋
1. What type of cheese works best? Hard cheeses like cheddar, gouda, or Swiss hold up best. Soft cheeses like brie also work, but pack them in a separate little container.
2. Can I use different crackers? Absolutely! Try whole grain, gluten-free, or even mini pretzels for extra crunch.
3. Is this recipe kid-friendly? Yes! Most kids love the “snack box” vibe. You can swap salami for turkey or ham if you prefer.
4. Can I add vegetables? Sure! Cucumber slices, cherry tomatoes, or baby carrots make great additions.
5. How long does it take to prep? Just 5 minutes total – faster than making a sandwich!
6. Can I make it nut-free? Yes, leave out the walnuts. Add seeds (pumpkin or sunflower) or extra dried fruit instead.
7. What if I don’t have salami? Use pepperoni, prosciutto, or even cooked chicken slices.
8. How do I keep crackers crunchy? Wrap them tightly in a separate bag or waxed paper inside the lunchbox. Don’t put them next to wet fruit.
9. Is this suitable for school lunchboxes? Check your school’s nut policy. If nuts are allowed, it’s a perfect no-heat lunch.
10. Can I double the recipe? Yes! Just multiply everything by 2, 3, or 4. It scales beautifully for weekly meal prep.
“`
Back-to-School Cheese Board Lunch Box
Equipment
- Lunch Containers
- Sandwich bags or wax paper
Ingredients
- 8 oz cheese your favorite kind
- 4 oz salami
- 20 crackers
- 16 dried apricots
- 1 cup walnuts
Instructions
- Slice the cheese into bite-sized pieces.
- Place sets of 5 crackers in small sandwich bags or wrap them in waxed paper to keep them crunchy.
- Divide the cheese, salami, wrapped crackers, dried apricots, and walnuts evenly among 4 lunch containers.
- Store in the refrigerator until ready to eat. These will stay fresh for up to 5 days.
Notes
- Calories: 638 kcal
- Total Carbs: 24.6g
- Net Carbs: 20.6g
- Fats: 48.9g
- Protein: 26.9g