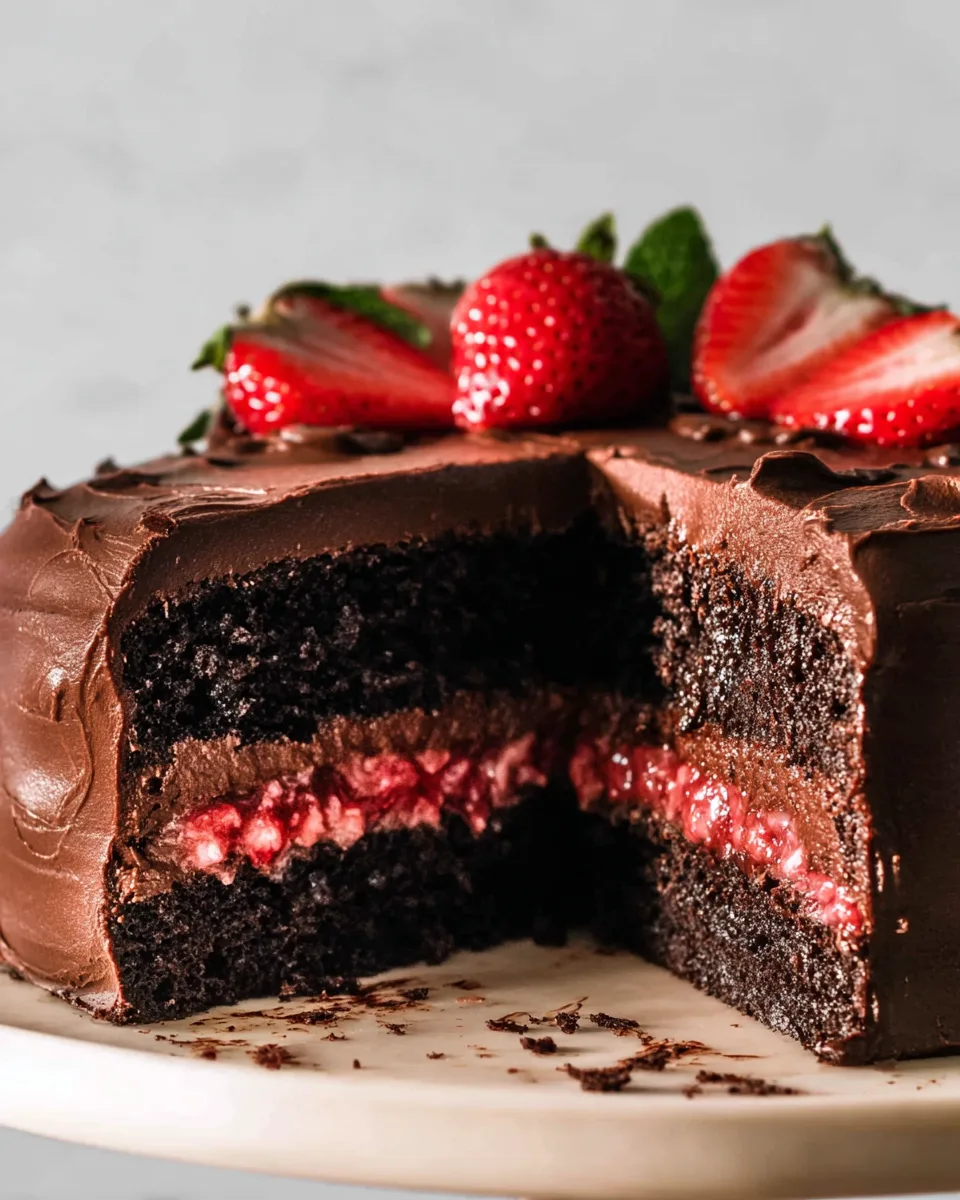
Chocolate Cake with Strawberry Filling 🍰
Let's create this truly delightful cake with simple, easy-to-follow steps for a homemade treat that's both impressive and delicious!
Equipment
- 8-inch Round Cake Pans
- Wire Rack
- Stand Mixer
- Piping bag
- Cake Spatula
- Cake Scraper
- Double Boiler
Ingredients
For the Rich Chocolate Cake Layers
- 1 ⅔ cups all-purpose flour spooned and leveled
- ⅓ cup + 3 tablespoons Dutch processed cocoa powder
- 1 cup granulated sugar
- 2 teaspoons espresso powder
- 1 teaspoon baking powder
- 1 teaspoon baking soda
- 1 teaspoon kosher salt
- ⅔ cup canola oil or other flavorless oil
- 3 large eggs at room temperature
- ¼ cup firmly packed light brown sugar
- ⅓ cup buttermilk at room temperature
- 4 tablespoons full-fat Greek yogurt or sour cream
- 1 tablespoon vanilla extract
- ⅔ cup very hot water nearly boiling
For the Luscious Roasted Strawberry Filling
- 8 oz fresh strawberries hulled and quartered
- 2 tablespoons granulated sugar
- 2 teaspoons lemon juice
- Pinch salt
For the Smooth Chocolate Cream Cheese Frosting
- 8 oz chopped dark chocolate between 50 and 60% cacao
- 8 oz cream cheese 1 block, softened at room temperature
- ⅓ cup heavy cream
- 2 cups powdered sugar
- 1 tablespoon vanilla extract
Instructions
- Making the Moist Chocolate Cake Layers:
- 1. Prepare Your Pans & Oven: Start by preheating your oven to 350°F (175°C). Lightly butter and coat two 8-inch round cake pans with cocoa powder, or use a baking release spray. For extra-even layers, you can use damp cake strips around your pans.
- 2. Combine Dry Ingredients: In a large mixing bowl, whisk together the all-purpose flour, both granulated and brown sugars, Dutch processed cocoa powder, baking powder, baking soda, espresso powder, and kosher salt. Set this mixture aside.
- 3. Mix Wet Ingredients: In another large bowl, whisk together the vanilla extract, eggs, Greek yogurt (or sour cream), buttermilk, and canola oil until they are well combined.
- 4. Bloom the Cocoa & Combine: Pour the very hot water into your dry ingredient bowl and mix until everything is just combined – this special step helps to deepen the chocolate flavor! Now, add the wet ingredient mixture to the dry mixture and gently mix until all ingredients are fully incorporated and smooth. Be careful not to overmix!
- 5. Bake Beautiful Layers: Divide the cake batter evenly between your two prepared cake pans (aim for about 515 grams in each pan if you're using a kitchen scale for precision). Bake for 35-40 minutes, or until the cake layers spring back when lightly touched in the center.
- 6. Cool Completely: Let the cakes cool in their pans for about 10 minutes before carefully transferring them to a wire rack to cool down completely. This is crucial before moving on to frosting!
- Crafting the Sweet Roasted Strawberry Filling:
- 1. Preheat for Berries & Toss: Adjust your oven temperature to 375°F (190°C). In a bowl, gently toss the fresh strawberries with granulated sugar, lemon juice, and a pinch of salt. This simple step truly enhances their natural sweetness and juiciness.
- 2. Roast to Perfection: Spread the berry mixture out onto an aluminum or metal baking pan. Roast for about 20 minutes, remembering to flip the berries halfway through, until they are wonderfully soft and have a lovely syrupy consistency.
- 3. Chill Out: Once roasted, transfer the warm strawberries to a heatproof bowl and allow them to cool completely in the refrigerator. This concentrated fruit flavor is absolutely worth the wait!
- Whipping Up the Dreamy Chocolate Cream Cheese Frosting & Cake Assembly:
- 1. Create a Double Boiler: Set up a double boiler by placing a medium heatproof bowl over a pot with a few inches of gently simmering water (ensure the bowl doesn't touch the water). Pour your heavy cream and chopped dark chocolate into the heatproof bowl.
- 2. Melt & Blend: Whisk the chocolate and cream occasionally as the gentle steam melts them into a smooth, glossy mixture. Once smooth, carefully remove the bowl from the pot (it will be hot!).
- 3. Combine Flavors: Transfer the melted chocolate mixture into the bowl of your stand mixer (fitted with the paddle attachment) or a large mixing bowl. Add the room temperature cream cheese and vanilla extract. Mix everything together for about 1 minute. Don't worry if it looks a little lumpy at first!
- 4. Achieve Smoothness: Lastly, beat in the powdered sugar until your frosting transforms into a wonderfully thick and smooth, pudding-like texture. Transfer this delicious frosting into a piping bag fitted with a round tip.
- 5. Anchor the Base Layer: Pipe or spread a dollop of your chocolate frosting onto your chosen cake plate or stand. This acts as "glue" to hold your first cooled cake layer in place. Set the first cake layer on top.
- 6. Frost & Create a Border: Pipe about a third of the frosting on top of this bottom layer and spread it evenly with a cake spatula or large metal spoon. Now, pipe a thick border of frosting around the edge of the layer. This clever border is essential for containing your delicious strawberry filling!
- 7. Fill with Berries: Spoon all of your cooled roasted strawberry filling inside the frosting border. Make sure your border is tall enough to prevent any juicy berries from escaping!
- 8. Stack & Frost the Cake: Gently place the second cooled cake layer on top of the first. Then, starting from the base of the cake and working your way up to the top, pipe a thick layer of frosting all around the sides and top of the cake.
- 9. Smooth It Out: Use a cake spatula to gently smooth out the frosting on the top of the cake. Alternate using your spatula and a cake scraper against the sides to gently smooth out any bubbles or imperfections in the frosting for a lovely finish. Don't stress too much – homemade is always charming!
- 10. Decorate (Optional): If you have any frosting remaining, use an open star tip on a piping bag to add any decorative touches you like. For a beautiful and healthy final flourish, top your cake with fresh sliced strawberries if desired!
Notes
The nutrition information per serving (1 of 16 slices) is: Calories: 445 kcal, Total Carbs: 52.1 grams, Net Carbs: 50 grams, Fats: 25.8 grams, Protein: 5.4 grams.
